
Decore Designz

Complete Guide

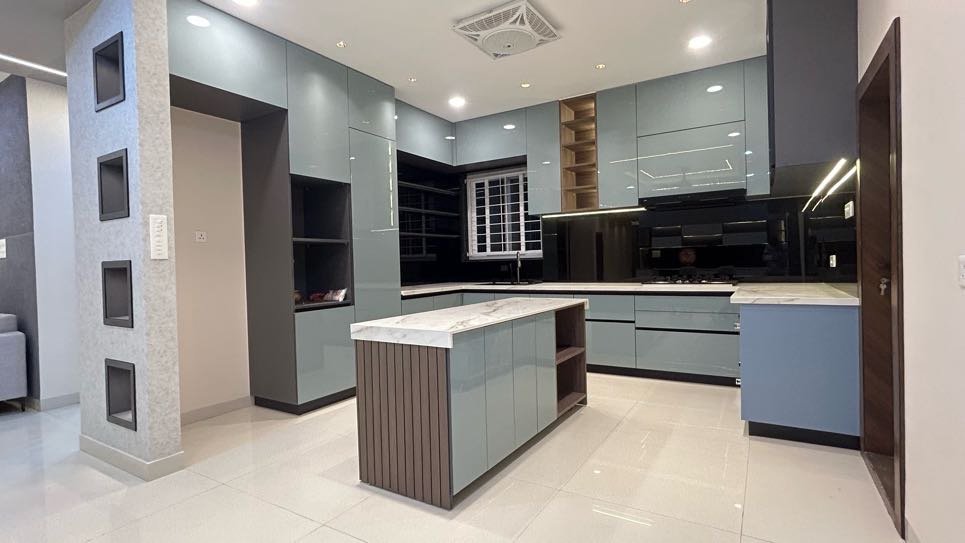
IMG 8500

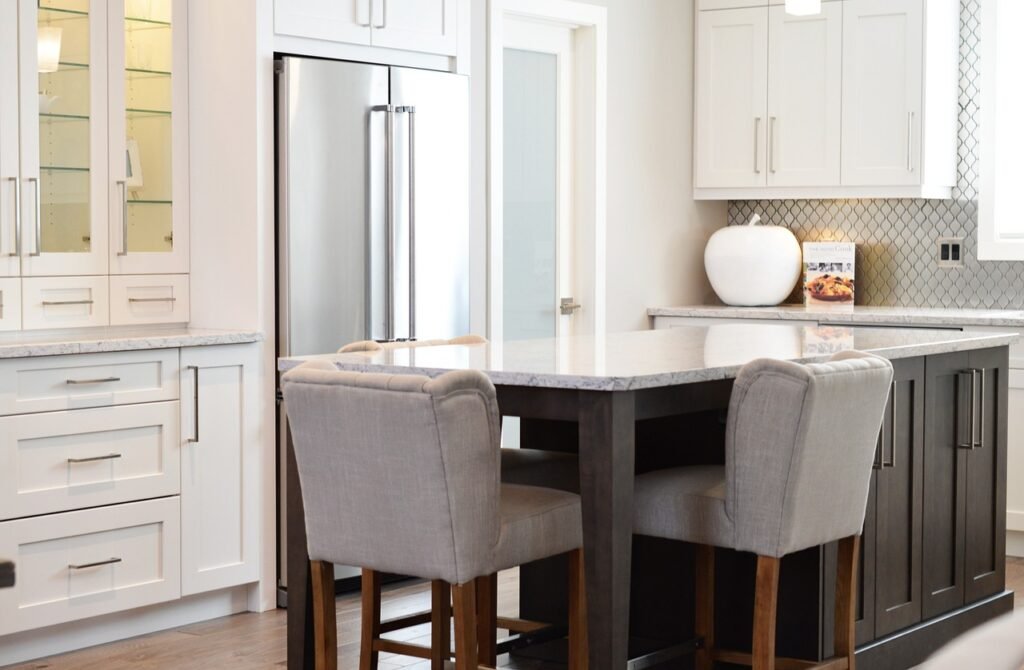
How to Plan a Modular Kitchen: A Complete Guide for Your Home

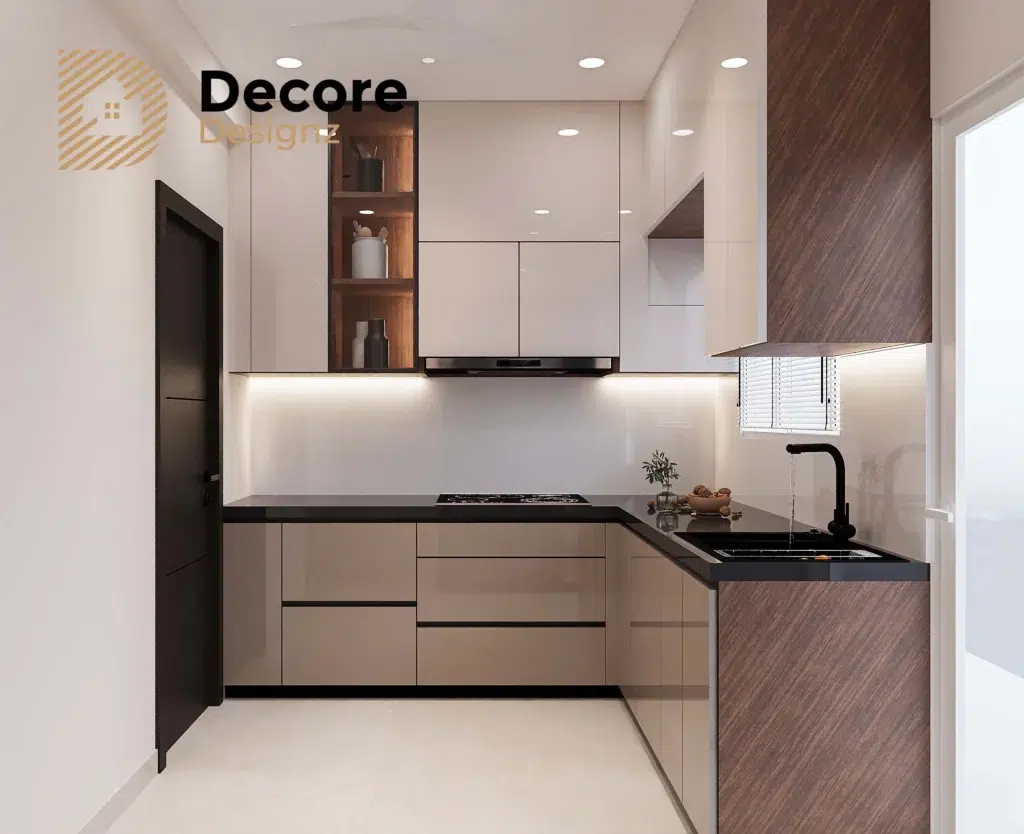
How to Plan a Modular Kitchen: A Complete Guide for Your Home A modular kitchen should be planned around how you cook, what you store and how you move through the space. The right design brings together the kitchen layout, cabinet dimensions, countertop space, appliances, materials, hardware, lighting and ventilation. Making these decisions in the correct order helps avoid cramped work areas, wasted storage and expensive changes during installation. For homeowners planning a new apartment or renovating an existing kitchen in Hyderabad, the first step is not choosing cabinet colours. It is understanding the available space and the way the kitchen will be used every day. 1. Start With Your Cooking Habits and Storage Needs Before choosing a kitchen layout, list the things the kitchen needs to accommodate. A household that cooks several meals daily may need different storage and preparation areas from one that uses the kitchen occasionally. Consider these questions: How many people regularly cook in the kitchen? How many people may need to use it at the same time? Do you cook with several pots and pans simultaneously? How much space do you need for groceries, utensils and appliances? Do you use a mixer, air fryer, microwave, dishwasher or other countertop appliances? Do you prefer drawers, shelves, tall units or pull-out storage? How much countertop space do you need for food preparation? Who will clean the kitchen, and how much maintenance is practical? Measure the available kitchen area and note the doors, windows, plumbing points, electrical connections and ventilation requirements. This information helps establish the layout and storage plan before the design moves into finishes and accessories. 2. Choose the Right Modular Kitchen Layout L-shaped kitchen An L-shaped kitchen uses two adjoining walls. It can work well in many apartments because it leaves the remaining area more open. It may suit homes that need a practical cooking area connected to a dining space. The design should still account for corner storage, appliance placement and sufficient countertop space. Explore our guide to L-shaped kitchen design. U-shaped kitchen A U-shaped kitchen uses three sides of the room and can provide generous cabinet and countertop space. It can work well when the room is wide enough to maintain comfortable movement between the opposing counters. The main risk is making the central aisle too narrow. Before choosing this layout, check the actual cabinet depths, appliance openings and the space needed for more than one person to work. Explore our guide to U-shaped kitchen design, layouts and dimensions. Parallel kitchen A parallel kitchen places cabinets and countertops along two opposite walls. It can be efficient when the available room supports a practical passage between the two sides. The layout should account for open drawers, refrigerator doors and appliance access. If the aisle becomes crowded when cabinet doors are open, the design needs adjustment. Explore our guide to Parallel kitchen design. Straight kitchen A straight kitchen places the main work areas along one wall. It may suit compact homes or open-plan spaces where a separate kitchen room is not available. Because the available wall length is limited, the positions of the sink, hob, refrigerator and preparation area need careful planning. Tall cabinets can provide additional storage where space allows. Island or peninsula kitchen An island or peninsula can add preparation space, storage or seating. However, it should not be included simply because it appears in a reference image. The room needs enough space for movement around the feature, cabinet doors and appliance access. A peninsula may be a more practical option where a freestanding island would obstruct circulation. 3. Plan the Kitchen Work Zones A practical kitchen allows you to move between storage, washing, preparation and cooking without unnecessary steps. Think of the kitchen as a series of connected work zones: Storage: The refrigerator and dry-goods storage should be convenient to access when bringing groceries into the kitchen. Washing: The sink, cleaning supplies and waste-disposal arrangements need a practical relationship with the plumbing and surrounding cabinets. Preparation: Leave a usable countertop area for chopping, mixing and assembling ingredients. Do not allow the hob, sink and small appliances to consume every available surface. Cooking: Position the hob, cookware storage and necessary utensils so that frequently used items are within comfortable reach. These zones should work together, but their exact arrangement depends on the room and appliance specifications. The traditional kitchen work triangle can be a useful planning reference, not a rigid rule that overrides the actual layout. 4. Design Storage Around What You Own More cabinets do not automatically mean better storage. The important question is whether the available storage is easy to access and suited to the items kept inside. Drawers for everyday utensils Deep drawers can make cookware easier to access than stacking everything at the back of a low cabinet. Their dimensions and load capacity should match the utensils and equipment they will hold. Tall units for groceries and appliances A tall unit can consolidate pantry storage or accommodate selected appliances. Plan shelf heights, ventilation requirements where applicable and access to heavier items before finalising it. Corner storage Corner cabinets can be difficult to use if the internal arrangement is not considered early. Depending on the layout, shelves, pull-out mechanisms or other corner solutions may improve access. Their cost and suitability should be weighed against how often the corner will be used. Storage for waste and cleaning Plan where waste bins, cleaning supplies and other frequently used items will go. These needs are easy to overlook when the design focuses only on visible cabinet fronts. Open shelves Open shelves can make selected items easy to reach and display. However, they expose their contents to dust and cooking residue, so they are not always the best choice for every storage requirement. Before adding accessories, list the items you want to store. This helps prevent spending on mechanisms that look impressive but do little to improve everyday use. 5. Choose Cabinet Materials Carefully Cabinet construction affects durability, maintenance and cost. The right

How to Plan a Modular Kitchen: A Complete Guide for Your Home Read More »
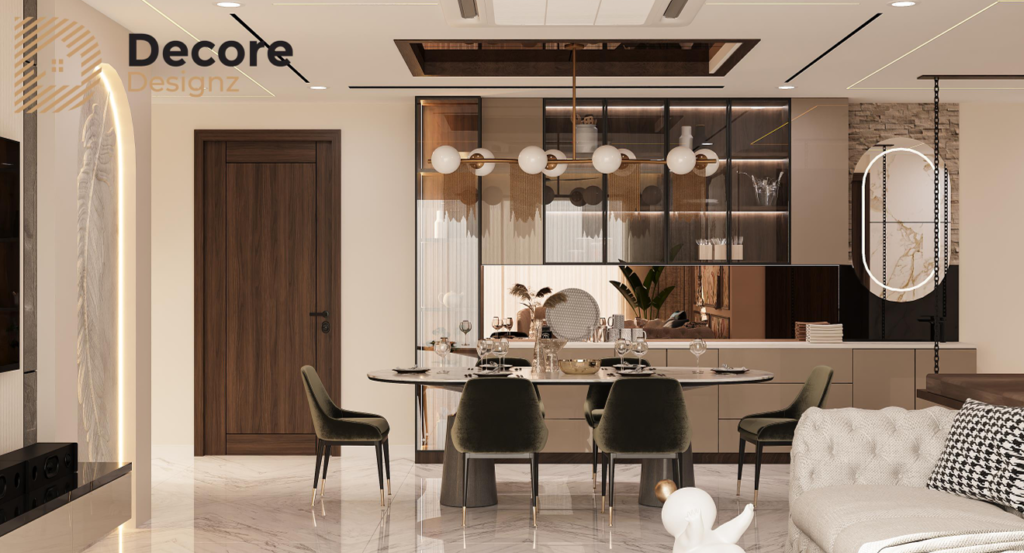
Dining Area 4BHK DSR Classe Kokapet

Living Room Interior Design Guide: Layout, Lighting, Furniture and Materials

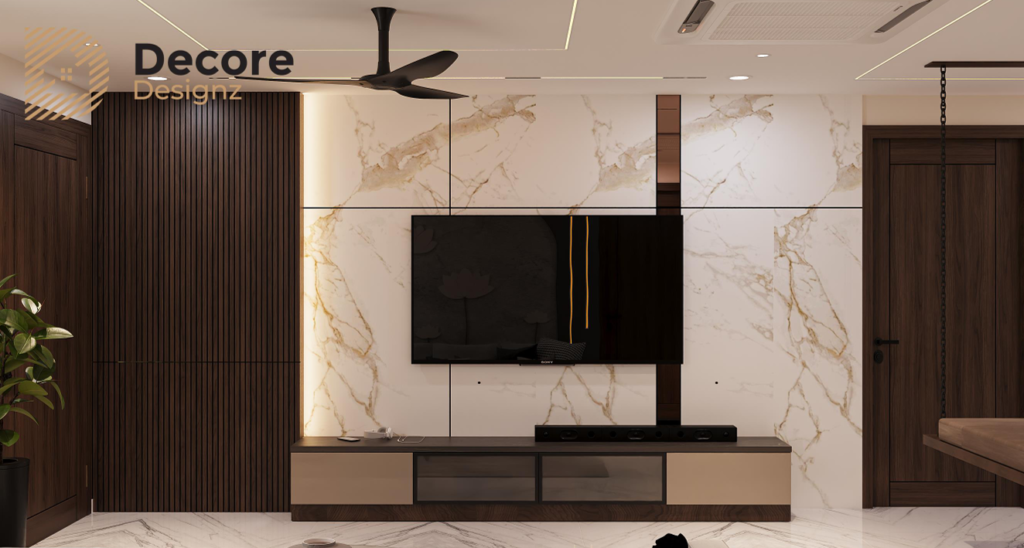
Living Room Interior Design Guide: Layout, Lighting, Furniture and Materials A well-designed living room should look good, feel comfortable and work for the people using it every day. The best living room interior design begins with the room’s dimensions, natural light, furniture requirements and movement through the space. Once these are clear, you can make better decisions about the sofa, TV unit, lighting, colours, storage and finishes without making the room feel crowded. For homeowners planning a new apartment or renovating an existing home, the goal is not to fit in every design trend. It is to create a living room that feels connected to the rest of the home and remains practical long after the photographs are taken. 1. Start With the Living Room Layout The layout should be decided before you select furniture or finalise decorative features. A beautiful sofa or elaborate TV wall will not improve the room if it blocks a passage or leaves too little space to move around. Start by identifying the room’s fixed elements: Doors, windows and balcony access. Electrical points and existing wiring. Columns, beams and structural restrictions. The connection between the living room, dining area and other rooms. The number of people who regularly use the space. Next, decide how the room will be used. A family that watches television together may need a different seating arrangement from a household that frequently entertains guests. If the living room also serves as a passage to the bedrooms or balcony, circulation becomes especially important. Before buying furniture, mark the proposed sofa, coffee table, TV unit and additional seating on a floor plan. This makes it easier to spot problems while changes are still relatively simple. 2. Choose Furniture That Fits the Room Furniture should be selected according to the room’s proportions, not just its appearance in a showroom. A large sectional sofa may work in a spacious living room but overwhelm a compact apartment. Conversely, furniture that is too small can make a large room feel disconnected and under-furnished. Consider these points before making a purchase: Sofa size: Measure the available wall length and the space needed for movement. Seating capacity: Plan for the people who use the room regularly, with additional seating if you frequently host guests. Coffee table: Check its size, shape and accessibility from the seating. Side tables: Include them where they serve a practical purpose, rather than filling every empty corner. Additional seating: Accent chairs or compact stools can provide flexibility without overcrowding the room. Keep enough clear space for people to walk comfortably between the entrance, seating and adjoining areas. The exact clearance depends on the layout and furniture dimensions, so assess it on the actual floor plan rather than following a single measurement for every room. 3. Plan the TV Unit and Feature Wall Together The TV wall often becomes a focal point in a contemporary living room. However, it should be designed around the television, viewing distance, storage needs and available wall space—not treated as a decorative panel added at the end. A well-planned TV unit may combine a display area, concealed storage, open shelving or a simple backdrop. The right combination depends on what needs to be stored and how much visual detail the room can accommodate. Think about the following before finalising the design: The size and mounting position of the television. Viewing comfort from the main seating. Concealed cable routing and accessible electrical points. Storage for devices, remotes and other everyday items. Ventilation for electronic equipment where required. Cleaning access and the practicality of open shelves. Materials such as laminates, veneers, paint and textured finishes can create different effects. Veneers can add wood character, while laminates offer a broad choice of patterns and finishes. The decision should consider appearance, maintenance and the intended application. For more focused ideas, explore our guide to TV unit design for the living room. 4. Use Lighting in Layers One ceiling light rarely provides everything a living room needs. The room may need general illumination for everyday activities, softer light for relaxing and accent lighting to highlight selected architectural or decorative features. A practical lighting plan can include: Ambient lighting: Provides general illumination throughout the room. Recessed lights or other suitable ceiling fixtures can serve this purpose. Task lighting: Supports activities such as reading. A floor lamp or appropriately positioned reading light may be useful near the seating. Accent lighting: Draws attention to a feature wall, artwork, textured surface or display niche. Decorative lighting: Adds character through selected pendant lights, wall lights or other fixtures. Natural light should also influence the design. Avoid placing bulky furniture where it unnecessarily obstructs a window or balcony opening. Consider glare on the television and how curtains or blinds will affect daylight. Plan lighting alongside the furniture layout and ceiling design. This helps prevent inconvenient switch positions, poorly placed fixtures and avoidable electrical changes during execution. 5. Select Colours That Work Together A living room colour scheme should relate to the flooring, furniture, natural light and adjoining spaces. Choosing each finish independently can make the final room feel disjointed. A useful starting point is to select one dominant colour direction and build around it: Warm neutrals: Beige, cream and warm off-white can create a relaxed backdrop. Cool neutrals: Selected greys and muted tones can support a cleaner, more contemporary look. Wood tones: Add warmth and visual texture. Accent colours: Introduce contrast through cushions, artwork, upholstery or selected wall details. Light colours can help a room feel brighter, but they do not automatically make every space look larger. Furniture scale, daylight, contrast and the amount of visual clutter also matter. Before finalising paint, laminate, veneer or fabric colours, compare actual samples under the room’s lighting. A finish can look different under warm artificial light than it does in daylight. For more combinations and practical examples, read our living room colour combinations guide. 6. Choose a Wall Treatment That Suits the Space A feature wall can give a living room a clear focal

Living Room Interior Design Guide: Layout, Lighting, Furniture and Materials Read More »

20261009 233516 1

Luxury Villa Interior Design in Hyderabad: A Floor-by-Floor Planning Guide for 3,500+ sq. ft. Homes

Luxury Villa Interior Design in Hyderabad: A Floor-by-Floor Planning Guide for 3,500+ sq. ft. Homes Luxury villa interior design is most successful when the entire home is planned as one connected space, rather than a collection of individually decorated rooms. For villas of 3,500 sq. ft. and above, that means coordinating the ground-floor living areas, kitchen, bedrooms, staircase, upper-floor privacy, storage, lighting and terrace spaces from the beginning. The goal is a home that feels cohesive, functions comfortably and reflects the way your family actually lives. A villa offers something an apartment often cannot: greater freedom to plan how rooms connect across multiple floors. But that freedom also creates more decisions. A beautiful living room cannot compensate for a poorly planned kitchen, awkward circulation or bedrooms that lack useful storage. For homeowners planning luxury villa interior design in Hyderabad, the best starting point is a floor-by-floor brief supported by one overall design plan. 1. What should you plan before starting villa interiors? Before choosing finishes, furniture or decorative lighting, establish how each part of the villa will be used. Start with these questions: How many people will live in the home, and how might that change over time? Do you regularly host extended family, friends or overnight guests? Should the kitchen connect closely to the dining area, or do you prefer more separation? Is a dedicated pooja room important to your family? Do you need a home office, study area, hobby room or additional family lounge? Which bedrooms require walk-in wardrobes or extra storage? How do you want to use the terrace or balcony areas? Which spaces need privacy, and which should feel open and connected? These answers determine the layout, storage, lighting and furniture requirements. They also help prevent expensive redesigns after carpentry or electrical work has started. For a large villa, create one consolidated design brief covering every floor. This keeps the overall character consistent while allowing each room to serve a distinct purpose. 2. How should the ground floor be planned? The ground floor often accommodates the most shared activities: welcoming guests, spending time with family, preparing meals and dining together. The design should make these activities feel natural without making the entire floor one undifferentiated open space. Living room and formal entertaining Begin by deciding how the living room will be used. A family that regularly entertains guests may need a different arrangement from one that uses the living room mainly for everyday relaxation. Plan the seating layout around conversation, movement and television viewing, where relevant. Check that the main circulation route does not cut through the centre of the seating arrangement. For larger living rooms, use lighting, furniture placement, rugs or carefully planned ceiling details to define zones. A double-height space can create a strong sense of openness, but its lighting, window treatments and visual proportions need to be considered early. Avoid filling a large room simply because it looks empty. Space to move is part of the design. Dining area and kitchen connection The dining area should work with the kitchen rather than being positioned only for visual symmetry. Consider how food will move from the kitchen to the table, where serving dishes will be placed, and whether the family needs a separate breakfast or informal dining spot. Leave enough room for chairs to move comfortably and for people to pass behind seated diners. Kitchen and utility or service area The kitchen needs detailed planning before cabinetry begins. Map the refrigerator, sink, cooking zone, preparation counter and frequently used storage according to the family’s cooking habits. Think about where groceries arrive, where appliances sit, how waste is handled and whether the utility area needs space for laundry, cleaning supplies or additional storage. Cabinet appearance matters, but the internal layout matters just as much. Door swings, drawer access, appliance clearances, ventilation and the location of electrical and plumbing points should be coordinated before execution. Pooja room and guest accommodation If the brief includes a pooja room, decide its location and dimensions early rather than fitting it into whatever space remains. Discuss any Vastu preferences at the start of planning so they can be considered alongside circulation, lighting and practical use. A ground-floor guest bedroom can be useful for visiting relatives or family members who prefer to avoid stairs. Its proximity to a bathroom and its level of privacy deserve attention. 3. How should the staircase connect the floors? In a multi-storey villa, the staircase is both a functional route and a prominent architectural feature. Its position influences how people move between common and private areas. A poorly located staircase can interrupt furniture layouts, reduce usable wall space or make the upper floor feel disconnected from the rest of the home. Plan the staircase with the architect and relevant technical teams, taking account of structural requirements, headroom, safe circulation, handrails and lighting. Interior finishes should follow these constraints, not override them. For the visual treatment, consider how the stair connects with the living room, foyer and upper landing. Materials, railing details and lighting can make it a design feature without competing with the rest of the interior. Also consider cleaning and maintenance. A finish that looks striking in a render should still be practical to maintain in everyday use. 4. What belongs on the upper floor? Upper floors commonly contain bedrooms and more private family spaces, although the right arrangement depends on the actual building plan. Main bedroom and walk-in wardrobe The main bedroom should feel restful and provide convenient access to clothing, personal belongings and the attached bathroom. Plan the bed position, bedside lighting, switches, wardrobe access and dressing area together. A walk-in wardrobe needs enough clear space to use drawers and doors comfortably; it should not be designed around storage capacity alone. If a walk-in wardrobe is not practical, a well-organised built-in wardrobe can provide excellent storage without taking away too much floor area. Children’s bedrooms and study spaces Children’s rooms should reflect how the space will be used now and how it

Luxury Villa Interior Design in Hyderabad: A Floor-by-Floor Planning Guide for 3,500+ sq. ft. Homes Read More »

TV Unit 4BHK DSR Classe Kokapet

How to Plan a Complete 2BHK Home: A Room-by-Room Guide

How to Plan a Complete 2BHK Home: A Room-by-Room Guide Planning a complete 2BHK home means bringing the layout, furniture, kitchen, wardrobes, lighting, materials and storage together before execution begins. The aim is not to fit as much furniture as possible into every room. It is to make the available space comfortable, organised and suitable for the people who will live there. For a 2BHK apartment in Hyderabad, begin with the floor plan and your daily routines. Decide what each room needs to do, identify the storage you genuinely require, and coordinate furniture, electrical points, lighting and finishes before work starts. This helps avoid last-minute changes and creates a home that feels connected rather than like a collection of separately designed rooms. 1. Start With a Plan, Not With Furniture or Colours When people get the keys to a new apartment, it is natural to start looking at sofas, wardrobes, kitchen finishes and bedroom designs. Those decisions are enjoyable, but they should not be the first ones finalised. Start by understanding the apartment itself. A 2BHK usually has a living area, kitchen, two bedrooms and one or more bathrooms, with the exact arrangement varying by property. The available floor area, door positions, windows, columns and circulation routes determine what can fit comfortably. Before choosing furniture, answer these questions: Who will live in the home? Will both bedrooms be used every day? Does anyone work or study from home? How much clothing, kitchenware, luggage and other belongings need storage? Do you regularly have family or friends over? Do you cook daily, occasionally or in larger batches? Are there existing furniture pieces you want to keep? Which parts of the home need to feel open, private or especially quiet? What level of customisation and execution do you want? These answers influence the design more than a reference image does. For example, a couple who works from home may need a proper workstation and organised cable management. A family with a child may need a study area, additional storage and clear floor space for play. A household that frequently hosts guests may prefer a flexible second bedroom. The floor plan may be the same, but the right design can be quite different. 2. Measure the Apartment and Map the Furniture Before developing the interior design, confirm the actual dimensions of the rooms and the fixed elements that affect furniture placement. A builder’s floor plan is a useful starting point, but on-site measurements help confirm what is available after accounting for wall finishes, columns, door swings and other conditions. Record the dimensions and positions of: Doors and windows Columns and structural projections Electrical points and switchboards Plumbing and drainage points Kitchen counters and utility access Air-conditioning provisions Existing built-in elements Ceiling height and beams where relevant Then map the major furniture items onto the plan. In the living room, test the sofa, television unit and any dining furniture together. In the bedrooms, check the bed, wardrobes and bedside tables. In the kitchen, consider the refrigerator, cooking area, sink and appliances before finalising cabinetry. The purpose is to find problems on paper rather than after furniture has been installed. A wardrobe may fit against a wall but prevent a bedroom door from opening fully. A dining table may fit inside the room but obstruct the route to the kitchen. A sofa may leave too little space to move comfortably between the entrance and the rest of the home. These are planning issues, not decoration issues. 3. Plan the Living Room Around Movement The living room often has to serve several purposes. It may be where the family relaxes, watches television, receives visitors, spends time together and occasionally works. The layout should reflect those uses. Choose the seating before the TV unit Start with the seating arrangement. Decide how many people should sit comfortably and how the seating relates to the television, windows, entrance and any dining area. Then select a television unit that fits the room rather than allowing the unit to dictate the entire layout. A large wall-mounted panel, extensive storage and decorative panelling may look attractive, but they are not always necessary. In a compact living room, a simpler unit may leave more visual and physical space for the furniture that gets used every day. Keep the entrance clear The route from the main door into the living room should feel natural. Avoid arrangements that force people to walk awkwardly around the sofa or dining table. If the living room and dining area share an open space, plan them as one connected layout. Furniture can define each zone without necessarily requiring a physical partition. Decide how much storage the room needs Some households need closed storage for documents, games, electronics and everyday items. Others prefer a lighter arrangement with only a few shelves. Do not add display shelves simply because a wall is empty. Every shelf creates another surface to organise and maintain. Coordinate the feature wall with the rest of the room If you want a statement wall, textured finish or decorative TV backdrop, consider it alongside the flooring, curtains, sofa fabric and lighting. The room should have a focal point, not several elements competing for attention. For more detailed room-specific ideas, explore living room interior design services in Hyderabad. 4. Plan the Kitchen Around How You Cook The kitchen is one of the most important spaces to plan carefully because its layout affects daily routines. A good-looking kitchen can still be frustrating if frequently used utensils are difficult to reach, the refrigerator interrupts movement or there is too little working counter space. Start with the way the household cooks. Think about: How many people use the kitchen at the same time Where vegetables and ingredients are prepared Where the sink and cooking area are located Which appliances need permanent space Where frequently used utensils should be stored Whether you need pantry storage How groceries and cleaning supplies will be organised How the utility area will be accessed Select the layout

How to Plan a Complete 2BHK Home: A Room-by-Room Guide Read More »

Modern kitchen with built-in cupboards, storage units, and sleek contemporary cabinetry.

Chimney and Ventilation Guide for Modular Kitchens

Chimney and Ventilation Guide for Modular Kitchens A good modular kitchen chimney should do more than look right above the hob. It should capture cooking smoke, oil vapour and odours effectively, while fitting the kitchen’s layout and ventilation arrangements. For Indian cooking, the important decisions include chimney size, suction capacity, filter type, ducting and installation height. Planning these details before cabinet fabrication helps prevent avoidable installation problems later. Why Does a Modular Kitchen Need Proper Ventilation? Cooking releases moisture, heat, grease particles and odours into the air. Without effective extraction, some of these can settle on cabinet shutters, walls and ceilings. Poor ventilation can also leave the kitchen feeling warm and stuffy. This matters in Indian kitchens where tempering, shallow frying, deep frying and high-heat cooking are common. However, choosing the most powerful chimney available is not always the answer. The appliance must suit the hob, cooking habits and available duct route. A well-planned kitchen considers the chimney, fresh-air movement, windows and other ventilation openings together. 1. Which Type of Kitchen Chimney Should You Choose? The first decision is how the chimney will handle the extracted air. Ducted chimney A ducted chimney draws cooking fumes through a pipe and discharges them outside the home through an appropriate outlet. Why consider it? It removes extracted air from the kitchen rather than returning it to the room. It is generally the preferred option for frequent frying and oily Indian cooking. It can reduce lingering cooking odours when correctly sized and installed. What needs planning? The duct needs a suitable route to an approved external outlet. Its length, diameter and bends affect airflow. The route should be planned before the cabinets, ceiling finishes and other services are finalised. Ductless or recirculating chimney A ductless chimney passes air through filters and returns it to the kitchen. Depending on the model, it may use grease filters and activated-carbon filters to help reduce odours. Why consider it? It may suit a kitchen where an external duct route is not possible. It avoids the need for a duct leading outside. It can offer more flexibility in certain apartment layouts. What should you know? A recirculating model does not discharge moisture and cooking fumes outside in the same way as a ducted system. Its odour-control performance depends on the filters and their condition. Filter replacement and maintenance requirements should be checked before purchase. Which is better for Indian cooking? If a suitable external duct can be installed, a ducted chimney is generally the stronger choice for removing cooking fumes. A recirculating model is a practical alternative where ducting is genuinely not feasible, but it should not be treated as equivalent to external extraction. 2. How Much Suction Capacity Does Your Kitchen Need? Chimney suction capacity is commonly expressed in cubic metres per hour (m³/h). It indicates the volume of air the appliance is designed to move under specified test conditions. Actual performance can vary with duct length, bends, filters and installation. The right capacity depends on several factors: Kitchen size: A larger space may require greater airflow. Cooking habits: Frequent frying and high-heat cooking can create more smoke and airborne grease than light cooking. Hob size: The chimney needs sufficient coverage over the cooking area. Kitchen layout: Open kitchens allow cooking odours to travel into connected living and dining spaces. Duct design: A long or restrictive duct route can reduce effective airflow. Noise and comfort: A high setting may be louder, so consider everyday operating conditions as well as the maximum rating. Do not choose a chimney by its advertised suction figure alone. Compare the manufacturer’s performance specifications and installation requirements, then match them to your kitchen. 3. Which Chimney Filter Is Suitable for Indian Cooking? The filter helps manage grease and other particles drawn into the chimney. The right choice depends on the appliance design and the maintenance routine you are comfortable following. Baffle filters Baffle filters use shaped panels to redirect airflow and separate grease from the air stream. They are commonly used in chimneys intended for Indian cooking. They need periodic cleaning to prevent grease build-up. Check whether the filters can be removed easily and whether the manufacturer permits washing them in a dishwasher or by hand. Mesh filters Mesh filters capture grease through a fine mesh structure. Grease can accumulate within the mesh, so cleaning frequency matters, especially when cooking with oil regularly. Before choosing this type, understand how often the filter needs cleaning and how easily it can be accessed. Filterless or auto-clean models Some models use designs that collect grease in a dedicated container, while others include a heating-based auto-clean function. The exact mechanism varies by product. These features can reduce certain cleaning tasks, but they do not make the entire appliance maintenance-free. The collection cup, internal surfaces and other specified components may still need attention. Practical advice: Compare the manufacturer’s filter design, cleaning process, replacement requirements and service support. Choose the system you can maintain consistently. 4. What Chimney Size Should Match Your Hob? The chimney should provide suitable coverage over the cooking area. A hood that is too narrow may fail to capture fumes escaping from the outer burners. Many domestic models are sold in widths commonly suited to standard hob sizes. However, the right selection depends on the actual dimensions of your hob and the chimney’s capture area. Before buying, check: The full width of the hob, including its outer burners. The chimney’s effective capture area. The installation clearance required by the manufacturer. The available wall or ceiling space. Whether nearby wall cabinets will interfere with the hood. If you are planning a new modular kitchen, select the hob and chimney together. This makes it easier to coordinate the cooking zone with the surrounding cabinets and countertop. 5. What Is the Correct Height for Installing a Kitchen Chimney? The mounting height affects both safety and smoke capture. If the chimney is installed too close to the hob, it may interfere with cooking or violate the manufacturer’s clearance requirements.

Chimney and Ventilation Guide for Modular Kitchens Read More »

good interior designers in hyderabad

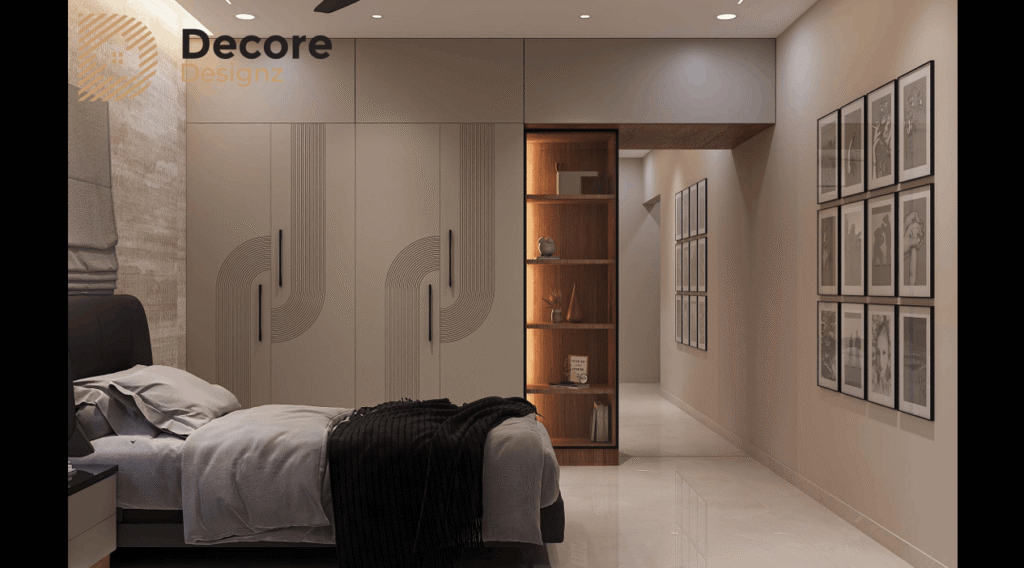
Bedroom Interior Design – A Complete Guide

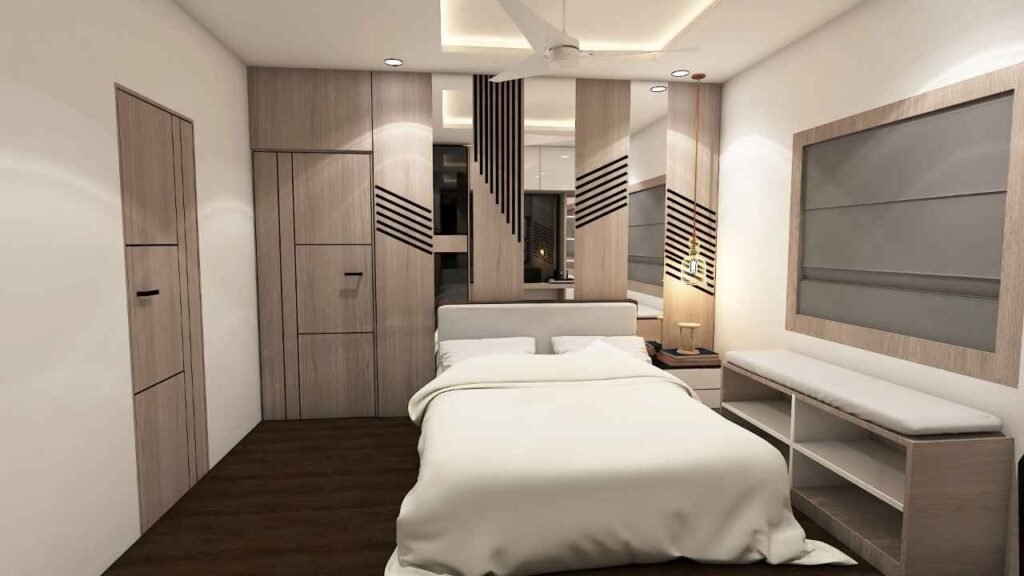
Bedroom Interior Design – A Complete Guide Bedroom interior design is not simply about choosing a bed, wardrobe and attractive wall colour. A well-designed bedroom should make movement easy, provide enough storage, offer the right lighting and create a comfortable atmosphere for everyday use. The best bedroom interiors start with the way you sleep, dress, work, relax and use the room—not with a picture copied from Pinterest. What makes a good bedroom interior design? A good bedroom brings together five things: layout, furniture, storage, lighting and finishes. The room should feel balanced when you enter it, but it also needs to work at 7 in the morning when you are getting ready for work or at night when you want the room to feel calm. Before deciding on colours or decorative elements, consider: Where the bed should go How much space is needed around the bed Where wardrobes and storage will fit Whether a dressing area is required Whether the room needs a study or work corner How much natural light enters the room Where switches, sockets and lighting points should be placed Which materials will be easy to maintain How the bedroom connects visually with the rest of the home This is why bedroom interior design should begin with planning rather than decoration. How should you plan a bedroom layout? The bed is usually the starting point because it is the largest piece of furniture in the room. Once its position is established, the rest of the bedroom can be organised around it. Bedside tables, wardrobes, dressing units, study tables and other furniture should be placed without creating unnecessary obstacles. A common mistake is choosing furniture first and trying to fit it into the room afterwards. This can leave awkward gaps, narrow walking paths or doors that interfere with other furniture. Instead, plan the room as a complete layout. For example, if the wardrobe doors open towards the bed, you need to consider the usable space in front of the wardrobe. If a study table is placed beside a window, check whether the position provides useful daylight without creating glare. The right bedroom layout is the one that makes the room easy to use—not simply the one that looks good in a floor plan. What furniture does a bedroom actually need? Bedroom furniture should be selected according to the room and the people using it. The basic furniture may include: Bed Bedside tables Wardrobe Dressing unit Chest of drawers or additional storage Study table Chair Bench or seating, where space permits Not every bedroom needs all of these. A smaller bedroom may work better with a compact bed, integrated bedside storage and a full-height wardrobe. A larger master bedroom may have enough room for a dressing area, seating or a study corner. The important point is proportion. Oversized furniture can make a large bedroom feel crowded, while furniture that is too small can make the room feel unfinished. How should bedroom wardrobes be planned? Wardrobes are one of the most important functional elements of bedroom interiors. A wardrobe should be planned around what you actually store rather than simply selecting a shutter style. Think about: Hanging clothes Folded clothes Drawers Accessories Shoes Bags Seasonal items Frequently used items Less frequently used storage Internal organisation matters just as much as the exterior finish. Decore Designz has a dedicated guide to Bedroom Wardrobe Planning because wardrobe planning deserves more attention than simply deciding between sliding and hinged shutters. The goal is straightforward: everyday items should be easy to reach, while less frequently used belongings can be stored in less accessible areas. Which bedroom colours work best? There is no single colour combination that works for every bedroom. The right choice depends on the amount of natural light, room size, furniture finish and the atmosphere you want to create. Neutral bedroom colours Beige, cream, warm white, taupe and soft grey can create a calm foundation. They also give you flexibility when choosing furniture, curtains and accessories. Earthy bedroom colours Wood tones, muted greens, terracotta, brown and warm beige can make a bedroom feel warmer and more grounded. Dark bedroom colours Deep grey, charcoal, navy or darker brown can create a dramatic bedroom, particularly when balanced with adequate lighting and lighter elements. Two-colour combinations A neutral base with one stronger colour can be more effective than using several competing shades. The important thing is not to choose colours independently. The wall colour, wardrobe, bed, flooring, curtains and lighting should be considered together. What type of bedroom lighting is best? Bedroom lighting should not depend on one bright ceiling light. A better approach is to use different layers for different activities. Ambient lighting This provides the general illumination for the room. Bedside lighting Bedside lamps, wall lights or integrated lighting can provide more comfortable illumination when reading or using the room at night. Wardrobe and dressing lighting Wardrobes and dressing areas may require additional focused lighting so that the space is practical to use. Decorative lighting Pendant lights, concealed LED lighting or carefully positioned accent lights can add character without becoming the main source of illumination. The lighting should also be planned with the furniture layout. A beautiful lighting design can become inconvenient if a switch is hidden behind the bed or a reading light is positioned too far from the person using it. For bedrooms with limited ceiling height, a false ceiling should not be added simply because it is popular. The design should justify the loss of ceiling height through lighting, service integration or a useful architectural feature. Decore Designz’s dedicated false ceiling design for bedroom guide covers that decision in more detail. What wall design works well in a bedroom? The bed wall is often the natural focal point of a bedroom. Possible treatments include: Wood or laminate panelling Upholstered headboards Textured finishes Wallpaper Paint Fluted or slatted elements Integrated bedside units Simple artwork The mistake is treating the bed wall as an opportunity to add everything at once. If

Bedroom Interior Design – A Complete Guide Read More »

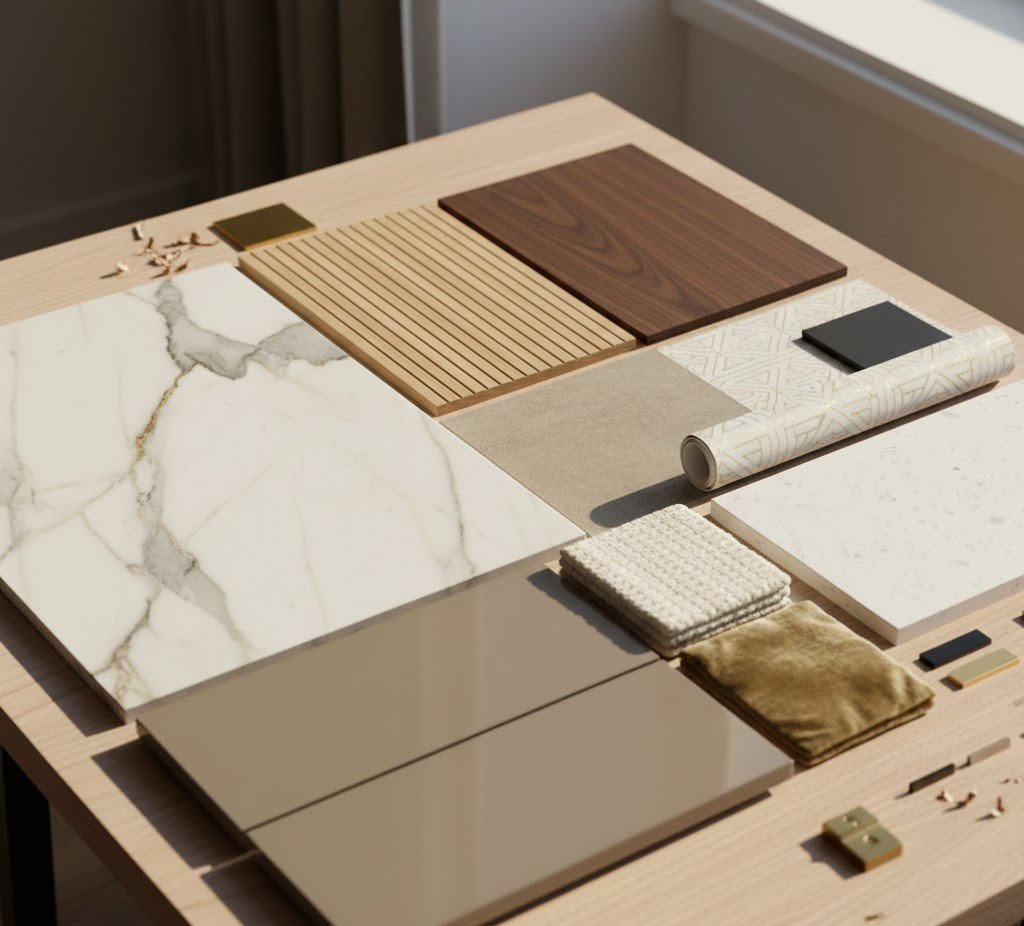
Material Selection & Finishes

Modular Kitchen Materials: A Complete Guide

Modular Kitchen Materials: A Complete Guide Choosing modular kitchen materials is not simply about picking the most expensive board or the finish that looks best in a showroom. A kitchen has different requirements at different levels: the cabinet structure needs to handle everyday use, the outer finish needs to suit the desired appearance and maintenance expectations, and the countertop needs to handle regular food preparation. The right material therefore depends on where it is being used, how the kitchen will be used, moisture and heat exposure, expected load, finish requirements, maintenance and overall design priorities. This guide explains the main modular kitchen materials and how to think about them before finalising your kitchen. What are the main modular kitchen materials? Modular kitchen materials can broadly be divided into four groups: Cabinet construction materials — such as plywood, MDF and other board options. Shutter and surface finishes — such as laminate, acrylic and veneer. Countertop materials — such as granite and quartz. Special construction options — such as aluminium for kitchens where its particular properties make sense. These materials do different jobs. That distinction matters because saying that one material is simply “the best” can be misleading. A material that works well for a cabinet structure may not be the right choice for a decorative shutter. Similarly, a good cabinet board does not automatically make a good countertop. What should you consider before choosing kitchen materials? Before comparing individual materials, start with the conditions in which they will be used. 1. Moisture exposure Kitchen cabinets are exposed to water, steam and regular cleaning. Areas around the sink require particular attention. However, moisture resistance is not determined by the board name alone. Construction, edge treatment, installation and the specific product specification also matter. 2. Expected load Some cabinets carry heavier cookware, appliances or stored items than others. A material decision should therefore consider what the cabinet is expected to support and how frequently it will be used. 3. Frequency of use A kitchen used several times a day has different demands from a rarely used secondary kitchen. Daily opening, closing, cleaning and loading can influence the choice of board, finish and hardware. 4. Finish requirements Do you want a smooth painted appearance? A glossy surface? A textured finish? A wood-like appearance? The answer can influence which material and finish combination makes sense. 5. Maintenance A beautiful finish is not automatically a practical finish for every household. Consider how easily the surface can be cleaned, how visible fingerprints or marks may be and how much maintenance you are comfortable with. 6. Construction quality The material specification is only one part of the finished cabinet. Thickness, joining method, edge treatment, hardware and installation can all affect how the finished kitchen performs. This is why two kitchens described using the same board name can still have different levels of quality. What is plywood, and where does it work in a modular kitchen? Plywood is made by bonding layers of wood veneer together. The construction gives it good structural strength, which makes it a commonly considered option for furniture that needs to handle regular use and load. In kitchens, plywood can be considered for cabinet components where structural performance is important. However, simply specifying “plywood” is not enough. The actual specification, construction, thickness, edge treatment, finish and installation should also be understood. For example, a kitchen cabinet near a sink may have very different exposure conditions from a tall dry-storage unit. So the question should not only be: “Is plywood good for a modular kitchen?” A better question is: “Where does plywood make sense in this particular kitchen, and what specification is being proposed?” For a detailed plywood-versus-MDF comparison, refer to the existing Plywood vs MDF for Home Interiors guide rather than treating this article as a replacement for that deeper comparison. What is MDF, and where can it be useful? MDF, or Medium-Density Fibreboard, is manufactured from refined wood fibres compressed with resin. Its smooth and consistent surface can make it useful for certain painted, routed and decorative applications. That does not mean MDF is automatically suitable for every part of a kitchen. Its suitability depends on the specific application, moisture exposure, construction and finish. For example, a decorative component with a smooth painted finish may have different requirements from a heavily used cabinet structure. Therefore, MDF should be evaluated according to where it is being used, rather than simply labelled as good or bad for kitchens. Can plywood and MDF be used together? Yes. A modular kitchen does not have to use one board material for every component. Different materials can be considered for different applications when their properties suit the job. For example, one component may prioritise structural strength while another may prioritise a smooth surface for a particular finish. This approach can be more practical than deciding that the entire kitchen must use one material. The important question is whether each choice has a clear reason behind it. What are laminate finishes for modular kitchens? Laminate is a commonly used exterior finish for modular furniture. It is available in a wide range of colours, patterns, textures and surface appearances. This makes it useful when homeowners want flexibility in the visual direction of the kitchen. Laminate can work particularly well when the priorities include: A wide choice of colours and textures Practical everyday surfaces Easy visual coordination Different matte or textured appearances A finish that fits the overall interior design However, laminate is a finish, not the same thing as the board used inside the cabinet. This distinction is important when comparing quotations. A quotation may mention laminate while separately specifying plywood, MDF or another board for the cabinet construction. So always ask: What is the cabinet made from, and what is the exterior finish? What is acrylic for modular kitchens? Acrylic is another kitchen surface finish, commonly associated with a smooth and glossy appearance. It can create a more reflective, contemporary look and can be useful when the visual goal is

Modular Kitchen Materials: A Complete Guide Read More »

wardrobes and bedroom

Types of False Ceiling Designs: A Homeowner’s Guide

Types of False Ceiling Designs: A Homeowner’s Guide Choosing a false ceiling is not simply about picking a design you like from a photograph. Different types of false ceilings serve different purposes, and the right choice depends on your ceiling height, room size, lighting plan, moisture exposure, maintenance requirements and overall interior style. For most homes, the main options include single-layer, multi-level, tray, cove or perimeter, gypsum, POP, PVC, wooden and grid-style false ceilings. The best choice is the one that fits the room rather than the most elaborate design. What are the main types of false ceiling designs? The main types can be understood in two ways: by the form of the ceiling design and by the material used to construct it. Design forms include single-layer, multi-level, tray, floating and cove or perimeter ceilings. Material choices include gypsum board, POP, PVC, wood or wood-finish panels and metal or grid systems. These categories can overlap. For example, a single-layer false ceiling can be made using gypsum board, while a wooden false ceiling may be used as a feature within a larger gypsum ceiling. That distinction is useful because design type and material are not the same decision. 1. What is a single-layer false ceiling? A single-layer false ceiling is one of the simplest false ceiling designs. A secondary ceiling is created at one level below the original slab, usually with a clean, uninterrupted appearance. It can accommodate: Recessed lights Downlights Concealed wiring Selected electrical fixtures Simple perimeter detailing This type works well when you want the ceiling to support the interior rather than become the main visual feature. It is particularly useful in apartments where excessive ceiling detailing can make the room feel lower. If you prefer a restrained look, explore our guide to simple false ceiling designs for more examples. 2. What is a multi-level false ceiling? A multi-level false ceiling uses two or more ceiling planes at different heights. The changes in level can create visual zones around: Seating areas Dining areas TV walls Bed zones Circulation areas Lighting features Multi-level ceilings can create more architectural interest, but they also require more planning. Adding layers simply because the ceiling looks empty can make a room feel visually heavy. The different levels should have a reason—whether that is lighting, zoning, proportion or a particular design language. For a compact apartment, a shallow and controlled version may work better than a heavily layered design. 3. What is a tray false ceiling? A tray ceiling creates a recessed or raised central portion, usually surrounded by a border. The result can give the ceiling a framed appearance without covering the entire surface with elaborate detailing. A tray false ceiling can work particularly well in: Living rooms Bedrooms Dining areas Larger master bedrooms Larger villas The proportions matter. A very wide border in a small room can reduce the feeling of openness, while a carefully scaled border can give the room structure without making the ceiling dominant. 4. What is a cove or perimeter false ceiling? A cove or perimeter false ceiling focuses the design around the edges of the room. The central ceiling remains relatively open while the perimeter can accommodate concealed lighting or a simple architectural detail. This is one of the more versatile approaches because it can provide a finished ceiling appearance without requiring multiple layers across the entire room. It can also work well when the furniture layout already provides a strong visual centre. For more detail on the lighting side, see our guide to false ceiling cove lighting. 5. What is a floating false ceiling? A floating false ceiling is designed to appear visually separated from the surrounding ceiling. A recessed edge or concealed light source can create the impression that the central ceiling element is floating. This design can create a clean contemporary effect, particularly when the lighting is carefully integrated. However, the floating effect depends heavily on proportions and lighting. If the recess is too shallow or the lighting is poorly positioned, the intended effect can disappear. 6. What is a gypsum false ceiling? Gypsum board is one of the most commonly considered materials for residential false ceilings. It is useful for creating: Smooth flat surfaces Simple geometric forms Recessed lighting Cove details Layered ceiling profiles Custom ceiling shapes Gypsum is particularly suitable when the design requires a clean finished surface and integrated lighting. However, gypsum should not automatically be treated as the best material for every location. Moisture exposure, access requirements, design complexity and workmanship all matter. Our dedicated gypsum board false ceiling guide goes deeper into the material itself. 7. Joints and screw points are treated The joints between boards and visible fixing points need to be treated so that the final surface can be finished cleanly. This stage is important because imperfections can become obvious after painting, particularly when light falls across the ceiling. A ceiling can look perfectly acceptable under construction lighting and reveal uneven areas once the final lighting is switched on. 7. What is a POP false ceiling? POP, or plaster of Paris, can be shaped into more customised decorative forms. It may be considered when the design calls for: Curved details Decorative profiles Custom mouldings Intricate ceiling shapes Bespoke architectural detailing POP can therefore provide design flexibility, particularly for decorative work. The quality of the finished result depends significantly on workmanship. A complicated shape does not automatically make a ceiling better. If you are deciding between materials, our POP vs gypsum vs PVC false ceiling guide can help you compare the practical differences. 8. What is a PVC false ceiling? PVC panels are another option, particularly in areas where moisture resistance is an important consideration. They can be useful for selected applications where conventional dry interior ceiling materials may not be the most practical choice. However, PVC should not be selected simply because it is marketed as a universal solution. The room’s appearance, ventilation, lighting, maintenance requirements and overall interior design still need to be considered. For rooms

Types of False Ceiling Designs: A Homeowner’s Guide Read More »

renovation service

Kitchen Storage Planning: A Practical Guide for Hyderabad Homes

Kitchen Storage Planning: A Practical Guide for Hyderabad Homes A kitchen can have plenty of cabinets and still feel short of storage. The problem is often not the amount of space available. It is how that space has been divided and how easily you can reach what you actually use. Good kitchen storage ideas start with a simple question: what needs to be stored, how often is it used, and where should it be kept? For Hyderabad homes, particularly apartments where kitchen space is often carefully defined by the floor plan, this becomes even more important. A well-planned kitchen can use drawers, baskets, pull-outs, tall units and corner storage to make everyday cooking more organised without making the room feel crowded. At Decore Designz, kitchen storage is planned as part of the overall kitchen design rather than added as an afterthought. The layout, cooking habits, appliances, materials and storage requirements need to work together. Why Kitchen Storage Planning Matters The easiest mistake to make when designing a kitchen is to count cabinets instead of thinking about storage. Two kitchens can have almost the same number of cabinets but feel completely different to use. One might have: Deep shelves where small items disappear Poorly used corners Too few drawers No dedicated pantry space Appliances occupying valuable counter space Another might use: Wide drawers for frequently used cookware Pull-outs for narrow spaces Tall pantry storage Baskets for vegetables and supplies Dedicated appliance storage Organised corner solutions The second kitchen may not actually have much more floor area. It simply uses the available volume more intelligently. Drawers: Make Everyday Items Easier to Reach Drawers are useful when you want to see and access the contents without reaching deep into a cabinet. They work particularly well for: Cutlery Cooking tools Plates Pans Containers Everyday cookware Drawer dimensions should be planned around their intended contents. A shallow drawer can work well for cutlery and smaller tools, while deeper drawers can accommodate larger cookware. However, making every cabinet a drawer is unnecessary. The right combination of drawers, shelves and specialised storage is usually more practical. Pull-Out Storage for Narrow Spaces Pull-outs can make otherwise awkward cabinet widths much more useful. This is particularly useful when a small gap remains between larger cabinet sections. A narrow pull-out can be used for: Oil bottles Spices Condiments Cleaning products Slim kitchen accessories   Instead of leaving the space unused, a properly designed pull-out can turn it into accessible storage. But there is an important consideration: not every narrow cabinet needs a pull-out. If you are storing large containers, cookware or bulky items, a wider drawer or shelf may provide better usable capacity. The accessory should solve a storage problem rather than simply be included because it looks sophisticated. Tall Units: Use the Full Height of the Kitchen Tall units are among the most effective kitchen storage solutions when floor space is limited. They use vertical space rather than taking up additional floor area. A tall unit can accommodate: Pantry items Dry groceries Small appliances Cleaning supplies Bulk storage Built-in appliances For apartment kitchens, this can be particularly useful because vertical storage can increase capacity without extending the kitchen footprint. However, tall units need to be positioned carefully. A tall cabinet beside a window can reduce natural light. One placed too close to the kitchen entrance can make the space feel narrow. Storage capacity should therefore be balanced with light, ventilation and movement. Kitchen Baskets: Simple Storage That Gets Used Baskets can be useful for items that need ventilation, quick access or regular handling. Depending on the design, they can be used for: Vegetables Onions and potatoes Cleaning supplies Frequently used kitchen items Pantry organisation The important thing is to choose the basket according to its purpose. For example, a vegetable basket should not be treated in the same way as a cutlery organiser. The internal storage system should reflect what is actually being stored. Corner Storage Needs a Specific Strategy Corners are often some of the least accessible areas of a kitchen. Simply installing a conventional cabinet in a corner can leave part of the available space difficult to reach. Depending on the layout, options can include: Corner drawers Corner shelves Rotating accessories Pull-out corner mechanisms Accessible storage for less frequently used items The right solution depends on the cabinet dimensions and how the corner connects with the surrounding units. Do not choose a corner accessory before the overall kitchen layout has been finalised. Plan Storage Around Appliances Appliances can consume significant counter and cabinet space if they are not considered early. Think about where you will keep: Microwave Oven Mixer grinder Air fryer Coffee machine Toaster Refrigerator Some appliances may be integrated into the kitchen, while others may need dedicated storage. A common mistake is designing all the cabinets first and then trying to find space for the appliances. The opposite approach is better. Identify the major appliances first and then plan the storage around them. Keep Frequently Used Items Within Easy Reach Not all storage should be equally accessible. A practical kitchen usually has different levels of accessibility. Everyday storage Keep frequently used plates, cookware, spices and utensils in easily reachable drawers and cabinets. Occasional storage Items used weekly or monthly can be placed in less accessible areas. Long-term storage Large serving pieces, festive cookware and rarely used items can occupy higher or deeper storage. This simple hierarchy makes a kitchen easier to use without requiring every cabinet to have expensive accessories. Don’t Ignore the Space Under the Sink The area beneath the sink is often difficult to use because of plumbing. Instead of treating it as wasted space, it can be planned for: Cleaning supplies Garbage segregation Dishwasher-related storage Sink accessories Cleaning tools The storage needs to account for the plumbing trap and service access. This is a good example of why storage planning should happen alongside the kitchen layout rather than after cabinet fabrication has begun. Storage Should Follow the Kitchen Workflow The best

Kitchen Storage Planning: A Practical Guide for Hyderabad Homes Read More »

L-Shaped Kitchen Design

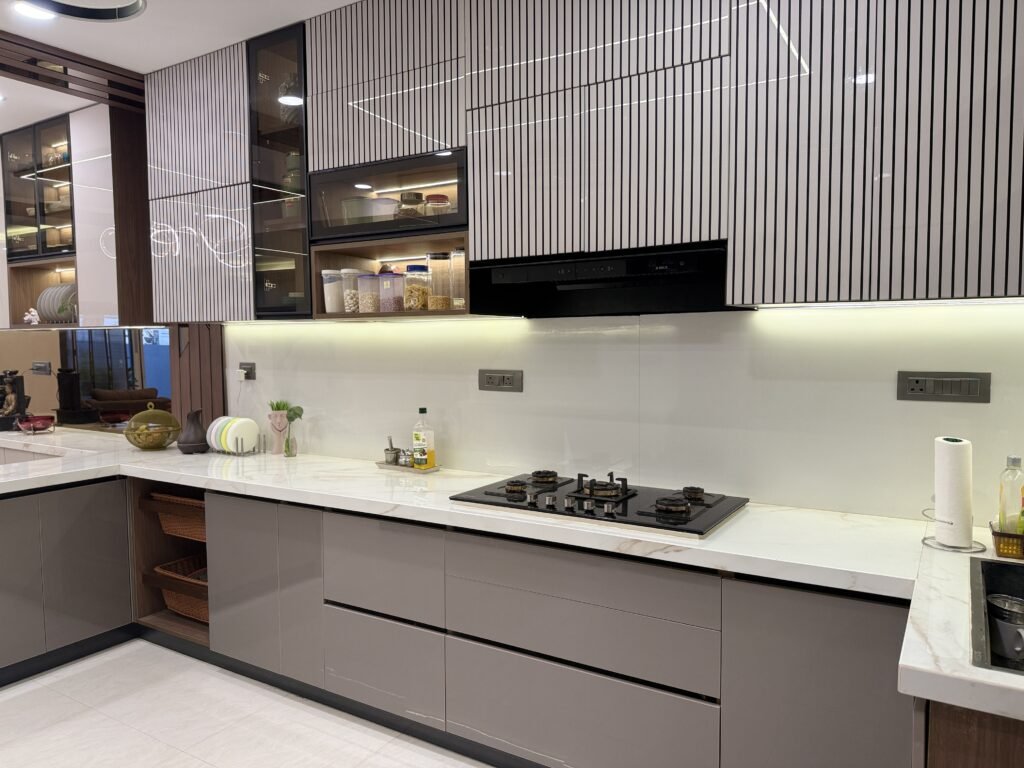
L-Shaped Kitchen Design: A Layout Guide for Hyderabad Homes

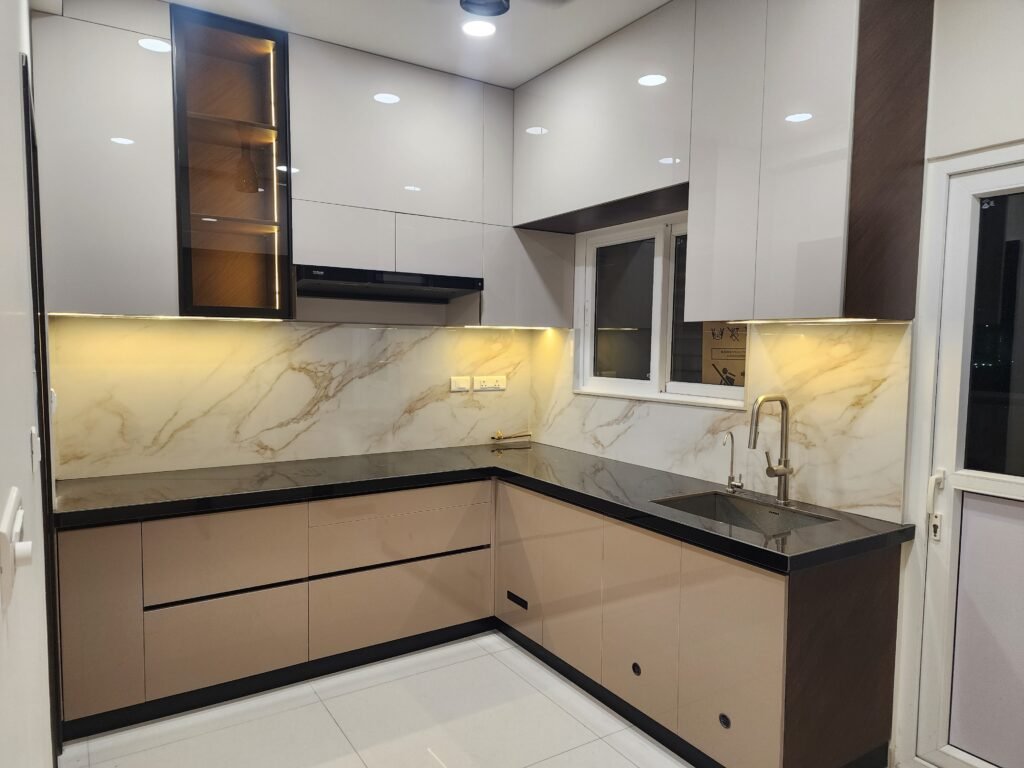
L-Shaped Kitchen Design: A Layout Guide for Hyderabad Homes An L-shaped kitchen is one of the most practical layouts for modern Indian homes. Whether you own a compact 2BHK apartment or a spacious villa in Hyderabad, this layout offers a balance of cooking space, storage and movement. However, a successful L shape kitchen design requires more than placing cabinets along two walls. The position of the sink, stove and refrigerator, the available counter space and the way cabinets open all influence how comfortably you can use your kitchen. In this guide, we explore L shape kitchen design ideas, layout planning, cabinet configurations, countertop materials and storage solutions to help you plan a kitchen that suits your home and daily routine. Design inspiration: A contemporary L-shaped kitchen with coordinated cabinetry and practical counter space. What Is an L-Shaped Kitchen? An L-shaped kitchen is a layout in which two adjoining walls accommodate kitchen counters, cabinets and appliances, forming the letter L. Typically, one side accommodates the primary cooking area, while the other provides space for washing, preparation or additional storage. Unlike a parallel kitchen, an L-shaped layout leaves two sides of the room relatively open. Therefore, it can create a more spacious environment and allow easier movement between different kitchen activities. Why Choose an L-Shaped Kitchen for Your Home? Efficient use of corner space and adjoining walls. Flexible placement of the sink, stove and refrigerator. Suitable for both open and enclosed kitchens. Adaptable to compact apartments and larger homes. Potential to accommodate a dining counter or island in spacious rooms. Continuous counter space for everyday cooking. However, the layout’s effectiveness depends on the room’s dimensions, door positions, ventilation and storage requirements. How to Plan an L Shape Kitchen Layout Before choosing cabinet colours or countertop finishes, start with a detailed L shape kitchen plan. The objective is to organise the kitchen around the way your family cooks, cleans and stores everyday essentials. Position the Sink, Stove and Refrigerator These three elements form the main kitchen work zones. For many Indian households, cooking involves several activities happening simultaneously, including chopping vegetables, washing utensils, preparing ingredients and cooking multiple dishes. Therefore, each activity needs sufficient working space. Illustrative L shape kitchen layout drawing showing how appliances and work areas can be distributed across two adjoining walls. A practical arrangement might include: Refrigerator near the kitchen entrance. Sink positioned along one counter. Preparation space between the sink and stove. Cooking hob along the adjoining counter. Frequently used utensils stored close to the cooking area. Recommended Kitchen Dimensions The following measurements are useful starting points for residential kitchen planning. Kitchen component Suggested dimension Standard counter height 850–900 mm Counter depth 600 mm Clear working aisle 900–1,200 mm Distance between counter and upper cabinets 450–600 mm Typical upper cabinet depth 300–350 mm These are planning guidelines rather than fixed requirements. Final measurements should account for the homeowner’s height, appliances, accessibility and site conditions. For example, a taller homeowner may prefer a slightly higher counter to reduce bending during food preparation. Make the Corner Functional The corner where both counters meet is often the most challenging part of an L-shaped kitchen. Poorly planned corners can create inaccessible storage and wasted cabinet space. Depending on the available budget and dimensions, consider a carousel, pull-out corner mechanism or conventional corner cabinet with accessible shelves. For compact kitchens, even a simple corner cabinet can work effectively when its door opening and internal storage are planned correctly. L Shape Kitchen Design Ideas for Hyderabad Homes The right design depends on your kitchen’s size, the available natural light and whether you prefer an open or enclosed cooking area. Here are five L shape kitchen ideas worth considering. 1. Modern L Shape Kitchen with Minimalist Cabinets A modern L shape kitchen uses clean lines, coordinated finishes and carefully integrated appliances to create a clutter-free appearance. Handleless cabinets, concealed lighting and neutral colours can make even a moderately sized kitchen feel organised. For a contemporary apartment, consider matte beige or grey cabinets paired with a light-coloured countertop. In addition, integrated appliance spaces can help maintain a consistent appearance. 2. Small L Shape Kitchen with Smart Storage A small L shape kitchen can accommodate essential cooking activities without making the room feel overcrowded. However, limited floor space makes cabinet planning particularly important. Consider extending upper cabinets towards the ceiling, incorporating vertical pull-outs and using deep drawers for larger utensils. Light-coloured finishes can also make the kitchen appear brighter, especially when natural light is limited. 3. L-Shaped Kitchen with an Island An L shape kitchen island arrangement can work well in spacious apartments, independent houses and villas. The island can serve as an additional preparation counter, informal dining area or storage unit. However, it is important to maintain sufficient clearance around the island. Aim for approximately 1,000–1,200 mm of working space where possible, particularly around appliances and frequently used drawers. For smaller kitchens, a peninsula or compact breakfast counter may be more practical than a freestanding island. 4. Two-Tone L-Shaped Kitchen Two-tone cabinets can introduce visual interest without making the kitchen look excessively decorative. For example, you can combine wooden upper cabinets with neutral lower cabinets or pair muted green cabinetry with a light countertop. Darker colours generally work well on lower cabinets, while lighter finishes can make upper cabinets feel less visually heavy. 5. Open L-Shaped Kitchen with a Breakfast Counter An open L-shaped kitchen can create a natural connection between the cooking, dining and living areas. A breakfast counter can provide additional preparation space while creating a subtle division between the kitchen and living room. However, Indian cooking often involves frying, tempering and aromatic spices. Therefore, effective ventilation and an appropriately specified chimney are especially important in open kitchens. Explore Our Projects L Shape Kitchen Cabinets: How to Plan Your Storage Well-designed L shape kitchen cabinets should accommodate everyday utensils, groceries, appliances and cleaning supplies without compromising accessibility. Instead of planning cabinets solely around appearance, identify what you need to store before finalising their

L-Shaped Kitchen Design: A Layout Guide for Hyderabad Homes Read More »