
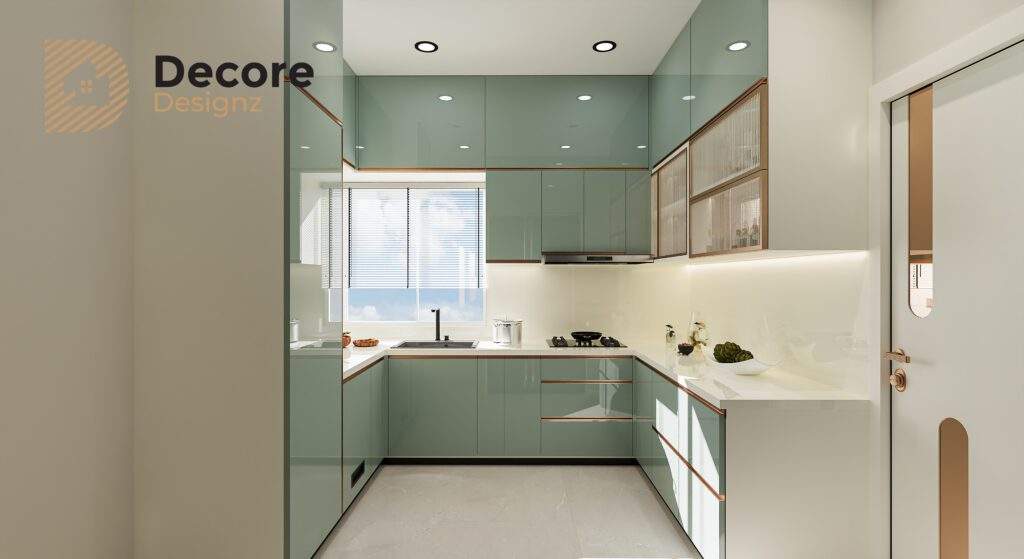
Decore Designz

Material

Modular kitchen

Best Countertop Material for Indian Kitchens: Granite, Quartz, Solid Surface and Steel

Best Countertop Material for Indian Kitchens: Granite, Quartz, Solid Surface and Steel The best countertop material for an Indian kitchen depends on how frequently you cook, how much heat the surface encounters and how much maintenance you are comfortable with. Granite is generally the most practical choice for heavy Indian cooking, while quartz offers better colour consistency and stain resistance. Solid surface suits seamless designs, and stainless steel works well for hygiene-focused, functional kitchens. Choosing a kitchen countertop is not simply about selecting a colour that matches your cabinets. It is one of the most frequently used surfaces in your home. Think about the everyday activities it needs to handle: preparing vegetables, working with turmeric and oil, placing heavy utensils, cleaning spills and managing hot cookware. A material that looks beautiful in a showroom might not be the right choice for your cooking habits. For Indian homes, the decision becomes particularly important because the kitchen often handles multiple cooking activities throughout the day. Let’s compare four popular kitchen countertop materials and understand where each one makes sense. 1. What Should You Consider Before Choosing a Kitchen Countertop? Before comparing individual materials, consider the conditions your countertop will experience. Factor Why it matters Heat resistance Hot kadais, tawas and pressure cookers can damage certain surfaces. Stain resistance Turmeric, oil, coffee and food spills can leave marks. Scratch resistance Heavy utensils and everyday food preparation create surface wear. Water resistance Frequent washing and moisture around the sink require a suitable surface. Maintenance Some materials need periodic sealing or specialised cleaning. Appearance Colour, texture, pattern and finish influence the overall kitchen design. Fabrication Joints, edges, sink cut-outs and installation quality affect long-term performance. One important point: countertop durability is not determined by the material alone. The quality of the slab, fabrication, supporting cabinets and installation also matter.   2. Is Granite the Best Countertop Material for Indian Kitchens? Granite remains one of the most practical choices for Indian kitchens, particularly for households that cook frequently. It is a natural stone known for its hardness, durability and ability to handle everyday kitchen activity. It also tolerates heat better than resin-based countertop materials. Why choose granite? Handles everyday cooking conditions well. Offers good resistance to scratches. Available in numerous natural colours and patterns. Generally handles hot cookware better than engineered quartz and solid surface. Works with traditional, contemporary and modern kitchen designs. What should you watch out for? Granite is a natural material, so no two slabs are necessarily identical. Some varieties have greater porosity than others. Certain granite surfaces can benefit from an appropriate penetrating sealer to reduce moisture absorption. Whether sealing is necessary depends on the particular stone. Dark granite, especially black varieties, is popular in Indian kitchens because it creates a strong contrast against lighter cabinetry. However, water marks, dust and fingerprints can sometimes be more noticeable depending on the finish. Best suited for: Families that cook frequently, use heavy cookware and want a durable everyday cooking platform. Which Granite Is Suitable for an Indian Kitchen? Black granite is a popular option, but choosing granite purely by colour is a mistake. Consider: Black granite: Creates a bold, clean appearance and pairs well with white, beige and wood-finish cabinets. Brown granite: Works well with warm wooden cabinetry and traditional kitchen palettes. Grey granite: Complements contemporary kitchens with neutral colours. Light granite: Creates a brighter appearance but requires careful evaluation of its stain resistance and maintenance requirements. Always inspect the actual slab rather than relying entirely on a small sample or catalogue photograph. 3. Is Quartz Better Than Granite for Kitchen Countertops? Engineered quartz is made using quartz particles combined with resin and pigments. Unlike natural granite, its manufacturing process allows greater consistency in colour and pattern. This makes it popular in contemporary kitchens where homeowners prefer clean, uniform surfaces. Why choose quartz? Non-porous surface. Excellent resistance to everyday staining. Consistent colours and patterns. Available in white, beige, grey and marble-inspired designs. Does not generally require the sealing associated with some natural stones. What should you watch out for? Heat is the main consideration. Engineered quartz contains resin, which can be affected by concentrated heat. Placing a very hot kadai, tawa or pressure cooker directly on the surface can cause discolouration, scorching or damage. Use trivets or heat-resistant pads. Quartz is also not scratch-proof. Cutting directly on the countertop and dragging heavy objects across it should be avoided. Another consideration is sunlight. Some engineered quartz products are intended primarily for indoor applications and may experience colour changes with prolonged UV exposure. Check the manufacturer’s specifications. Best suited for: Homeowners who prefer a uniform, contemporary appearance and want a low-maintenance surface, provided they are comfortable using heat protection. Quartz vs Granite: Which Is Better for Indian Cooking? The answer depends on your cooking habits. If your kitchen sees frequent heavy cooking, granite generally offers greater tolerance for direct heat exposure. If you prioritise stain resistance, consistent patterns and a contemporary appearance, quartz has advantages. Neither material is indestructible. The right selection depends on how you use the kitchen. 4. Is Solid Surface a Good Option for Kitchen Countertops? Solid surface is an engineered material commonly made using acrylic or polyester resins combined with mineral fillers. Its biggest design advantage is its ability to create smooth, continuous surfaces. Unlike conventional stone countertops, solid surface can be fabricated with joints that are designed to appear almost invisible. Why choose solid surface? Seamless-looking joints. Can be shaped into curved designs. Integrated sinks can be created. Non-porous surface. Minor scratches and some surface damage can be repaired or refinished. It is particularly useful when the design calls for a continuous countertop and integrated sink rather than separate components. What should you watch out for? Solid surface is less suitable for households that frequently place hot cookware directly on the kitchen platform. High temperatures can cause scorching or other surface damage. It can also develop scratches through everyday use, although many minor imperfections are repairable. Dark, glossy finishes may

Best Countertop Material for Indian Kitchens: Granite, Quartz, Solid Surface and Steel Read More »
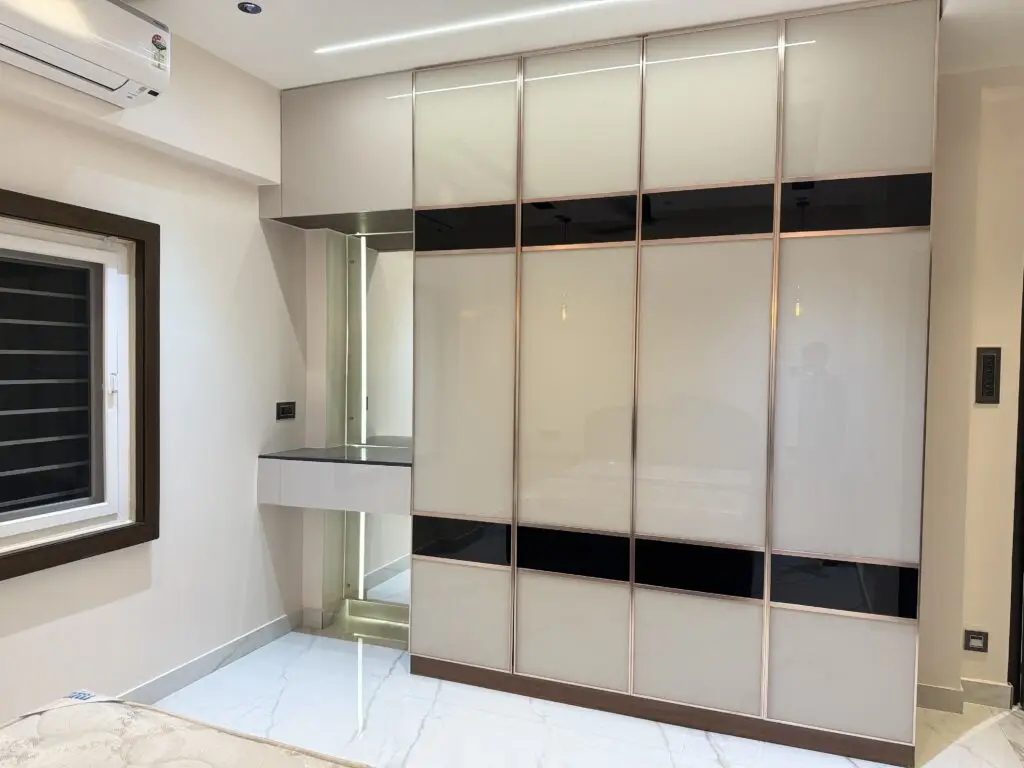
Modern storage unit with built-in cabinets, shelves, and contemporary design

Best Shutter Finish for Wardrobes: Fingerprints, Glare and Sliding Doors

Best Shutter Finish for Wardrobes: Fingerprints, Glare and Sliding Doors A wardrobe can look impressive in a showroom and become difficult to maintain once it is used every day. Fingerprints on dark shutters, reflections from glossy surfaces and visible dust on certain finishes can all affect how the wardrobe looks over time. The best finish for wardrobe shutters is not necessarily the most expensive-looking or the most reflective. It is the one that suits the bedroom’s lighting, how frequently the wardrobe is used, who uses it and how much maintenance the household is comfortable with. For most bedrooms, a good-quality matte or soft-textured finish is a practical starting point. Glossy finishes can work well when a brighter, more reflective appearance is wanted, while laminate, acrylic, veneer and other surface options each have different maintenance requirements. 1. Matte vs Glossy Wardrobe: What Is the Actual Difference? The first decision is usually between a matte and a glossy appearance. Both can look refined, but they behave differently under bedroom lighting and daily use. Matte wardrobe finishes Matte finishes have a low-reflection surface. They absorb and diffuse more light instead of reflecting it directly, giving wardrobe shutters a quieter, understated appearance. Advantages: Reflections and glare are generally less noticeable. They suit contemporary, minimal and warm bedroom interiors. They can make large wardrobe surfaces feel visually calmer. Subtle textures can help disguise minor surface marks. Limitations: Dark matte finishes can still show oily fingerprints and hand marks. Some textured surfaces collect dust in their grain or grooves. Cleaning methods depend on the actual finish and manufacturer instructions. Matte is a strong option for bedrooms where the wardrobe occupies a large wall or sits opposite a window. It avoids the prominent reflections that can make a large glossy surface visually distracting. Glossy wardrobe finishes Glossy shutters have a reflective surface that creates a brighter, more polished appearance. They can reflect daylight and artificial lighting, making them useful in rooms where a more luminous finish is desired. Advantages: Reflects light and can make a room feel brighter. Creates a smooth, polished appearance. Works well with contemporary and high-contrast bedroom designs. Smooth surfaces are generally straightforward to wipe. Limitations: Fingerprints and smudges can be more visible, particularly on dark glossy surfaces. Reflections from windows, ceiling lights and downlights can become distracting. Scratches and surface imperfections may be more noticeable depending on the material. Glossy finishes are worth considering when the wardrobe is not directly exposed to strong reflections and the household is comfortable wiping the shutters regularly. 2. Which Wardrobe Finish Shows Fewer Fingerprints? Fingerprint visibility is influenced by three things: surface sheen, colour and texture. It is not accurate to assume that every matte finish hides fingerprints or that every glossy finish shows them equally. A dark, smooth surface can reveal oily marks under side lighting. A lighter, lightly textured finish may disguise everyday handling better. Here is how common choices compare: Finish Fingerprint visibility Light matte Generally less noticeable Dark matte Can show oily marks Light glossy Smudges may be less prominent than on dark glossy surfaces Dark glossy Often makes fingerprints and wipe marks obvious Textured laminate Texture may help disguise minor marks For a master bedroom wardrobe that is opened several times a day, a light or medium-toned matte laminate is often a practical choice. For a child’s bedroom, consider a durable, easy-to-clean surface rather than selecting a finish based only on appearance. Also consider where the handles are placed. Shutters with integrated finger pulls or push-to-open mechanisms can concentrate hand contact around specific areas. Handle design and cleaning habits matter as much as the finish itself. 3. How Bedroom Lighting Affects Wardrobe Finishes A wardrobe finish should be selected in the actual bedroom lighting conditions, not only under showroom lights. A glossy shutter opposite a large window can reflect daylight directly into the room. Similarly, a wardrobe facing ceiling spotlights may show bright reflected spots across its surface. Matte finishes diffuse light more softly, making them easier to coordinate with layered bedroom lighting. Before finalising a finish, consider: Window position: Check whether daylight falls directly on the wardrobe. Artificial lighting: Look at how spotlights, cove lighting and bedside lights reflect on the shutters. Room size: Large reflective surfaces can dominate a compact bedroom. Colour: Dark finishes can feel visually heavier, while lighter shades often create a more open appearance. Other surfaces: Coordinate the wardrobe with flooring, wall colours, headboard finishes and furniture. For a small bedroom, a light matte or subtle textured finish is often easier to integrate. A glossy finish can also work, but it should be tested under the room’s actual lighting before approval. 4. Choosing Between Laminate, Acrylic, PU and Veneer Matte and glossy describe the appearance of a surface. Laminate, acrylic, PU and veneer describe different finish materials or finishing systems. They should not be treated as interchangeable categories. Laminate Laminate is a versatile wardrobe shutter option available in a wide range of colours, patterns, textures and sheen levels. It can imitate wood grains, stone-like patterns and solid colours. Matte and textured laminates are useful when a restrained appearance and practical everyday maintenance are priorities. Best suited for: Bedrooms that need a broad choice of finishes and a balance between appearance and everyday usability. Acrylic Acrylic is commonly selected for its smooth, high-gloss appearance. It produces a more reflective surface than a typical matte laminate. It can look striking on contemporary wardrobes, but fingerprints and smudges may be more noticeable, particularly on darker colours. Best suited for: Wardrobes where a polished, reflective appearance is a deliberate design choice. PU finish PU (polyurethane) is a coating system that can create a smooth, refined finish in different sheen levels, depending on the product and application. It offers flexibility in colour and appearance, but the quality of preparation and application matters. Maintenance and repair requirements should be discussed with the finishing specialist. Best suited for: Custom wardrobes where a specific colour, surface appearance or seamless design is required. Veneer Veneer

Best Shutter Finish for Wardrobes: Fingerprints, Glare and Sliding Doors Read More »

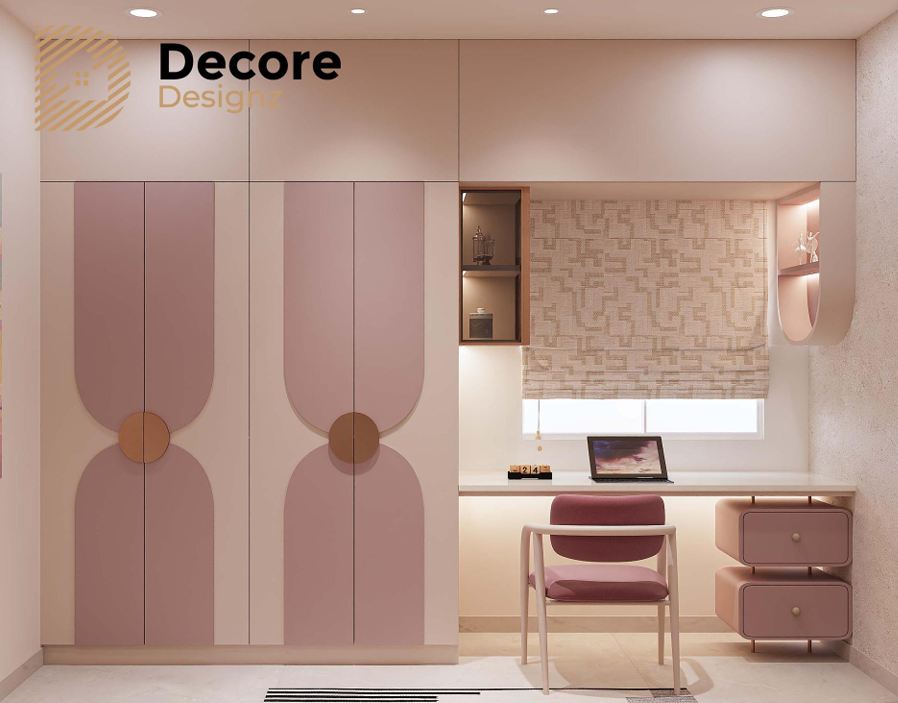
Kids wardrobe My Home Sayuk Tellapur

Laminate vs Acrylic: Which Finish Should You Choose?

Laminate vs Acrylic: Which Finish Should You Choose? Choosing a finish for your kitchen cabinets or wardrobe is not just about selecting a colour. The surface affects how the furniture looks, how it handles everyday use, how easily it can be maintained and how well it fits the overall interior. Two popular options are laminate and acrylic. Both are available in a wide range of colours and finishes, but they create noticeably different results. Laminate offers greater variety in textures and surface effects, while acrylic is known for its smooth, reflective appearance. So, in the laminate vs acrylic comparison, which finish should you choose? Choose laminate if you want flexibility in design, a wide range of textures and a practical surface for everyday use. Choose acrylic if you prefer a sleek, high-gloss appearance and a more reflective, contemporary look. Neither is universally better. The right option depends on the room, the design, maintenance expectations and how the furniture will be used. What Is Laminate Finish? Laminate is a decorative surface material made by bonding layers of paper and resin under heat and pressure. It is commonly used on furniture and cabinetry, where it is applied over a suitable substrate such as plywood, MDF or particle board. It is available in several surface styles, including: Matte: A low-reflection surface that creates a subtle, understated appearance. Glossy: A reflective finish that adds brightness and visual contrast. Textured: Surfaces that imitate wood grain, stone, fabric or other materials. Woodgrain: Patterns that create the appearance of natural timber. Solid colours: A broad selection of neutral, muted and bold shades. One of laminate’s main advantages is its design flexibility. It can suit traditional, contemporary and minimalist interiors without requiring the same surface appearance throughout the home. However, laminate quality varies. Thickness, grade, surface texture and manufacturing quality all influence how it performs. Edge banding and application workmanship also matter. What Is Acrylic Finish? Acrylic is a decorative surface finish commonly used on cabinet shutters and furniture panels. Acrylic sheets are applied to a suitable substrate to create a smooth, uniform surface. Its best-known feature is its high-gloss appearance. Light reflects across the surface, giving cabinets a clean and polished look. Acrylic is also available in matte options, although high-gloss acrylic is often the more recognisable choice. Acrylic is commonly selected for: Modern modular kitchen shutters. Contemporary wardrobe shutters. Minimalist storage units. Feature cabinets and display units. Designs that use clean lines and reflective surfaces. Acrylic can create a premium-looking finish, but it is not scratch-proof or maintenance-free. Fingerprints, dust and surface marks can be more visible on glossy finishes, particularly in areas that are touched frequently. Laminate vs Acrylic: Key Differences Comparison Laminate vs Acrylic Appearance Laminate offers matte, gloss, textured and woodgrain options; acrylic creates a smoother, more uniform appearance. Reflectivity Depends on the selected laminate finish; high-gloss acrylic generally offers stronger reflection. Design variety Wide choice of colours, patterns and textures, including realistic woodgrain effects. Scratch resistance Varies by laminate grade and texture; acrylic can show scratches, especially on glossy surfaces. Fingerprints Usually less noticeable on textured or matte laminates; more visible on glossy acrylic. Maintenance Generally straightforward; cleaning depends on the surface texture and manufacturer’s instructions. Moisture The finish alone does not make the cabinet waterproof; substrate, edges and joints matter. Repair Localised damage can be difficult to make invisible; repair options depend on the finish and damage. Typical use Wardrobes, kitchen cabinets, storage units and furniture across many design styles. Best suited to Homes needing design flexibility and varied textures; contemporary spaces prioritising a sleek, reflective look.   1. Appearance: Which Finish Looks Better? Appearance is often the first reason homeowners compare laminate and acrylic. Laminate gives you more freedom to work with different design directions. You can choose a soft matte surface, a subtle woodgrain, a stone-inspired texture or a bold colour. This makes it easier to coordinate cabinetry with flooring, wall finishes, countertops and other furniture. Acrylic creates a more uniform and polished appearance. High-gloss acrylic reflects light and can make cabinet fronts look sleek and visually clean. It is particularly effective in contemporary kitchens where the design uses flat shutters, minimal detailing and controlled colour combinations. The choice is not simply between ordinary and premium-looking finishes. A well-selected matte or textured laminate can look just as considered as acrylic. The difference is the visual effect you want. Choose laminate for texture, woodgrain and understated surfaces. Choose acrylic for a smooth, reflective and contemporary appearance. 2. Durability: Which Finish Lasts Longer? Neither finish should be treated as indestructible. Durability depends on product quality, substrate preparation, application, edge detailing and everyday handling. Good-quality laminate is generally a practical option for frequently used furniture. Its performance varies by grade and surface type. A suitable laminate can handle normal household use, although sharp objects, excessive impact and poor edge protection can still cause damage. Acrylic offers a smooth decorative surface, but glossy versions can show scratches and marks more visibly. Damage to the sheet or its edges may also be difficult to conceal. The important distinction is between actual damage and visible marks. A surface that shows fingerprints easily is not necessarily less durable; it may simply require more frequent cleaning to maintain its appearance. For busy households, the finish should be selected around how the furniture will be used, not just how it looks in a sample display. 3. Scratch Resistance and Everyday Wear Scratch resistance is one of the most important considerations when comparing acrylic vs laminate for wardrobes and kitchens. Laminate performance depends on its grade, texture and surface properties. Textured and matte options can be practical because minor marks may be less noticeable than on highly reflective surfaces. However, laminate can still be scratched, chipped or damaged by sharp objects. High-gloss acrylic can make scratches and surface marks more visible because light reflects across the smooth finish. It should be cleaned with suitable materials and protected from abrasive contact. For homes with children, pets or frequent kitchen

Laminate vs Acrylic: Which Finish Should You Choose? Read More »

Bedroom And Wardrobes Aparna Zenon Puppalaguda

HDHMR vs Plywood: Which Is Better for Wardrobes and Kitchens?

HDHMR vs Plywood: Which Is Better for Wardrobes and Kitchens? Choosing the right board material is one of the most important decisions when planning wardrobes and kitchen cabinets. Two options that often come up are HDHMR and plywood. Both are used in residential interiors, but they differ in how they are manufactured, how they respond to moisture, how they hold screws and where they perform best. So, in the HDHMR vs plywood comparison, which one should you choose? Plywood is generally the more dependable choice for kitchen cabinets and structures that need strong mechanical fixing and better tolerance for demanding conditions. HDHMR can be a practical option for wardrobe shutters, panels and selected interior applications where a smooth, uniform surface is important. The right choice still depends on board quality, grade, thickness, construction and exposure. Let’s compare them in practical terms. What Is HDHMR Board? HDHMR stands for High-Density High Moisture Resistance board. It is an engineered wood panel made by compressing wood fibres with resin under heat and pressure. This produces a dense, uniform board with a relatively smooth surface. HDHMR is often considered for wardrobe shutters, cabinet panels and furniture components because its consistent surface can support a neat finish. It can be used with laminates, acrylic and other suitable surface finishes, subject to the manufacturer’s specifications. However, the term moisture resistant should not be interpreted as waterproof. Prolonged exposure to water, poorly sealed edges or damp conditions can still damage the board. Its actual performance depends on the product specification and manufacturing quality. What Is Plywood? Plywood is made by bonding multiple thin layers of wood veneer together, generally with the grain direction of adjacent layers arranged at right angles. This cross-layer construction gives plywood good structural stability and strength. Different plywood grades are designed for different conditions. MR, BWR and BWP are common classifications you may encounter, but the grade and its intended application should always be checked against the manufacturer’s documentation. Plywood is widely used for kitchen carcasses, wardrobes, storage units, partitions and other furniture structures. Its layered construction also makes it suitable for many applications that require reliable screw fixing. Like HDHMR, plywood is not automatically waterproof or immune to damage. The correct grade, adhesive quality, edge sealing and installation matter. HDHMR vs Plywood: Key Differences Comparison HDHMR vs Plywood Construction HDHMR is made from compressed wood fibres; plywood is made from bonded wood veneers. Surface HDHMR generally offers a uniform, smooth surface; plywood may show natural veneer variation. Structural strength Plywood is generally preferred for demanding structural applications; HDHMR performance depends on density and product specification. Moisture resistance HDHMR offers moisture resistance but is not waterproof; plywood performance depends heavily on grade and edge protection. Screw holding Plywood generally offers dependable screw-holding across many furniture applications; HDHMR requires suitable fixing methods and edge-distance care. Finishing HDHMR’s uniform surface can be useful for certain finishes; plywood can take laminates, veneer and other suitable finishes. Weight Both vary by thickness and density; HDHMR can be relatively dense. Typical applications HDHMR is often used for shutters and selected panels; plywood is commonly used for carcasses and structural furniture components. 1. Strength and Load-Bearing Performance Strength is one of the main reasons plywood is widely used in furniture construction. Its cross-layer veneer structure provides good stability and makes it suitable for cabinet carcasses, shelves, partitions and storage units. When properly specified and constructed, plywood can handle the demands of everyday furniture use. HDHMR is dense and can be suitable for several furniture applications. However, density alone does not establish structural suitability. The board’s internal bonding, thickness, span, fixing method and manufacturer’s performance data all matter. Our practical view: For kitchen carcasses, heavy storage and components that need reliable structural fixing, plywood is usually the safer starting point. HDHMR should be selected for structural use only when its specifications support the intended load and fixing requirements. 2. Moisture Resistance: Which Performs Better? Moisture resistance is especially important in kitchens, utility areas and homes where boards may be exposed to humidity or occasional spills. HDHMR is manufactured to offer better moisture resistance than ordinary fibreboard products. However, it can still swell or deteriorate if water enters through exposed edges, damaged surfaces or joints. Plywood’s moisture performance depends on its grade. MR plywood is intended for interior use in relatively dry conditions, while BWR and BWP grades are designed for more demanding moisture conditions. These terms should not be treated as interchangeable, and the manufacturer’s stated application should be checked. For either material, water can enter through poorly sealed edges, cut-outs, joints and damaged finishes. Our practical view: For kitchen cabinets, choose the plywood grade according to the actual exposure conditions. HDHMR may work in selected kitchen components, but it should not be treated as a waterproof substitute. 3. Screw-Holding and Hardware Fixing Cabinets rely on hinges, drawer channels, handles and other hardware. The board must hold these fixings securely through repeated use. Plywood is generally a dependable option for screw fixing, which is one reason it is commonly used for cabinet structures and furniture carcasses. HDHMR can also be used with hardware, but the fixing method needs attention. Screw type, pilot-hole preparation, edge distance and board thickness can influence the result. Repeated removal and refitting of screws can also affect holding performance. For heavy shutters, frequently used drawers and hardware-intensive cabinets, the material should be selected alongside the hardware and construction details. Our practical view: Plywood is usually the more straightforward choice for components with demanding hardware requirements. HDHMR can be suitable where the fixing design is appropriate and the board specification supports it. 4. Surface Finish and Appearance Both materials can be used to create refined, contemporary interiors. The difference is often in the surface preparation and finish selected. HDHMR has a relatively uniform surface, which can make it useful for applications where a consistent finish is required. It is commonly considered for laminate and other compatible shutter finishes. Plywood can also receive laminates, veneer and other

HDHMR vs Plywood: Which Is Better for Wardrobes and Kitchens? Read More »

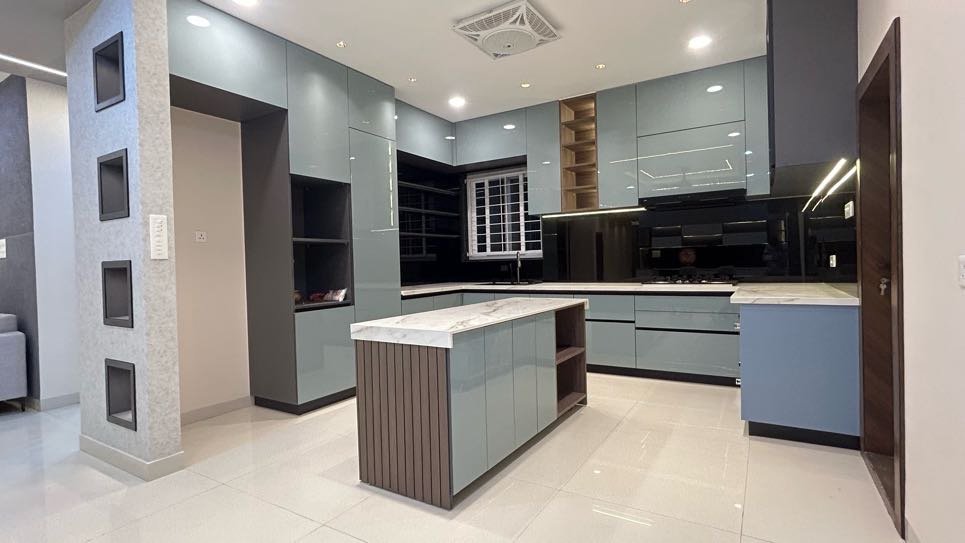
DSR Enclave Island Kitchen

Shutter and Surface Finishes: Laminate, Acrylic, PU, Veneer, Membrane and Glass Compared

Shutter and Surface Finishes: Laminate, Acrylic, PU, Veneer, Membrane and Glass Compared The finish on a wardrobe or kitchen shutter affects more than its appearance. It determines how the surface reflects light, how easily fingerprints show, how much maintenance it needs and how it responds to everyday use. Laminate, acrylic, PU, veneer, membrane and glass each have different strengths. The right choice depends on the furniture’s location, the look you want, the level of use and how much care you are prepared to give the surface. What are the different types of wardrobe and shutter finishes? A shutter is the visible front panel of a cabinet, wardrobe or storage unit. Its finish is the outer surface that gives it colour, texture, sheen and protection. The six common options are not all made in the same way. Laminate and acrylic are typically supplied as surface materials; PU is a coating applied to a prepared surface; veneer is a thin layer of natural wood; membrane is a PVC film formed over a shutter; and glass is used as a separate visible panel or facing. Finish What it is Typical visual character Laminate Decorative sheet bonded to a substrate Matte, textured, wood-look, stone-look or glossy Acrylic High-gloss or matte decorative surface sheet Smooth, clean and contemporary PU Polyurethane coating applied to a prepared surface Seamless painted appearance with varied sheen Veneer Thin natural-wood layer applied to a substrate Real wood grain and natural variation Membrane PVC film pressed over a shaped shutter Smooth or routed profiles, often with a continuous finish Glass Glass panel used as a shutter facing or insert Reflective, sleek or translucent depending on type   The names alone do not tell you how durable a shutter will be. Substrate quality, edge treatment, application, hardware, installation and maintenance all influence the result. 1. Laminate finish: Is it the practical everyday choice? Laminate is one of the most widely used finishes for wardrobes, kitchen cabinets and other built-in furniture. It is a decorative sheet bonded to a board surface, available in a broad range of colours, patterns and textures. You can choose a restrained matte finish, a wood-grain texture, a stone-inspired pattern or a high-gloss surface. This flexibility makes laminate useful when several pieces of furniture need to work together visually. Advantages Wide choice of colours, patterns and textures. Available in matte, textured and glossy options. Generally straightforward to clean with suitable products. Can work across wardrobes, kitchen shutters, study units and other cabinetry. Offers practical options for furniture used every day. Limitations Damaged or chipped laminate can be difficult to repair invisibly. Poor edge finishing can allow moisture to affect the board underneath. Glossy surfaces may show fingerprints, smudges and scratches more clearly. The final result depends on the quality of the sheet, substrate and workmanship. Where it works: Wardrobes, kitchen cabinets, utility storage, study units and other frequently used furniture. For homeowners who want a finish that balances design flexibility with manageable maintenance, laminate is often a sensible starting point. 2. Acrylic finish: Does the high-gloss look justify the choice? Acrylic finishes are known for their smooth, reflective appearance. High-gloss acrylic can make a cabinet front look crisp and contemporary, while matte acrylic offers a more subdued surface. It is often selected for modern kitchens and wardrobes where a clean, uninterrupted appearance is important. Advantages Smooth, refined surface. High-gloss options reflect light and create a bright appearance. Available in contemporary colours and selected matte finishes. Suitable for modern wardrobe and kitchen designs. Limitations Fingerprints and smudges can be noticeable, particularly on darker glossy colours. Scratches may be visible depending on the colour and surface. Repairs to damaged areas can be difficult to blend. Edge quality and substrate preparation matter to the final appearance. Where it works: Modern wardrobes, kitchen shutters, display units and selected feature cabinets. Acrylic is not automatically the best finish because it looks premium. If the furniture will be handled frequently, consider how visible fingerprints and surface marks will be in daily use. 3. PU finish: When should you choose a painted surface? PU, short for polyurethane, is a coating applied to a prepared surface. Unlike a decorative sheet, it creates a painted finish. It can be specified in different colours and sheen levels, including matte, satin and gloss. One of its main design advantages is the ability to create a consistent painted appearance across cabinet fronts, including certain shaped or detailed profiles. Advantages Smooth, continuous painted appearance. Wide choice of colours and sheen levels. Useful for customised colour schemes. Can be applied to suitable flat or shaped surfaces. Works well when cabinetry needs to coordinate closely with the interior palette. Limitations The quality of the result depends heavily on surface preparation and application. Chips and scratches may expose the layer underneath. Touch-ups may not perfectly match the original finish. Application requires appropriate conditions, materials and skilled workmanship. Where it works: Premium wardrobes, feature cabinets, selected kitchen shutters, vanity units and custom furniture. PU is worth considering when the colour itself is a major part of the design. However, the application process and repair requirements should be discussed before finalising it. 4. Veneer finish: What makes natural wood different? Veneer is a thin layer of real wood applied to a stable substrate. It gives furniture the natural grain and variation of timber without constructing the entire shutter from solid wood. No two veneer sheets look exactly alike. Grain direction, colour variation and the way the veneer is matched across adjacent shutters all influence the finished appearance. Advantages Genuine natural-wood appearance. Distinctive grain patterns and character. Can be finished in different stains and protective coatings. Suitable for warm, understated and material-led interiors. Limitations Natural variation means samples and finished panels may not look identical. The surface needs appropriate protection and care. Scratches and damage may require specialist repair. Poor sealing and unsuitable exposure can affect long-term performance. Where it works: Feature wardrobes, bedroom cabinetry, study furniture, living-room storage and selected premium kitchen applications. Veneer is a

Shutter and Surface Finishes: Laminate, Acrylic, PU, Veneer, Membrane and Glass Compared Read More »

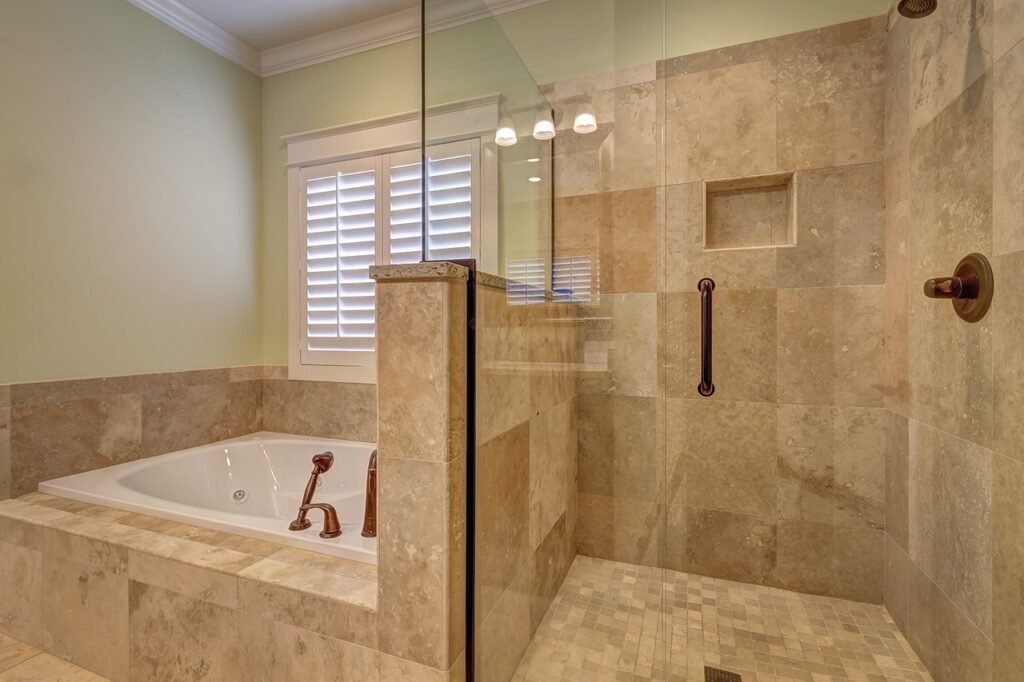
renovation service

Vitrified, Porcelain and Ceramic Tiles: What’s the Real Difference?

Vitrified, Porcelain and Ceramic Tiles: What’s the Real Difference? Choosing tiles is not just about colour, size or finish. The tile body affects water absorption, durability, maintenance and where the material is suitable. Ceramic tiles are commonly chosen for walls and lighter-duty applications, while vitrified tiles are widely used for residential flooring because of their dense body and low water absorption. Porcelain tiles are a type of ceramic tile made to meet stricter performance requirements, although product terminology can overlap across manufacturers. The right choice depends on the tile’s technical specifications and the room where it will be installed. What is the difference between vitrified, porcelain and ceramic tiles? The key differences are how the tile is manufactured, how much water it absorbs, and how well it performs in its intended application. Tile type What it means in practical terms Ceramic tiles Made from clay and other natural materials, then fired. The category includes products with different bodies, finishes and performance levels. Vitrified tiles Made using a process that creates a dense, low-porosity body. Commonly used for floors in homes and other spaces. Porcelain tiles A category of ceramic tile generally defined by very low water absorption and specific technical requirements. Often used for floors and walls.   One important detail: vitrified and porcelain are not always completely separate categories in everyday retail terminology. Manufacturers may use the terms differently depending on their product range and applicable standards. Do not choose based on the label alone. Check the product’s technical data, intended use and water-absorption rating. Are vitrified tiles better than ceramic tiles? Vitrified tiles are often a practical choice for high-use residential floors because their dense body generally absorbs less water than many conventional ceramic tiles. They can also be available in a wide range of finishes, including stone-look, marble-look and concrete-look designs. Ceramic tiles still have a clear role. They can be suitable for wall applications, decorative areas and spaces where the selected product’s performance meets the requirement. They are not automatically inferior; they are simply a broad category with products designed for different purposes. The better tile is the one that matches the application. A decorative wall tile should not be selected for a floor unless the manufacturer specifically rates it for floor use. What are the advantages and limitations of each tile type? Ceramic tiles: where do they make sense? Ceramic tiles are available in many colours, patterns, sizes and finishes. They can be a sensible option for kitchen backsplashes, bathroom walls and other vertical surfaces. Advantages Broad choice of designs and finishes. Useful for decorative wall applications. Individual tiles can often be replaced if damaged, provided a matching tile is available. Limitations Performance varies considerably by product. Some ceramic tiles are not suitable for floors or heavy-use areas. Wall tiles should not be assumed to have the slip resistance or strength required for flooring. Vitrified tiles: why are they common in home flooring? Vitrified tiles are widely used for living rooms, bedrooms, passages and other residential floor areas. Their dense body and low porosity can make them suitable for everyday use when the product is correctly specified and installed. Advantages Generally low water absorption. Available in polished, matte, textured and other finishes. Can suit large, visually continuous floor areas. Many designs replicate the appearance of marble, stone or concrete. Limitations Polished surfaces may become slippery when wet. Hard surfaces can feel less forgiving underfoot than some alternative flooring materials. Large-format tiles require a suitable substrate, careful handling and accurate installation. Porcelain tiles: what makes them different? Porcelain tiles are generally characterised by very low water absorption and a dense body. They are available for both indoor and outdoor applications, but not every porcelain tile is suitable for every location. Check whether the product is rated for the intended use. For example, a smooth polished porcelain tile may look appropriate in a bathroom but may not provide sufficient slip resistance for a wet floor. Do not assume that every tile labelled “porcelain” is automatically stronger, safer or more durable than every vitrified tile. Compare the actual specifications. Which tiles should you choose for each room? Area What to prioritise Living room Abrasion resistance, easy cleaning, appearance and a finish suited to the household’s use. Bedroom Comfort underfoot, visual continuity with adjoining spaces and everyday maintenance. Kitchen floor Cleanability, suitable floor rating, resistance to everyday wear and a finish that is manageable around spills. Kitchen backsplash A wall-rated tile with a surface that is easy to wipe clean. Bathroom floor Slip resistance under expected wet conditions, suitable floor rating and correct waterproofing below the tile. Bathroom walls Wall-rated tiles, easy cleaning, appropriate detailing around fittings and compatibility with the chosen layout. Balcony or outdoor area Outdoor suitability, weather exposure, drainage and slip resistance.   These are starting points, not universal rules. The same tile can behave differently depending on its finish, installation, grout joints, cleaning products and site conditions. For bathroom planning, our guide to stylish bathroom interior design ideas can help connect material selection with the overall layout and appearance. Does tile finish matter as much as tile type? Yes. The tile body is only part of the decision. The surface finish affects appearance, cleaning and traction. Glossy or polished: Reflects more light and can create a bright, formal look. However, a polished surface may be slippery when wet and may show smudges or water marks more clearly. Matte: Usually produces less reflection and can be practical for everyday spaces. Its slip performance still depends on the specific product. Textured: May offer better grip in some applications, but deeper texture can make cleaning more demanding. Structured or grip finish: Can be useful in selected wet or outdoor areas, provided the product is rated for the application. Do not select a bathroom or balcony tile by appearance alone. Ask for the manufacturer’s slip-resistance information and confirm that the rating is appropriate for the expected conditions. What is the difference between double-charge and full-body vitrified tiles? These

Vitrified, Porcelain and Ceramic Tiles: What’s the Real Difference? Read More »

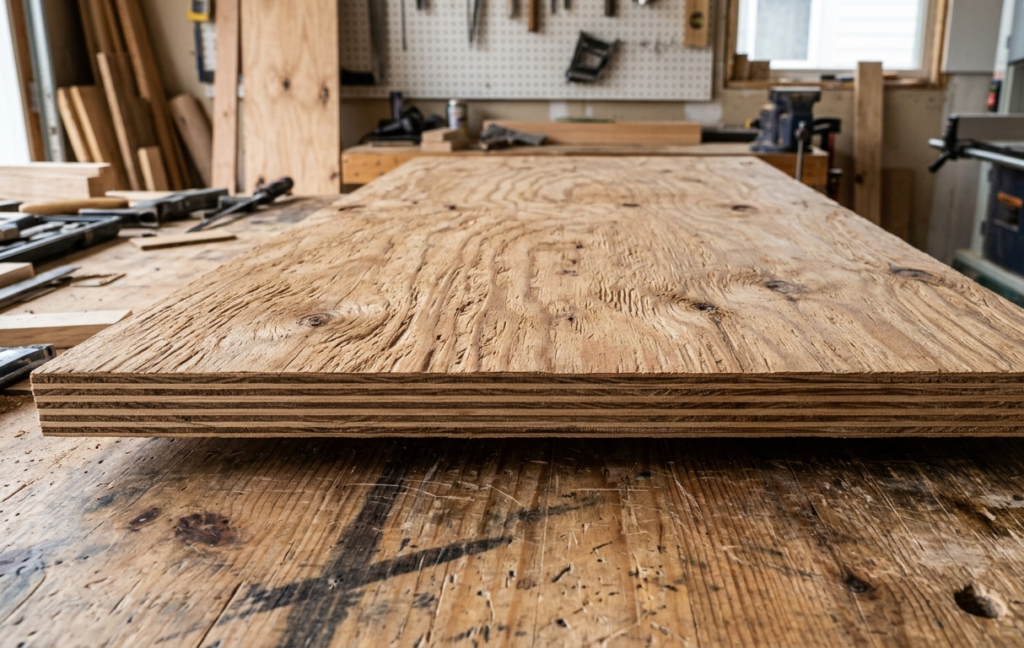
Plywood

Types of Plywood for Interiors: MR, BWR, BWP and Marine Grade Explained

Types of Plywood for Interiors: MR, BWR, BWP and Marine Grade Explained Choosing plywood for home interiors is not just about selecting a brand. The grade determines how well the adhesive bond withstands moisture, while core quality, thickness and manufacturing influence how the board performs in furniture. MR plywood is generally suited to dry indoor applications, BWR offers greater moisture resistance, and BWP is designed for more demanding water exposure. Marine plywood follows a separate product specification. Understanding these differences helps homeowners choose suitable materials for wardrobes, kitchen cabinets, bathroom vanities and other interior furniture. What are the different types of plywood used in interiors? The main plywood grades homeowners encounter in India are MR (Moisture Resistant), BWR (Boiling Water Resistant) and BWP (Boiling Water Proof). Marine plywood is another category manufactured to a separate specification. Although sellers sometimes use these terms interchangeably, they do not mean exactly the same thing. The grade primarily relates to the water resistance of the adhesive bond, not whether the entire sheet or finished cabinet is waterproof under every condition. Plywood type Properties and typical applications MR grade plywood Intended for general indoor use in relatively dry conditions. Commonly used for wardrobes, beds, study tables and TV units. BWR grade plywood Offers greater water resistance than MR. Often considered for kitchen cabinets and utility furniture exposed to higher humidity or occasional splashes. BWP grade plywood Designed to meet more demanding boiling-water-resistance requirements. Can be considered for sink-base cabinets and other moisture-prone applications when properly specified. Marine plywood Manufactured to a separate marine plywood specification. May be appropriate for demanding wet-area joinery where its additional requirements are justified.   These are general recommendations, not guarantees. Actual performance depends on product certification, board construction, installation, edge protection and exposure conditions. 1. What is MR grade plywood, and where should you use it? MR stands for Moisture Resistant. Commonly sold as commercial plywood, it is intended for general interior applications where prolonged water exposure is not expected. MR plywood is often suitable for: Bedroom wardrobes in dry locations Bed frames and headboards Study tables and bookshelves TV units and living-room storage Decorative wall panelling in dry interiors Its advantage is that a higher moisture-resistance grade is not necessary for every piece of furniture. Selecting materials according to actual use can prevent unnecessary upgrades without compromising the intended application. However, moisture resistant does not mean waterproof. MR plywood should not be treated as the default choice for sink cabinets, regularly wet bathroom furniture or locations where leaks may go unnoticed. Designer’s recommendation: MR plywood may be appropriate for a wardrobe in a dry bedroom. If the wardrobe sits against a damp wall or near a bathroom, investigate the moisture source and ventilation before choosing the grade. For homeowners comparing board materials for furniture, our guide to plywood vs MDF for home interiors explains how the two materials differ in practical applications. 2. What is BWR plywood, and how is it different from MR? BWR stands for Boiling Water Resistant. Compared with MR, BWR plywood is designed to provide a more water-resistant adhesive bond. It can be appropriate for furniture exposed to higher humidity, occasional splashes or moisture associated with everyday kitchen use. Common applications include: Kitchen wall and tall cabinets Kitchen storage away from direct water contact Utility-area cabinets in suitably protected locations Furniture installed in areas with elevated humidity BWR does not guarantee protection against standing water, leaking plumbing or repeated soaking. Water can still enter through exposed edges, poorly sealed cut-outs, joints or damaged laminate. The location of each kitchen cabinet matters. An overhead cabinet exposed mainly to cooking humidity does not face the same conditions as a cabinet immediately below a sink. For a broader comparison of carcass materials, finishes and other kitchen components, see our modular kitchen materials guide. 3. What is BWP plywood, and when is it worth choosing? BWP stands for Boiling Water Proof. It describes a plywood grade intended to meet more demanding water-resistance requirements than ordinary moisture-resistant plywood. It is worth considering for components where water exposure is a significant design concern, including: Kitchen sink-base cabinets Cabinets close to plumbing connections Bathroom vanity carcasses, when suitable for the application Utility storage exposed to frequent splashes BWP is not automatically the best choice for every cabinet. Its value comes from matching its performance to the conditions the board will face. For example, a sink-base cabinet has a greater risk of water damage than a wardrobe in a dry bedroom. Specifying a suitable grade for the sink base makes more sense than upgrading every board in the home indiscriminately. Even BWP plywood requires correct installation. Sealed edges, protected plumbing cut-outs, suitable hardware and prompt attention to leaks remain essential. One important distinction: under the revised Indian standard for general-purpose plywood, BWP is a recognised grade. Therefore, do not assume that every product labelled BWP is marine plywood. Check the standard and certification printed on the actual product. 4. What is marine plywood, and is it better than BWP? Marine plywood is manufactured to a separate specification for marine plywood. In India, the relevant standard is IS 710, while general-purpose plywood is covered by IS 303. Marine plywood is designed for demanding moisture-related applications, but the label does not mean the complete furniture unit is waterproof. The board, edges, joints, surface finish and installation must work together. Marine plywood may be worth evaluating for: Bathroom vanity cabinets exposed to frequent splashes Utility units exposed to challenging moisture conditions Joinery where the project specification requires marine plywood Other demanding applications where the additional specification is justified It is not automatically necessary for every kitchen, wardrobe or bedroom unit. A dry wardrobe does not become more durable simply because its plywood has a higher water-resistance grade. What is the difference between BWP and marine plywood? The key distinction is the applicable product standard and its requirements, rather than the marketing name alone. Comparison point Explanation BWP plywood A boiling-water-proof grade. General-purpose plywood under IS

Types of Plywood for Interiors: MR, BWR, BWP and Marine Grade Explained Read More »

IMG 8500

How to Plan a Modular Kitchen: A Complete Guide for Your Home

How to Plan a Modular Kitchen: A Complete Guide for Your Home A modular kitchen should be planned around how you cook, what you store and how you move through the space. The right design brings together the kitchen layout, cabinet dimensions, countertop space, appliances, materials, hardware, lighting and ventilation. Making these decisions in the correct order helps avoid cramped work areas, wasted storage and expensive changes during installation. For homeowners planning a new apartment or renovating an existing kitchen in Hyderabad, the first step is not choosing cabinet colours. It is understanding the available space and the way the kitchen will be used every day. 1. Start With Your Cooking Habits and Storage Needs Before choosing a kitchen layout, list the things the kitchen needs to accommodate. A household that cooks several meals daily may need different storage and preparation areas from one that uses the kitchen occasionally. Consider these questions: How many people regularly cook in the kitchen? How many people may need to use it at the same time? Do you cook with several pots and pans simultaneously? How much space do you need for groceries, utensils and appliances? Do you use a mixer, air fryer, microwave, dishwasher or other countertop appliances? Do you prefer drawers, shelves, tall units or pull-out storage? How much countertop space do you need for food preparation? Who will clean the kitchen, and how much maintenance is practical? Measure the available kitchen area and note the doors, windows, plumbing points, electrical connections and ventilation requirements. This information helps establish the layout and storage plan before the design moves into finishes and accessories. 2. Choose the Right Modular Kitchen Layout L-shaped kitchen An L-shaped kitchen uses two adjoining walls. It can work well in many apartments because it leaves the remaining area more open. It may suit homes that need a practical cooking area connected to a dining space. The design should still account for corner storage, appliance placement and sufficient countertop space. Explore our guide to L-shaped kitchen design. U-shaped kitchen A U-shaped kitchen uses three sides of the room and can provide generous cabinet and countertop space. It can work well when the room is wide enough to maintain comfortable movement between the opposing counters. The main risk is making the central aisle too narrow. Before choosing this layout, check the actual cabinet depths, appliance openings and the space needed for more than one person to work. Explore our guide to U-shaped kitchen design, layouts and dimensions. Parallel kitchen A parallel kitchen places cabinets and countertops along two opposite walls. It can be efficient when the available room supports a practical passage between the two sides. The layout should account for open drawers, refrigerator doors and appliance access. If the aisle becomes crowded when cabinet doors are open, the design needs adjustment. Explore our guide to Parallel kitchen design. Straight kitchen A straight kitchen places the main work areas along one wall. It may suit compact homes or open-plan spaces where a separate kitchen room is not available. Because the available wall length is limited, the positions of the sink, hob, refrigerator and preparation area need careful planning. Tall cabinets can provide additional storage where space allows. Island or peninsula kitchen An island or peninsula can add preparation space, storage or seating. However, it should not be included simply because it appears in a reference image. The room needs enough space for movement around the feature, cabinet doors and appliance access. A peninsula may be a more practical option where a freestanding island would obstruct circulation. 3. Plan the Kitchen Work Zones A practical kitchen allows you to move between storage, washing, preparation and cooking without unnecessary steps. Think of the kitchen as a series of connected work zones: Storage: The refrigerator and dry-goods storage should be convenient to access when bringing groceries into the kitchen. Washing: The sink, cleaning supplies and waste-disposal arrangements need a practical relationship with the plumbing and surrounding cabinets. Preparation: Leave a usable countertop area for chopping, mixing and assembling ingredients. Do not allow the hob, sink and small appliances to consume every available surface. Cooking: Position the hob, cookware storage and necessary utensils so that frequently used items are within comfortable reach. These zones should work together, but their exact arrangement depends on the room and appliance specifications. The traditional kitchen work triangle can be a useful planning reference, not a rigid rule that overrides the actual layout. 4. Design Storage Around What You Own More cabinets do not automatically mean better storage. The important question is whether the available storage is easy to access and suited to the items kept inside. Drawers for everyday utensils Deep drawers can make cookware easier to access than stacking everything at the back of a low cabinet. Their dimensions and load capacity should match the utensils and equipment they will hold. Tall units for groceries and appliances A tall unit can consolidate pantry storage or accommodate selected appliances. Plan shelf heights, ventilation requirements where applicable and access to heavier items before finalising it. Corner storage Corner cabinets can be difficult to use if the internal arrangement is not considered early. Depending on the layout, shelves, pull-out mechanisms or other corner solutions may improve access. Their cost and suitability should be weighed against how often the corner will be used. Storage for waste and cleaning Plan where waste bins, cleaning supplies and other frequently used items will go. These needs are easy to overlook when the design focuses only on visible cabinet fronts. Open shelves Open shelves can make selected items easy to reach and display. However, they expose their contents to dust and cooking residue, so they are not always the best choice for every storage requirement. Before adding accessories, list the items you want to store. This helps prevent spending on mechanisms that look impressive but do little to improve everyday use. 5. Choose Cabinet Materials Carefully Cabinet construction affects durability, maintenance and cost. The right

How to Plan a Modular Kitchen: A Complete Guide for Your Home Read More »

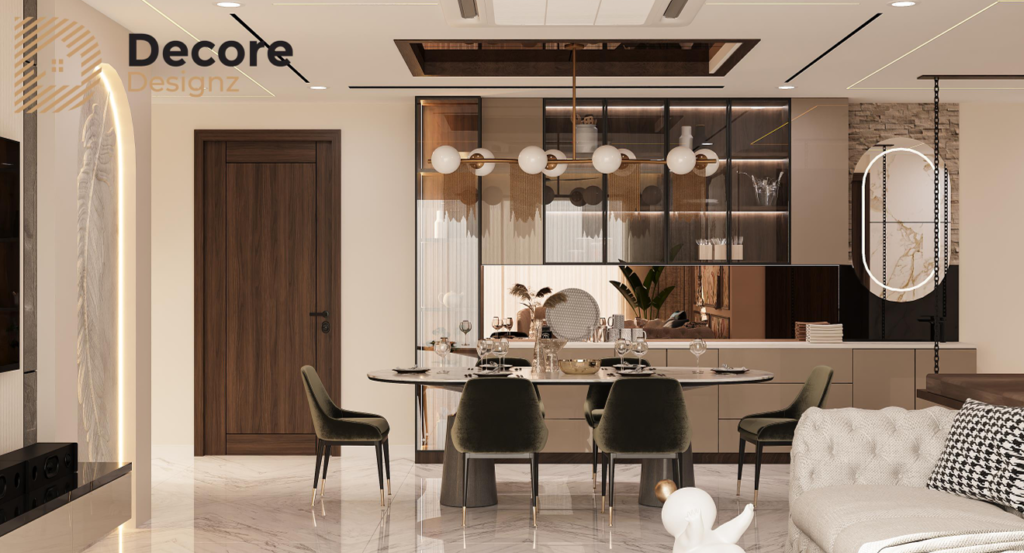
Dining Area 4BHK DSR Classe Kokapet

Living Room Interior Design Guide: Layout, Lighting, Furniture and Materials

Living Room Interior Design Guide: Layout, Lighting, Furniture and Materials A well-designed living room should look good, feel comfortable and work for the people using it every day. The best living room interior design begins with the room’s dimensions, natural light, furniture requirements and movement through the space. Once these are clear, you can make better decisions about the sofa, TV unit, lighting, colours, storage and finishes without making the room feel crowded. For homeowners planning a new apartment or renovating an existing home, the goal is not to fit in every design trend. It is to create a living room that feels connected to the rest of the home and remains practical long after the photographs are taken. 1. Start With the Living Room Layout The layout should be decided before you select furniture or finalise decorative features. A beautiful sofa or elaborate TV wall will not improve the room if it blocks a passage or leaves too little space to move around. Start by identifying the room’s fixed elements: Doors, windows and balcony access. Electrical points and existing wiring. Columns, beams and structural restrictions. The connection between the living room, dining area and other rooms. The number of people who regularly use the space. Next, decide how the room will be used. A family that watches television together may need a different seating arrangement from a household that frequently entertains guests. If the living room also serves as a passage to the bedrooms or balcony, circulation becomes especially important. Before buying furniture, mark the proposed sofa, coffee table, TV unit and additional seating on a floor plan. This makes it easier to spot problems while changes are still relatively simple. 2. Choose Furniture That Fits the Room Furniture should be selected according to the room’s proportions, not just its appearance in a showroom. A large sectional sofa may work in a spacious living room but overwhelm a compact apartment. Conversely, furniture that is too small can make a large room feel disconnected and under-furnished. Consider these points before making a purchase: Sofa size: Measure the available wall length and the space needed for movement. Seating capacity: Plan for the people who use the room regularly, with additional seating if you frequently host guests. Coffee table: Check its size, shape and accessibility from the seating. Side tables: Include them where they serve a practical purpose, rather than filling every empty corner. Additional seating: Accent chairs or compact stools can provide flexibility without overcrowding the room. Keep enough clear space for people to walk comfortably between the entrance, seating and adjoining areas. The exact clearance depends on the layout and furniture dimensions, so assess it on the actual floor plan rather than following a single measurement for every room. 3. Plan the TV Unit and Feature Wall Together The TV wall often becomes a focal point in a contemporary living room. However, it should be designed around the television, viewing distance, storage needs and available wall space—not treated as a decorative panel added at the end. A well-planned TV unit may combine a display area, concealed storage, open shelving or a simple backdrop. The right combination depends on what needs to be stored and how much visual detail the room can accommodate. Think about the following before finalising the design: The size and mounting position of the television. Viewing comfort from the main seating. Concealed cable routing and accessible electrical points. Storage for devices, remotes and other everyday items. Ventilation for electronic equipment where required. Cleaning access and the practicality of open shelves. Materials such as laminates, veneers, paint and textured finishes can create different effects. Veneers can add wood character, while laminates offer a broad choice of patterns and finishes. The decision should consider appearance, maintenance and the intended application. For more focused ideas, explore our guide to TV unit design for the living room. 4. Use Lighting in Layers One ceiling light rarely provides everything a living room needs. The room may need general illumination for everyday activities, softer light for relaxing and accent lighting to highlight selected architectural or decorative features. A practical lighting plan can include: Ambient lighting: Provides general illumination throughout the room. Recessed lights or other suitable ceiling fixtures can serve this purpose. Task lighting: Supports activities such as reading. A floor lamp or appropriately positioned reading light may be useful near the seating. Accent lighting: Draws attention to a feature wall, artwork, textured surface or display niche. Decorative lighting: Adds character through selected pendant lights, wall lights or other fixtures. Natural light should also influence the design. Avoid placing bulky furniture where it unnecessarily obstructs a window or balcony opening. Consider glare on the television and how curtains or blinds will affect daylight. Plan lighting alongside the furniture layout and ceiling design. This helps prevent inconvenient switch positions, poorly placed fixtures and avoidable electrical changes during execution. 5. Select Colours That Work Together A living room colour scheme should relate to the flooring, furniture, natural light and adjoining spaces. Choosing each finish independently can make the final room feel disjointed. A useful starting point is to select one dominant colour direction and build around it: Warm neutrals: Beige, cream and warm off-white can create a relaxed backdrop. Cool neutrals: Selected greys and muted tones can support a cleaner, more contemporary look. Wood tones: Add warmth and visual texture. Accent colours: Introduce contrast through cushions, artwork, upholstery or selected wall details. Light colours can help a room feel brighter, but they do not automatically make every space look larger. Furniture scale, daylight, contrast and the amount of visual clutter also matter. Before finalising paint, laminate, veneer or fabric colours, compare actual samples under the room’s lighting. A finish can look different under warm artificial light than it does in daylight. For more combinations and practical examples, read our living room colour combinations guide. 6. Choose a Wall Treatment That Suits the Space A feature wall can give a living room a clear focal

Living Room Interior Design Guide: Layout, Lighting, Furniture and Materials Read More »

Plywood

How to Identify Good Plywood: A Site Checklist

How to Identify Good Plywood: A Site Checklist How can you identify good-quality plywood? To identify good-quality plywood, inspect the sheet’s markings, edges, exposed core, surface condition and visible glue-line defects before accepting delivery. Confirm that the grade and thickness match the approved specification, and check the manufacturer’s documentation. No single test, including weight, tapping or appearance, can reliably establish plywood quality on its own. When plywood arrives at your home interior site, this inspection matters. Once the sheets have been cut into wardrobe panels, kitchen cabinets or storage units, some defects become harder to identify and may already be built into the furniture. You do not need to be a carpenter to perform a useful first inspection. You need a checklist, the approved material specification and enough time to examine the sheets before work begins. 1. Check the plywood markings before anything else Start with the manufacturer’s markings and product documentation. Do not rely only on what the supplier or contractor calls the material. Look for the following details: Manufacturer or brand: Confirm that the product comes from the approved manufacturer. Grade and intended use: Check that the supplied grade matches the specification for the intended application. Thickness: Verify that the nominal thickness is what was approved. Applicable standard: Check the relevant Indian Standard marking or certification details, where applicable, and verify them against the manufacturer’s documentation. Batch or traceability information: Retain the packaging, invoice or other information that identifies the supplied product. For example, plywood specified for a moisture-prone application should not be accepted merely because the delivery note says “waterproof plywood.” The actual grade, intended use and manufacturer’s declared performance need to match the project requirements. What do BWR, BWP and MR mean? These terms describe different plywood categories or moisture-resistance claims. Term What to understand MR Moisture-resistant plywood intended for appropriate interior applications; it is not waterproof. BWR Boiling Water Resistant plywood, with performance governed by the applicable specification. BWP Boiling Water Proof plywood terminology commonly used for higher water-resistance applications; verify the actual product standard and documentation. These labels are not substitutes for checking the actual product specification. Nor does a water-resistance category tell you everything about the sheet’s core quality, surface finish or structural suitability. Site rule: If the delivered grade differs from the approved specification, stop and clarify the discrepancy before cutting the material. 2. Inspect the plywood edges and exposed core The exposed edge is one of the most useful places to look because it gives you a view of the veneer layers inside the sheet. Examine several sheets, not just the top one. What should you look for? Consistent layers: The veneers should appear reasonably uniform, without obvious large gaps or missing sections. Visible core gaps: Large voids, open cavities or poorly formed areas in the exposed core deserve closer inspection. Layer separation: Look for veneers that appear to be separating or lifting away from adjacent layers. Obvious damage: Crushed corners, chipped edges and damaged sections should be documented before the sheet is accepted. Uneven construction: Significant inconsistencies between sheets may justify asking the supplier for clarification. Not every variation visible at an edge automatically makes a sheet defective. Plywood construction varies by product and grade. The concern is whether a defect falls outside the product specification or affects the intended application. Why does the core matter? Consider a wardrobe shelf that will carry folded clothes or a cabinet panel that needs reliable fixings. Large internal voids or poor bonding can affect performance in ways that a decorative laminate on the outside will not reveal. A neat-looking surface cannot compensate for a defective core. 3. Check the surface for visible defects Place the sheet where you can see its surface clearly. Inspect it in good light, preferably before other sheets are stacked on top. Look for: Deep cracks or splits. Blisters or raised areas. Loose or lifting veneer. Obvious surface delamination. Large patches or repairs that appear inconsistent with the approved product. Severe warping or damage that could affect cutting and installation. Water staining or signs that the sheet may have been stored improperly. Some surface patches and natural variations may be normal for a particular grade. A sheet intended to receive a concealed finish has different appearance requirements from one intended for a visible veneer finish. The correct question is not whether every sheet looks identical. It is whether the sheet’s condition is acceptable for the specified grade and final use. If the plywood is intended for veneer or another finish that depends on surface quality, make the required face-grade and finish expectations clear before delivery. 4. Inspect the glue lines and look for delamination Plywood is made by bonding veneer layers together. The quality of that bonding is important, but a quick visual inspection cannot fully establish adhesive performance. Look at the exposed edges for obvious separation between layers. Check the faces for blisters, lifted veneer or areas where the layers appear to be coming apart. What is a glue-line defect? A glue-line defect occurs when the bond between layers does not perform as required. Visible separation can be a warning sign, although not every adhesive defect is visible from the outside. If you notice suspected delamination, photograph the affected area and ask the supplier or manufacturer to assess the sheet. Should you perform a water or boiling test on site? Do not treat an improvised water-soaking or boiling test as a reliable homeowner quality test. Such tests require defined procedures and appropriate interpretation to establish whether a product meets a particular standard. Likewise, pouring water over a sheet does not establish its overall quality or prove that it is suitable for every moisture-prone application. For a disputed delivery, use the product documentation and, where necessary, a qualified inspection or appropriate laboratory testing. 5. Verify thickness instead of trusting the label Plywood thickness matters because it affects how the board fits into the furniture design and how it performs under the expected load. Check the thickness against the

How to Identify Good Plywood: A Site Checklist Read More »