
Decore Designz

Author name: Syed Nayeem

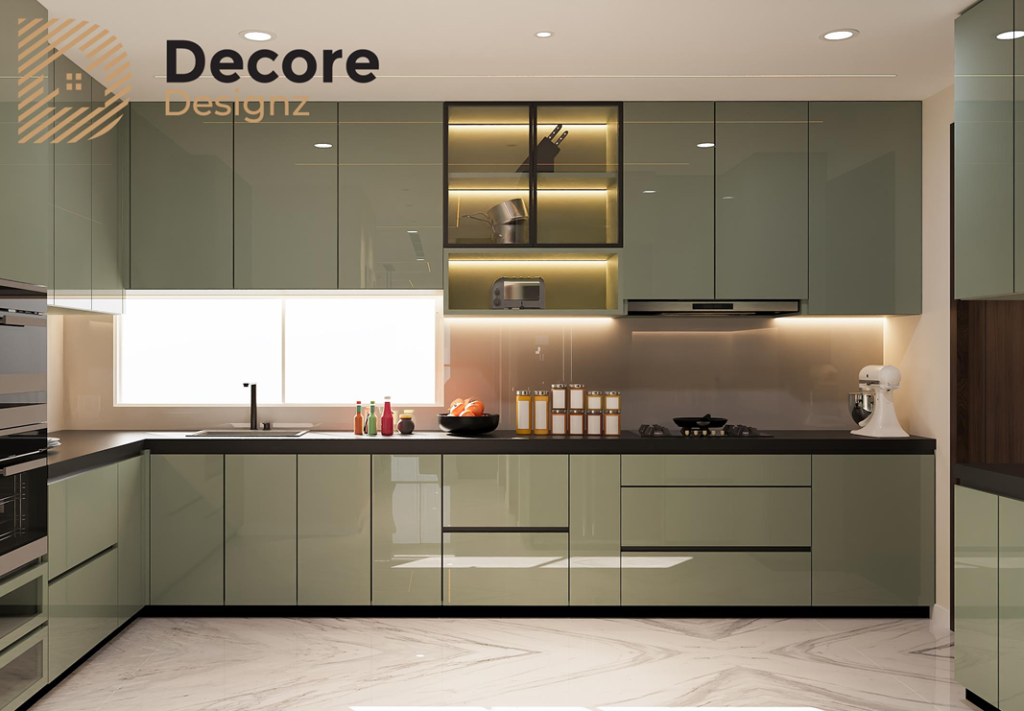
Modern kitchen with built-in cupboards, storage units, and sleek contemporary cabinetry.

Chimney and Ventilation Guide for Modular Kitchens

Chimney and Ventilation Guide for Modular Kitchens A good modular kitchen chimney should do more than look right above the hob. It should capture cooking smoke, oil vapour and odours effectively, while fitting the kitchen’s layout and ventilation arrangements. For Indian cooking, the important decisions include chimney size, suction capacity, filter type, ducting and installation height. Planning these details before cabinet fabrication helps prevent avoidable installation problems later. Why Does a Modular Kitchen Need Proper Ventilation? Cooking releases moisture, heat, grease particles and odours into the air. Without effective extraction, some of these can settle on cabinet shutters, walls and ceilings. Poor ventilation can also leave the kitchen feeling warm and stuffy. This matters in Indian kitchens where tempering, shallow frying, deep frying and high-heat cooking are common. However, choosing the most powerful chimney available is not always the answer. The appliance must suit the hob, cooking habits and available duct route. A well-planned kitchen considers the chimney, fresh-air movement, windows and other ventilation openings together. 1. Which Type of Kitchen Chimney Should You Choose? The first decision is how the chimney will handle the extracted air. Ducted chimney A ducted chimney draws cooking fumes through a pipe and discharges them outside the home through an appropriate outlet. Why consider it? It removes extracted air from the kitchen rather than returning it to the room. It is generally the preferred option for frequent frying and oily Indian cooking. It can reduce lingering cooking odours when correctly sized and installed. What needs planning? The duct needs a suitable route to an approved external outlet. Its length, diameter and bends affect airflow. The route should be planned before the cabinets, ceiling finishes and other services are finalised. Ductless or recirculating chimney A ductless chimney passes air through filters and returns it to the kitchen. Depending on the model, it may use grease filters and activated-carbon filters to help reduce odours. Why consider it? It may suit a kitchen where an external duct route is not possible. It avoids the need for a duct leading outside. It can offer more flexibility in certain apartment layouts. What should you know? A recirculating model does not discharge moisture and cooking fumes outside in the same way as a ducted system. Its odour-control performance depends on the filters and their condition. Filter replacement and maintenance requirements should be checked before purchase. Which is better for Indian cooking? If a suitable external duct can be installed, a ducted chimney is generally the stronger choice for removing cooking fumes. A recirculating model is a practical alternative where ducting is genuinely not feasible, but it should not be treated as equivalent to external extraction. 2. How Much Suction Capacity Does Your Kitchen Need? Chimney suction capacity is commonly expressed in cubic metres per hour (m³/h). It indicates the volume of air the appliance is designed to move under specified test conditions. Actual performance can vary with duct length, bends, filters and installation. The right capacity depends on several factors: Kitchen size: A larger space may require greater airflow. Cooking habits: Frequent frying and high-heat cooking can create more smoke and airborne grease than light cooking. Hob size: The chimney needs sufficient coverage over the cooking area. Kitchen layout: Open kitchens allow cooking odours to travel into connected living and dining spaces. Duct design: A long or restrictive duct route can reduce effective airflow. Noise and comfort: A high setting may be louder, so consider everyday operating conditions as well as the maximum rating. Do not choose a chimney by its advertised suction figure alone. Compare the manufacturer’s performance specifications and installation requirements, then match them to your kitchen. 3. Which Chimney Filter Is Suitable for Indian Cooking? The filter helps manage grease and other particles drawn into the chimney. The right choice depends on the appliance design and the maintenance routine you are comfortable following. Baffle filters Baffle filters use shaped panels to redirect airflow and separate grease from the air stream. They are commonly used in chimneys intended for Indian cooking. They need periodic cleaning to prevent grease build-up. Check whether the filters can be removed easily and whether the manufacturer permits washing them in a dishwasher or by hand. Mesh filters Mesh filters capture grease through a fine mesh structure. Grease can accumulate within the mesh, so cleaning frequency matters, especially when cooking with oil regularly. Before choosing this type, understand how often the filter needs cleaning and how easily it can be accessed. Filterless or auto-clean models Some models use designs that collect grease in a dedicated container, while others include a heating-based auto-clean function. The exact mechanism varies by product. These features can reduce certain cleaning tasks, but they do not make the entire appliance maintenance-free. The collection cup, internal surfaces and other specified components may still need attention. Practical advice: Compare the manufacturer’s filter design, cleaning process, replacement requirements and service support. Choose the system you can maintain consistently. 4. What Chimney Size Should Match Your Hob? The chimney should provide suitable coverage over the cooking area. A hood that is too narrow may fail to capture fumes escaping from the outer burners. Many domestic models are sold in widths commonly suited to standard hob sizes. However, the right selection depends on the actual dimensions of your hob and the chimney’s capture area. Before buying, check: The full width of the hob, including its outer burners. The chimney’s effective capture area. The installation clearance required by the manufacturer. The available wall or ceiling space. Whether nearby wall cabinets will interfere with the hood. If you are planning a new modular kitchen, select the hob and chimney together. This makes it easier to coordinate the cooking zone with the surrounding cabinets and countertop. 5. What Is the Correct Height for Installing a Kitchen Chimney? The mounting height affects both safety and smoke capture. If the chimney is installed too close to the hob, it may interfere with cooking or violate the manufacturer’s clearance requirements.

Chimney and Ventilation Guide for Modular Kitchens Read More »
best interior design companies in hyderabad

Staircase Design for Duplex Homes and Villas in Hyderabad

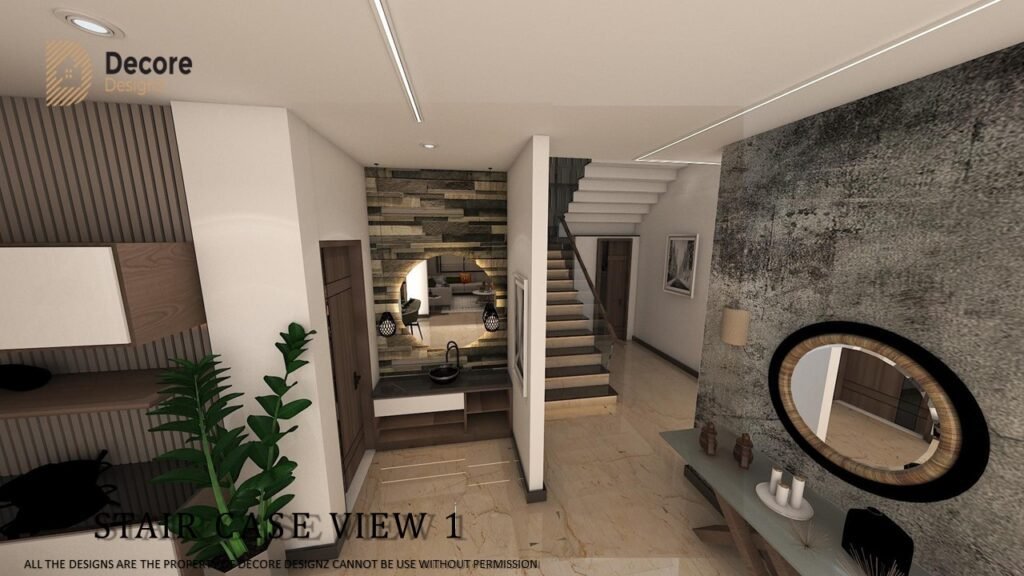
Staircase Design for Duplex Homes and Villas in Hyderabad A staircase takes up a fixed part of a floor plan, so its layout should be decided before construction begins. The wrong position can interfere with furniture placement, block a window or leave little room near the upper-floor landing. The right choice depends on the available dimensions, the connection between floors and how the staircase will be used. 1. Which Staircase Layout Fits Your Floor Plan? The staircase shape determines how much floor area it occupies and where people enter and leave it. Four common layouts are worth comparing before making a decision. Straight staircase  A straight staircase follows one direction from the lower floor to the upper floor. Its simple arrangement can make it easier to plan the railing and finish, but it may require a longer run than other layouts. L-shaped staircase  An L-shaped staircase changes direction at a landing. It can fit into a corner and separate the staircase from the main seating area. U-shaped staircase  A U-shaped staircase has two flights running in opposite directions, connected by a landing. It may suit a floor plan with sufficient width but limited length. Spiral staircase A spiral staircase follows a compact circular layout around a central support. It can be considered where floor area is limited or where a secondary connection between levels is required. However, the steps vary in usable depth across their width. Carrying furniture can also be difficult, so this layout should be assessed carefully before choosing it for the main staircase used by the family.   2. Where Should the Staircase Begin and End? The staircase position affects how people move through both floors. It should connect the levels without blocking important routes or making the surrounding rooms difficult to arrange. Consider the following while reviewing the floor plan:  Living room: An open staircase may be visible from the seating area. Check whether its position leaves enough room for the sofa, television unit and walking route.  Dining area: Avoid a layout that makes people walk around the dining table to reach the upper floor.  Entrance: Check whether the first steps obstruct the entrance route or make the entry feel crowded.  Upper-floor landing: The staircase should open onto an area from which people can reach the rooms without awkward turns.  Windows and doors: Check that the flight and railing do not obstruct openings or access.  Furniture movement: Consider how large items will be carried upstairs. Tight turns can make moving beds, mattresses and wardrobes difficult. For a villa, the floor plan may offer more options for staircase placement. In a duplex, the available length and width may have limited choices. In either case, the staircase position should be confirmed before the surrounding interiors are finalised. 3. Step Measurements That Should Not Be Decided by Appearance The comfort of a staircase depends on its dimensions. Two terms are particularly important when reviewing a drawing. Riser: The vertical height between one step and the next. Tread: The horizontal surface on which the foot rests. The riser heights should be consistent, and the treads should provide sufficient footing. Uneven steps can increase the risk of tripping, especially when people use the staircase without looking at every step. 4. Choosing a Finish for the Steps The staircase finish should suit the expected use, maintenance routine and surrounding flooring. A material that looks good in a sample may behave differently when used on steps that receive regular foot traffic. Stone and tile Stone and tile can be selected to match or complement the flooring on the ground and upper floors. Check slip resistance before selecting a polished finish. The surface should be suitable for walking and cleaning, particularly if water may reach the steps. Wood Wood can add warmth and can be matched with wooden doors, furniture or other interior details. Its appearance depends on the type of wood and the finish selected. Ask about maintenance, surface wear and the suitability of the material for staircase use. The final choice should account for regular foot traffic rather than appearance alone. Concrete A concrete staircase can be incorporated into the building structure and finished with a selected surface material. Its shape and dimensions need to be established during the construction planning stage. Changing the staircase after the structure is completed can be difficult. Confirm the layout, step measurements and intended finish before construction proceeds. Metal Metal may be used for a staircase structure or for selected components, depending on the design. It can suit a straightforward, minimal appearance. The type of metal, finish, connections and protection against corrosion should be confirmed for the intended location. These details affect maintenance and long-term use. Staircase finishes, railings and lighting should complement the wider interior scheme. In a villa, these details need to work with the flooring, furniture, wall finishes and lighting in adjoining spaces. Explore our interior design projects in Hyderabad to see how Decore Designz approaches residential interiors across different property types and layouts. 5. Railing Design: What Should You Compare? The railing is a safety feature, so its support, height and openings matter as much as its appearance. The choice should also suit the staircase width and the people using it. Metal railing Metal railings can be made with simple vertical bars or other patterns. Straightforward designs are often easier to clean than ones with many decorative details. Glass railing Glass railing allows more of the surrounding room to remain visible. It may be suitable when homeowners want the staircase to feel less enclosed. Wooden handrail A wooden handrail can complement wooden steps or other timber finishes. The grip should be comfortable, with no rough edges or sharp corners. 6. How to Light the Staircase Without Creating Glare Lighting should make each step easy to see. A decorative fitting alone may not provide enough light along the full flight. Wall lights can illuminate the route, while ceiling lights can provide general illumination. Step lights or lights near the handrail can help

Staircase Design for Duplex Homes and Villas in Hyderabad Read More »

Choosing a Modular Kitchen Sink: 5 Key Checks

Choosing the Right Kitchen Sink for Your Modular Kitchen

Choosing the Right Kitchen Sink for Your Modular Kitchen Choosing a modular kitchen sink involves more than selecting a shape or finish. The right sink should suit your cooking habits, available counter space, cleaning routine, countertop material and plumbing layout. For most homes, the key decisions are the number of bowls, sink material, installation style, size and placement. Making these choices early helps the sink work naturally with the rest of your kitchen. What Should You Consider When Choosing a Modular Kitchen Sink? A suitable modular kitchen sink should be easy to use, straightforward to maintain and properly integrated into the countertop and cabinets. Before choosing a model, consider how often you cook, the size of your utensils, how much counter space you need and whether your kitchen can accommodate the required plumbing. For Hyderabad apartments, where the kitchen footprint and plumbing points may already be defined, these practical checks are especially important. 1. Should You Choose a Single-Bowl or Double-Bowl Sink? The main difference is how you prefer to wash, rinse and prepare items. A single-bowl sink provides one open basin, while a double-bowl sink separates the space into two sections. Feature Single-bowl sink Double-bowl sink Best suited for Everyday washing and larger utensils Separating washing and rinsing tasks Large cookware Usually easier to accommodate Each bowl may have less usable space Countertop planning Often simpler Needs careful sizing Cleaning routine One main basin Tasks can be divided between bowls When does a single-bowl sink make sense? Choose a single-bowl sink if you regularly wash large pots, pressure cookers, kadais or baking trays. The uninterrupted basin can make these tasks easier. It can also be a practical choice when the available countertop is limited. When is a double-bowl sink useful? A double-bowl sink may suit households that prefer to keep washing and rinsing separate or need to handle several tasks at once. However, check the dimensions of each bowl rather than judging the sink by its overall width alone. The practical rule: Choose the bowl configuration around your everyday utensils and cleaning routine, not just its appearance. 2. Which Sink Material Is Best for a Modular Kitchen? Sink material affects appearance, maintenance, resistance to everyday wear and the way the sink sounds during use. Stainless steel and granite-composite sinks are two options worth comparing, although the performance of any particular product depends on its construction and specification. Stainless steel sinks Stainless steel is a widely used option for working kitchens. It has a clean, versatile appearance and is available in different thicknesses, finishes and bowl configurations. Advantages Works with many countertop styles. Generally straightforward to clean. Available in a broad range of shapes and sizes. Can suit both compact and larger kitchens. Things to consider Water spots and scratches can become visible depending on the finish. Thin or poorly specified products may sound louder during use. The grade, thickness, finish and overall build quality matter. Granite-composite sinks Granite-composite sinks typically have a more solid, textured appearance and are available in several colours. They can work well when the sink needs to coordinate closely with the countertop and cabinet palette. Advantages Offers a different visual character from polished steel. Available in colours that can complement contemporary kitchens. Some finishes can make everyday marks less noticeable. Things to consider Product composition and care instructions vary by manufacturer. Lifting and installation requirements should be checked. Confirm resistance to heat, stains and impacts using the manufacturer’s specifications rather than assuming all composite sinks perform the same way. How should you decide? Compare the exact product specifications, cleaning instructions, finish, installation requirements and warranty. A material should suit the way you use the kitchen as well as the look you want to achieve. 3. What Sink Size and Depth Do You Need? A sink that looks generous in a product photograph may not fit comfortably into your kitchen. Its dimensions need to work with the available countertop, cabinet width, plumbing and the space needed for food preparation. Before finalising the sink, check: Cabinet compatibility: Confirm the minimum cabinet width required by the sink manufacturer. Bowl dimensions: Make sure the basin can accommodate your regular cookware. Depth: A deeper bowl can help contain splashes, but consider the user’s height and comfort when washing. Countertop space: Leave enough room for food preparation and other daily tasks. Tap clearance: Check that the tap, handle and any accessories can operate without hitting a wall or window. Under-sink space: Account for the drain, plumbing trap, water filter connections and any waste-segregation system. Do not finalise the sink based on its external dimensions alone. The usable bowl size and the installation space are equally important. 4. Top-Mount or Under-Mount: Which Installation Style Works Better? The installation style affects the countertop edge, cleaning routine and how the sink integrates with the kitchen. Top-mount sink A top-mount sink sits in a cut-out, with its rim resting on the countertop. It may be suitable when the selected countertop and sink are designed for this installation. However, the raised rim can affect how crumbs and water are swept from the counter into the basin.   Under-mount sink An under-mount sink is installed beneath a compatible countertop, leaving the countertop edge visible around the opening. This can create a clean, continuous appearance and make it easier to wipe surface debris into the basin. However, the countertop material, edge finishing, fixing method and waterproofing details must be suitable for the installation. Which should you choose? Decide on the countertop and sink together. Check the manufacturer’s installation instructions and ensure that the fabricator and installer agree on the cut-out, support and sealing requirements before fabrication. 5. Where Should the Sink Be Placed in a Modular Kitchen? Sink placement affects movement, preparation space and the way the kitchen’s work zones connect. Ideally, the sink should be convenient for washing vegetables, cleaning utensils and accessing the preparation counter. However, the final location depends on the existing plumbing, windows, appliances, countertop dimensions and overall layout. Keep these points in

Choosing the Right Kitchen Sink for Your Modular Kitchen Read More »

Modern Pooja Room Design in Hyderabad

Aesthetic Bedroom Design Ideas for a Calming Space

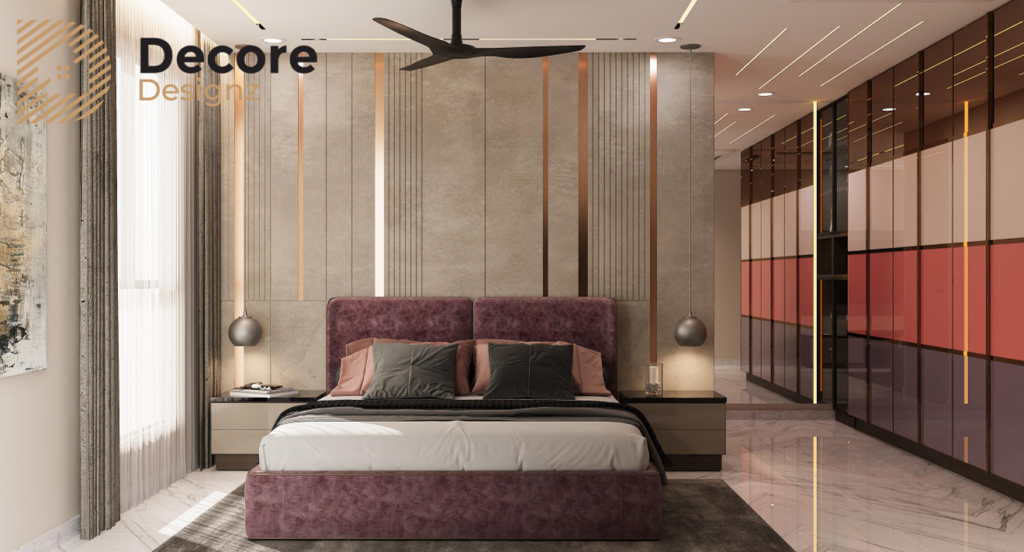
Aesthetic Bedroom Design Ideas for a Calming Space A calming bedroom does not need expensive decor, elaborate wall panels or a perfectly styled bed. The best aesthetic bedroom designs bring together colours, textures, lighting, furniture and personal details that feel consistent with one another. Whether you prefer warm neutrals, natural materials, a minimalist look or a soft contemporary style, the aim is to create a room that feels comfortable to return to at the end of the day. What makes a bedroom aesthetic and calming? An aesthetic bedroom has a clear visual direction. Its colours complement one another, furniture suits the available space, lighting creates the right atmosphere, and decorative elements feel intentional rather than scattered. A calming bedroom also works in everyday life. Storage is accessible, surfaces are manageable, and the layout supports the way you use the room. A beautiful bedroom that is difficult to maintain or uncomfortable to move around in is not well designed. Here are practical ways to create that balance. 7 aesthetic bedroom design ideas to create a calmer space 1. Start with a colour palette that feels cohesive Colour establishes the mood of a bedroom before you add furniture or decor. Warm white, beige, muted greige, soft brown and pale wood can create a relaxed foundation. Muted green and dusty blue offer alternatives when you want colour without a visually busy result. Choose one main wall colour, a complementary colour for larger furniture or textiles, and a smaller accent for contrast. This gives the room a consistent appearance without making every element identical. For example, warm white walls can work with beige bedding, walnut-toned furniture and a muted green cushion. The colours differ, but their visual warmth helps them sit together. Pay attention to undertones. A cool grey wardrobe may look disconnected beside strongly yellow-toned walls, even when both colours appear neutral individually. For more combinations, explore bedroom colour design ideas. Use the existing colour-trends article as a related resource rather than turning this post into a comprehensive colour-pairing guide. 2. Use natural textures to make the room feel warmer A calming room often benefits from a mixture of surfaces rather than a single finish repeated everywhere. Consider combining: Wood or wood-finish furniture for visual warmth. Cotton or linen-look bedding for a softer appearance. A textured rug where it suits the layout. Matte finishes on selected furniture or walls. A small number of ceramic, woven or natural-fibre accessories. The key is contrast in texture, not quantity of decor. For instance, a smooth wardrobe finish can balance textured bedding and a fabric headboard. If the headboard, curtains, wallpaper and furniture all have strong patterns or pronounced textures, the room can begin to feel crowded. Material selection should also reflect maintenance. Fabric finishes can feel inviting but may collect dust or require more care than hard surfaces. Wood finishes vary in grain, colour and sheen, so view samples together before finalising them. 3. Choose furniture that leaves the room breathing Aesthetic bedroom design is not about filling every empty corner. Furniture should support the room’s purpose while leaving comfortable routes for movement. Start with the bed, then position the wardrobe and bedside storage. Add a dressing unit, bench or accent chair only if it serves a clear purpose and does not obstruct access. In a compact bedroom, a simple bed frame and streamlined bedside tables may work better than bulky furniture with decorative detailing. A larger bedroom can accommodate more substantial pieces, but it still benefits from a clear visual hierarchy. Keep the largest furniture pieces relatively consistent in finish. A coordinated bed, wardrobe and side table can make the room feel more organised without requiring matching furniture sets. If you are selecting furniture for a bedroom from scratch, plan its dimensions and placement before choosing decorative accessories. 4. Layer lighting for different moments of the day Lighting has a major effect on how a bedroom looks and feels. A single bright ceiling light may provide general visibility, but it can leave the room feeling flat when you want a softer evening atmosphere. Consider three functions: General lighting: Provides sufficient light for everyday activities and moving around the room. Task lighting: Bedside reading lights or lighting near a dressing area help with specific activities. Accent lighting: Concealed LEDs or a carefully illuminated feature can add depth when glare is controlled. Warm-white lighting is often suitable for a relaxed bedroom atmosphere, although the final choice should work with the wall colours, furniture finishes and the light needed for practical tasks. Plan the positions of switches, sockets and concealed lighting before the furniture and ceiling work is completed. Adding lighting after the layout is fixed can result in awkward cable routes or lights that do not illuminate the intended area. A decorative false ceiling is not essential. A straightforward ceiling with well-positioned fixtures can look just as considered. 5. Keep the bed wall simple but intentional The wall behind the bed often becomes the natural focal point of a bedroom. It does not need multiple decorative elements to stand out. Depending on the room, you could use a restrained paint contrast, a fabric headboard, a subtle textured finish or a simple wood-finish panel. The best option depends on the room’s proportions and the finishes used elsewhere. A feature wall should relate to the wardrobe, floor and bedding rather than compete with them. If the furniture already has a strong wood grain or prominent detailing, a quieter wall treatment may create a better balance. Avoid adding wall panels purely because they appear in inspiration photographs. They should have a clear visual purpose and suit the actual room. For more specific treatment options, see bedroom wall decor ideas. 6. Use soft furnishings to add depth without clutter Bedding, curtains, cushions and rugs can change the mood of a bedroom without requiring a complete redesign. Start with the larger textiles. Choose bedding and curtains that complement the main palette, then introduce a limited amount of contrast through cushions or

Aesthetic Bedroom Design Ideas for a Calming Space Read More »

Modern Pooja Room Design in Hyderabad

Modern Puja Unit Designs for Contemporary Homes

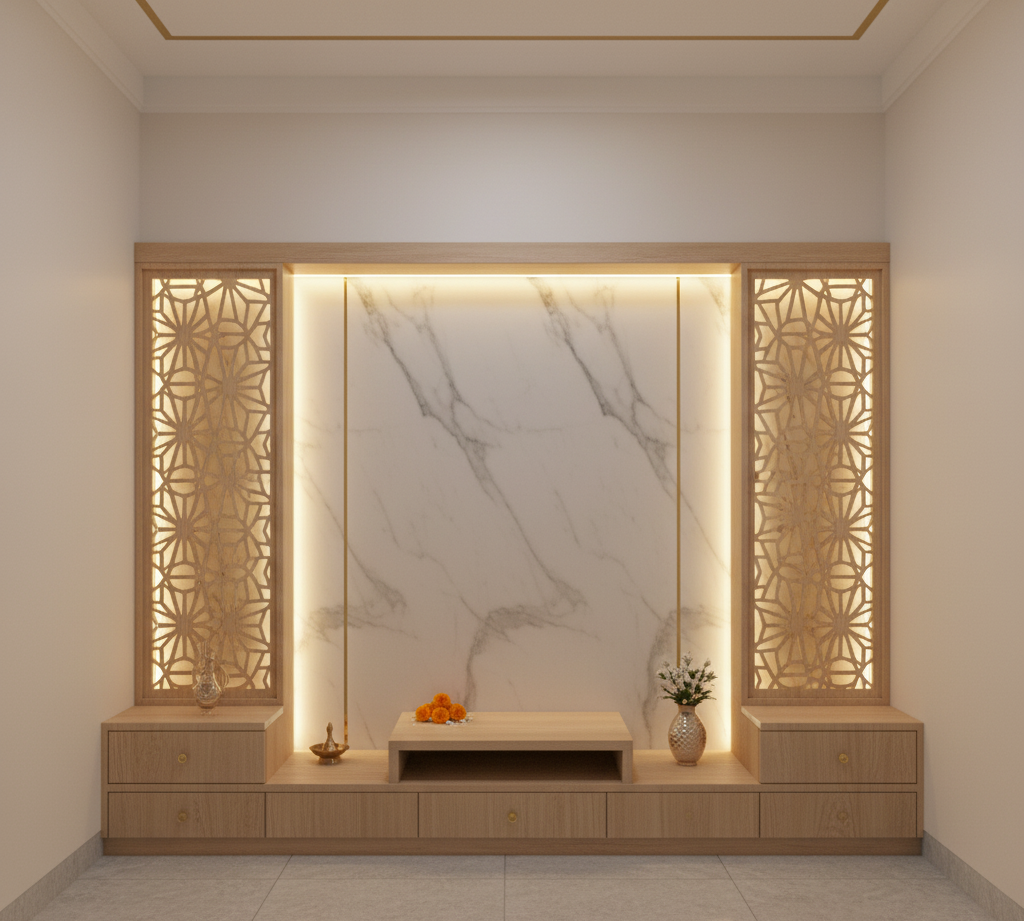
Modern Puja Unit Designs for Contemporary Homes A prayer area can be part of the living room, a separate room or a small section near the dining area. The design depends on the place available and how you want to arrange the idols, pictures and items used during prayer. Some homeowners prefer a traditional wooden finish, while others choose a simple wall-mounted arrangement. Before selecting a design, it helps to look at the different ways the area can be planned and decide which details suit your home. 1. A Separate Niche for the Prayer Area If your home has an unused wall recess, it can be considered for a dedicated prayer area. The niche creates a clear boundary without requiring a separate room. A wooden frame around the opening can give it a finished appearance. You can also use a different wall finish inside the niche to distinguish it from the surrounding walls. If the recess is narrow, keep the decoration simple so the idols remain the main focus. Check the depth before choosing this option. A shallow niche may suit framed pictures and smaller idols, but it may not provide enough room for a wider arrangement. When planning a prayer niche within a shared space, the surrounding furniture and room layout also matter. Explore our guide to living room interior design in Hyderabad for ideas on balancing feature areas, furniture and movement. 2. Traditional Woodwork With a Modern Finish Traditional detailing does not have to cover the entire structure. A plain wooden cabinet with a carved border, decorative pillars or a small arch can provide a traditional appearance without making the design too elaborate.   Consider these things:  The choice of wood shade also affects the overall look. Darker finishes can create contrast against light walls, while lighter shades may suit rooms with pale flooring and furniture. If you are considering carved panels, look at the pattern at its actual size. A design that looks attractive in a small catalogue image may appear too busy when used across a large panel.  3. Marble and Stone Finishes for the Backdrop A marble-look panel can provide a different finish from the wooden cabinet below it. White and cream shades are common choices, but beige or grey can also work depending on the colours used in the room. You do not need to cover the whole wall with stone. A panel behind the idols may be sufficient, especially when the surrounding wall already has a suitable finish. Before finalising the material, compare samples under the lighting planned for the room. Check the maintenance instructions as well, particularly if the surface is close to oil lamps or incense. 4. Jaali Panels as a Decorative Feature A jaali panel can be used as a backdrop or as a partition when the prayer area shares a room with the living or dining space. The pattern allows the design to have detail without using several different decorative finishes. Geometric patterns can suit a simple contemporary interior, while floral or traditional patterns may work better with carved wooden details. Consider the pattern and panel size together. A heavily detailed design may not suit a narrow section, and a large cut-out may need additional support depending on the material. The designer should confirm the panel dimensions and fixing method before fabrication. 5. Open Shelves or Closed Cabinets? An open arrangement keeps the idols visible and makes it easy to reach the items used during prayer. A cabinet with doors gives the area a more enclosed appearance when it is not in use. The decision also depends on where the prayer area is located. In a living room, closed storage may help keep spare items out of sight. In a separate prayer room, open shelves may be enough if you do not need additional storage. You can combine both options by keeping the main platform open and placing less frequently used items in a lower cabinet. The number of shelves and compartments should depend on the items you actually have, rather than adding them only for appearance. 6. Lighting That Suits the Design A small light above the idols can provide visibility without making the backdrop too bright. Concealed lighting can also be used behind a panel, provided the fitting and wiring are installed safely. The finish matters here. Glossy surfaces may reflect the light directly, while textured or matte surfaces can produce a different effect. Ask to see the material sample with the proposed lighting before approving the final combination. Keep electrical fittings, wires and decorative materials away from the flame and heat of a diya. The lamp should sit on a stable, suitable surface with adequate clearance from anything combustible. 7. Planning a Small Prayer Corner When there is limited room, the design should suit the available wall rather than occupy more of the room than necessary. A compact platform with a simple backdrop may be sufficient if you only need room for a few idols and regularly used items. Check the surrounding furniture before deciding the width. A unit beside a television cabinet, doorway or dining table should not obstruct movement or make the wall feel overcrowded. If you need a place for extra pooja items, consider one small drawer or cabinet instead of a large base unit. This keeps the design compact while providing some enclosed storage. 8. Storage Without Making the Design Bulky Storage can be included below the prayer platform or in a side cabinet. The right arrangement depends on whether you keep only a few daily-use items or also need room for books, spare lamps and festival accessories. Consider these things For a modern puja unit design with storage, measure the items before deciding the drawer depth. Small packets and prayer books do not require the same compartment size as larger containers. Avoid adding several narrow drawers if a single wider compartment would be easier to use. Simple internal divisions can help separate different items without adding extra fittings to the exterior.

Modern Puja Unit Designs for Contemporary Homes Read More »

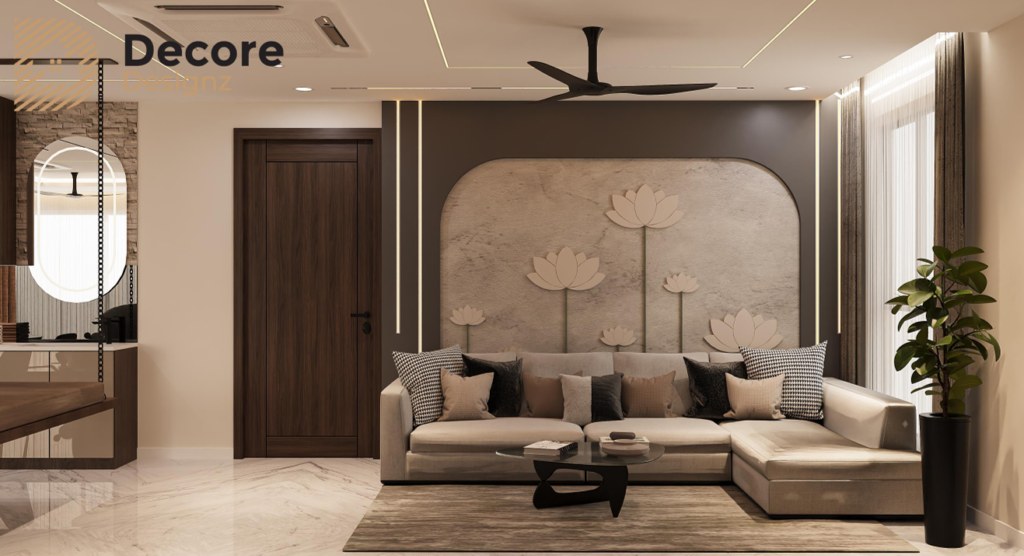
Living Room 2 4BHK DSR Classe Kokapet

Bedroom Design Ideas for 10×10 and 10×12 Rooms

Bedroom Design Ideas for 10×10 and 10×12 Rooms A small bedroom can feel spacious when the bed, wardrobe, lighting and walking space are planned together. The best bedroom design ideas for 10×10 and 10×12 rooms start with the room’s actual dimensions, door and window positions, and everyday storage needs. A 10×10 room usually needs tighter furniture choices, while a 10×12 room offers more flexibility for bedside tables, wardrobes or a compact study corner. How should you design a 10×10 or 10×12 bedroom? A 10×10 bedroom has approximately 100 square feet of floor area, while a 10×12 bedroom has approximately 120 square feet, assuming the measurements are in feet and represent the clear internal dimensions. That extra area can make furniture placement easier, but it does not automatically guarantee a better layout. Door positions, windows, columns and wardrobe depth can have a significant effect on the usable space. Design consideration 10×10 bedroom 10×12 bedroom Bed placement Prioritise the bed and clear movement paths More flexibility to adjust the bed position Bedside storage Consider compact or wall-mounted tables Standard compact tables may fit more easily Wardrobe Plan door access and standing space carefully More options for wardrobe placement Study corner Often needs a slim, carefully positioned desk May accommodate a compact desk if circulation allows Visual design Keep large surfaces visually simple More flexibility for a feature wall or additional furniture Main priority Avoid overcrowding Use the additional area without filling it unnecessarily These are planning guidelines, not fixed rules. Actual furniture dimensions and room geometry determine what will fit. 7 bedroom design ideas for 10×10 and 10×12 rooms 1. Position the bed before choosing anything else The bed usually occupies the largest uninterrupted area in a bedroom. Decide where it belongs before selecting the wardrobe, side tables or decorative elements. In a 10×10 room, placing the bed against a suitable wall can help preserve a more direct route from the entrance to the sleeping area. In a 10×12 room, you may have more flexibility to centre the bed or adjust its position around a window. Before finalising the layout, check: Whether the bedroom door opens freely. Whether the wardrobe can be opened and used comfortably. Whether both sides of the bed are accessible where needed. Whether drawers, if present, can open without hitting other furniture. Do not rely on a floor plan that shows only furniture outlines. The space needed to use that furniture matters just as much. 2. Choose a bed frame that suits the room A bulky bed frame can make a small bedroom feel crowded even when the mattress itself fits. Consider a simple platform bed or a frame with a visually lighter profile. Check the total external dimensions, including the headboard and side rails, rather than choosing by mattress size alone. A storage bed can be useful when the room lacks space for additional cabinets. However, check how its storage mechanism opens and whether the room provides enough clearance to use it. A lift-up bed may solve one storage problem but become inconvenient if access is obstructed by nearby furniture. For more detailed furniture-selection guidance, connect this decision to your broader bedroom furniture planning rather than adding extra furniture by default. 3. Plan the wardrobe around access, not just capacity A wardrobe should provide enough storage without blocking the main circulation route. In a compact room, the wrong wardrobe position can make the bed difficult to approach or leave too little space to stand comfortably while choosing clothes. Sliding shutters can avoid the outward swing of hinged doors, although the wardrobe still needs adequate standing space in front. Hinged shutters may offer simpler access to the full cabinet opening, depending on the configuration. Use the internal layout to organise hanging space, shelves and drawers around what you actually own. Adding more compartments does not help if the layout makes everyday items difficult to reach. See Bedroom Wardrobe Planning for more detailed guidance on wardrobe layout. 4. Use light colours without making the room feel plain Light walls can help a small bedroom feel brighter, especially when daylight is limited. Warm white, soft beige, muted greige and pale natural wood can create a calm background for the bed and storage. You do not need to make every surface white. A deeper shade behind the headboard, a textured finish or a restrained combination of two colours can give the room character. The important distinction is between contrast and clutter. A single considered accent can create a focal point; several competing colours, patterns and finishes may make the room feel visually busy. Choose paint and laminates together where possible. A wall colour that looks warm on its own may appear different beside a cool grey wardrobe or a reddish wood finish. 5. Make vertical space work harder When floor space is limited, use the wall carefully. Depending on the layout, you could consider a wall-mounted bedside shelf, a compact dressing mirror, a slim floating ledge or shelving positioned away from the bed’s movement path. Wall-mounted furniture can free floor area, but its placement and fixing must suit the wall construction and intended load. Avoid installing shelves directly where they create a head-strike risk or make the bed feel boxed in. Likewise, overhead storage should be designed around safe access rather than maximum capacity alone. Keep frequently used items within easy reach. Storage that is difficult to access tends to become unused storage. 6. Layer the lighting instead of relying on one bright ceiling light A small bedroom needs enough light for dressing and everyday tasks, but it should also feel comfortable at night. Use general lighting for overall visibility, with a separate bedside light for reading or winding down. Wall-mounted reading lights can reduce the need for bulky bedside lamps when their position is planned properly. A wardrobe light may help in a darker storage area. If you choose concealed LED lighting, plan the power supply, access for maintenance and glare control before the carpentry is completed. Do not

Bedroom Design Ideas for 10×10 and 10×12 Rooms Read More »

Simple Bedroom Design Ideas

Bedroom House Interior Painting Ideas

Bedroom Accent Walls and Paint Finish Ideas A well-designed bedroom accent wall adds depth and character without making the room feel busy. The best approach is to choose one wall with a clear purpose, then select a paint colour, finish or texture that works with the lighting, furniture and rest of the interior. For most bedrooms, a carefully planned matte finish or subtle textured surface creates a more balanced result than applying a decorative treatment to every wall. What Are the Best Bedroom Accent Wall Ideas? The best bedroom accent wall ideas depend on the room’s proportions, the position of the bed, natural light and the look you want to create. A painted wall behind the headboard is a straightforward option. Textured paint adds depth, while wallpaper introduces a pattern or more pronounced visual detail. Before choosing a treatment, decide what the wall needs to do. Should it make the bed the focal point? Add warmth to a neutral bedroom? Create contrast in a minimalist interior? Or bring character to a plain wall without introducing more furniture? That decision will help narrow the options. 1. Which Bedroom Accent Wall Designs Work Best? A painted wall behind the bed The wall behind the headboard is often the most practical place for an accent. It naturally draws attention towards the bed and can establish the bedroom’s visual direction. A single painted surface can work particularly well when the bed, wardrobe and bedside tables already have enough detail. You do not need decorative panels or multiple materials to create a focal point. Keep the paint treatment within the wall’s natural boundaries unless there is a clear reason to extend it. An oversized colour block can look disconnected if it ignores the furniture layout. A two-tone bedroom wall A two-tone wall introduces contrast without requiring a complicated design. You could use a deeper shade on the lower section and a lighter shade above, or create a clean horizontal or vertical division. The proportions matter more than the number of colours. A line placed at an arbitrary height can make the wall feel awkward. Relate the division to the headboard, furniture or architectural features so the composition looks intentional. A soft, textured accent wall Textured paint is useful when you want a wall to have character without adding a strong pattern. Depending on the product and application method, the surface may have a subtle mineral appearance, a brushed effect or a more pronounced texture. Fine texture tends to work well with simple furniture because it adds interest without competing for attention. Heavier texture is more noticeable and needs careful coordination with lighting. Always inspect a sample before committing. A finish that looks subtle in a showroom can appear much stronger when applied across a large wall. A darker feature wall A deeper shade behind the bed can create a sense of depth and make lighter bedding or furniture stand out. It can also give a large bedroom a more intimate feel. However, a dark wall does not automatically make a bedroom look luxurious. If the room receives limited daylight, or if several other surfaces are already dark, the overall effect can feel heavy. Use the room’s natural light, artificial lighting and furniture finishes to judge whether the contrast is appropriate. 2. How Do You Plan an Accent Wall for an Indian Bedroom? In Hyderabad homes, the practical details matter as much as the finish selected. Start by checking the wall’s condition. Newly plastered surfaces need appropriate preparation and drying before painting. Older walls may have cracks, previous paint layers, damp patches or repairs that need attention. Then consider how the room is used. A bedroom with a large upholstered headboard may need only a restrained painted backdrop. A wall with limited furniture may benefit from a stronger visual treatment, provided the proportions are right. Also consider: Natural light: Observe the wall in daylight and after the room’s lights are switched on. Artificial lighting: Wall washers and lights placed close to the surface can exaggerate texture and imperfections. Furniture alignment: Plan the accent around the bed and headboard rather than choosing a colour before finalising the layout. Electrical points: Account for switches, sockets, bedside lights and other fittings. Adjacent finishes: Check how the paint relates to flooring, wardrobe shutters, curtains and ceiling colour. Maintenance: Ask whether the selected product can tolerate the cleaning the wall is likely to need. The sample should be viewed on the actual wall whenever possible. Small colour cards are useful for narrowing choices, but they do not fully show how a shade will look across a large surface. 3. What Common Accent-Wall Mistakes Should You Avoid? Painting every wall in a strong colour: An accent wall works through contrast. If every surface demands attention, the focal point disappears. Choosing a finish before inspecting the wall: Higher-sheen finishes can expose uneven surfaces. Correct preparation is more effective than expecting paint to hide poor workmanship. Combining too many treatments: Textured paint, patterned wallpaper, elaborate panelling and contrasting colours can compete with one another. Choose a main treatment and let the other elements support it. Ignoring lighting: A wall may look different under daylight, warm bedside lamps and cooler ceiling lights. Review the actual lighting conditions before finalising the colour. Selecting a trend without considering the furniture: A popular shade can still clash with existing flooring, wardrobes or upholstery. The entire room needs to work together. Forgetting future repairs: Special textures and strongly patterned wallpaper can be more difficult to match after damage. Keep product details and colour references for future maintenance. Which Paint Finishes Are Best for Bedroom Walls? The paint finish affects how light reflects from a wall, how clearly surface imperfections appear and how easily the surface can be maintained. The right choice depends on the wall condition, the specific paint product and how the bedroom is used. Paint finish Appearance Main consideration Matte Soft, low-reflection surface Can help disguise minor surface irregularities, but some products are harder to clean

Bedroom House Interior Painting Ideas Read More »

IMG 9517

Modular Kitchen Units: Base, Wall, Tall & Pantry

Modular Kitchen Units Explained: Base, Wall, Tall and Pantry Units Modular kitchen units are the individual cabinets and storage components that make up a kitchen. The main types include base units installed below the countertop, wall units mounted above the counter, tall units that use vertical space, and pantry units designed to organise groceries and provisions. Understanding how these units differ helps you plan a kitchen with practical storage, comfortable movement and a layout suited to your home in Hyderabad. What Are the Different Types of Modular Kitchen Units? A modular kitchen is made up of individual units that serve different purposes. Some support the countertop and store cookware, while others hold everyday utensils, groceries or appliances. The four main categories are: Base units: Cabinets installed below the countertop for cookware, utensils, drawers and other everyday items. Wall units: Cabinets mounted above the countertop to keep frequently used items within convenient reach. Tall units: Full-height or near-full-height cabinets that use vertical space for storage and, where suitable, built-in appliances. Pantry units: Dedicated grocery-storage units that organise provisions and make them easier to access. These categories can be combined according to the kitchen’s dimensions, the household’s cooking habits and the amount of storage required. Not every kitchen needs all four types. A compact apartment kitchen may benefit from carefully planned base and wall units, while a larger kitchen may have room for a separate pantry or tall cabinet. At Decore Designz Studio, kitchen units should be planned as part of the complete layout rather than selected individually without considering their relationship to one another. 1. What Are Base Units in a Modular Kitchen? Base units are the cabinets installed along the lower part of the kitchen, usually beneath the countertop. They provide support for the work surface while creating storage for items used during cooking and cleaning. Because these units sit at the main working level, their internal arrangement has a direct effect on how comfortable the kitchen is to use. What can you store in base units? Base units can accommodate: Pots, pans and cooking vessels. Plates, bowls and everyday utensils. Cutlery and kitchen tools in drawer organisers. Cleaning supplies in a suitably planned cabinet. Waste bins in a dedicated pull-out. Small appliances that need to be stored when not in use. The best configuration depends on what the household owns and how frequently those items are used. Drawers or cabinet shelves: Which is better? Drawers can make cookware and utensils easier to reach because the contents slide out towards you. Deep drawers are particularly useful for heavier vessels, provided the drawer system is specified for the expected load. Conventional cabinets with shelves can work well for larger items or irregularly shaped objects. However, items placed at the back may be harder to access without reorganising the contents. Neither option is universally better. A combination of drawers and shelves often makes sense because different items have different storage requirements. What should you consider before choosing base units? First, check the countertop height and the available working area. Then consider the sink, hob, dishwasher, refrigerator and other appliances before fixing the cabinet arrangement. The under-sink area also needs special attention because plumbing occupies part of the available space. Similarly, drawers should not collide with appliance doors or obstruct the main walking route when open. Design tip: Plan base units around the items they will hold, rather than choosing cabinet sizes first and trying to fit everything inside later. 2. What Are Wall Units in a Modular Kitchen? Wall units are cabinets mounted above the countertop. They provide additional storage without using more floor space, making them useful in many apartment kitchens. They are commonly used for lighter cookware, cups, glasses, frequently used ingredients and other everyday kitchen items. What can wall-mounted kitchen cabinets store? Depending on their dimensions and configuration, wall units can hold: Cups, glasses and smaller serving items. Plates and bowls. Tea, coffee and frequently used ingredients. Light cookware. Small kitchen essentials that need to remain accessible. Heavy items should be stored only where the cabinet construction, fittings and mounting are suitable for the load. How high should wall units be installed? The installation height should account for the countertop, the people using the kitchen, the ceiling height and the equipment positioned underneath. Units that are too high can make everyday items difficult to reach. On the other hand, units that extend too low may interfere with countertop activities or create a cramped feeling. The placement of the chimney and hob is particularly important. Their installation and clearance requirements must be considered before the surrounding cabinets are finalised. Should every kitchen have overhead cabinets? Not necessarily. Wall units offer useful storage, but covering every available wall can make a compact kitchen feel visually crowded. In some layouts, leaving part of the wall open or using a carefully selected open shelf can create a more balanced appearance. The decision should depend on the available storage, the room’s proportions, lighting and the homeowner’s preferences. Design tip: Use wall units for items that benefit from convenient access, and check reachability before finalising their height. 3. What Are Tall Units in a Modular Kitchen? Tall units are cabinets that extend significantly higher than standard base units. Depending on the design, they may reach close to the ceiling and can use vertical space that would otherwise remain underused. They are particularly useful when a kitchen needs more storage without expanding its footprint. What can tall kitchen units store? Tall units may be planned for: Bulk groceries and packaged provisions. Small appliances. Large serving dishes. Kitchen supplies used less frequently. Built-in ovens or other compatible appliances. Dedicated storage compartments arranged according to household needs. The internal layout should reflect the intended use. For example, a cabinet intended for bulky appliances needs different shelf spacing from one intended for packaged groceries. What are the advantages of tall units? They use vertical space. A tall cabinet can provide substantial storage without extending the kitchen’s floor area.

Modular Kitchen Units: Base, Wall, Tall & Pantry Read More »

Indoor Courtyard Design Ideas for Indian Homes

Indoor Courtyard Design Ideas for Indian Homes

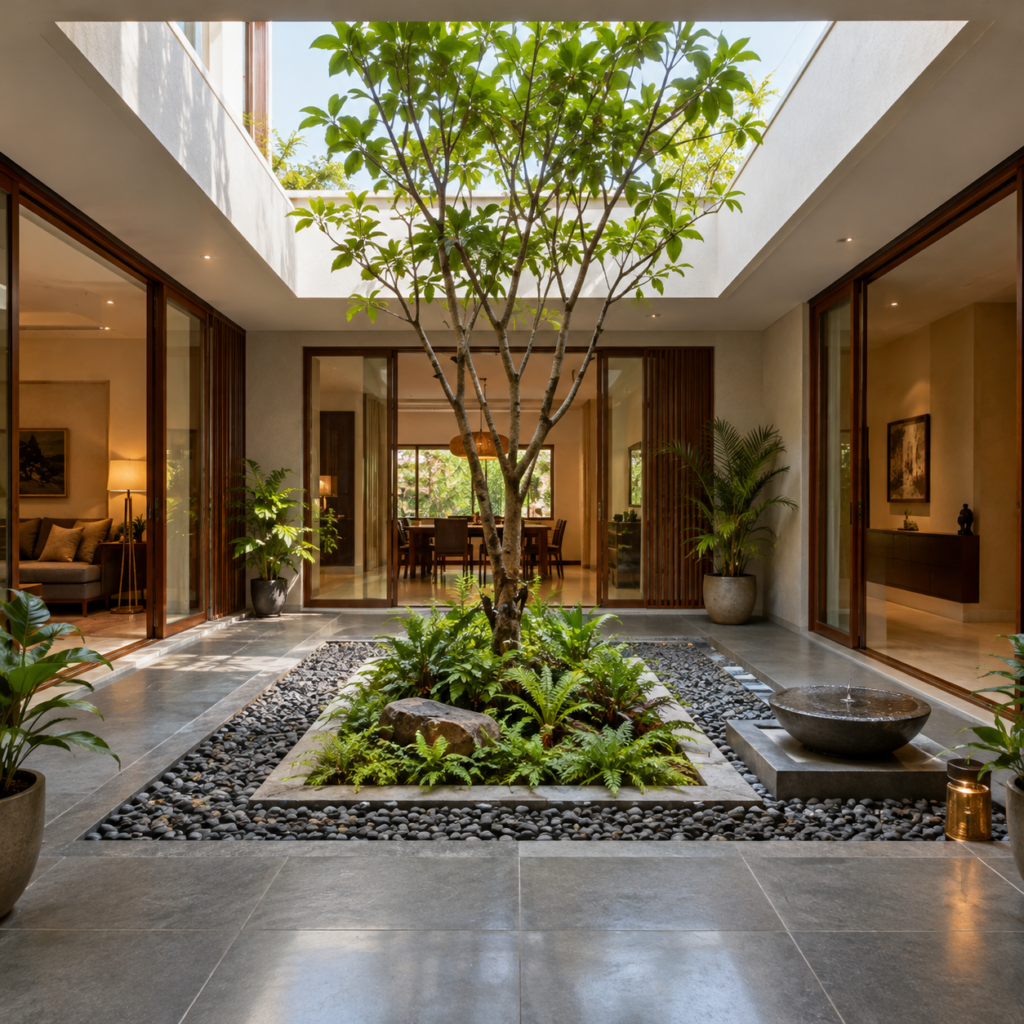
Indoor Courtyard Design Ideas for Indian Homes An indoor courtyard can bring natural light and plants indoors, without having to lay out a separate garden. It could be a simple open space in the middle of the house, a small area besides the living room, or a space visible from the dining area. The size could be determined by the floor plan, even a small courtyard has an effect when it is well planned. That said, simply putting a plant and choosing appealing flooring is not enough. Sunlight, rain, drainage, ventilation and maintenance are all aspects worth considering for an Indian home, where the courtyard could be exposed to heavy rain during monsoon and searing sunlight during summer. Before taking up the idea of an indoor courtyard, it helps to have an understanding of how the courtyard fits into the house, and how you plan to use it. Where Can You Have an Indoor Courtyard? Depending on the house’s floor plan, the indoor courtyard can be located in several areas of the house. For instance, for an independent house with sufficient centre space, you could have an open-to-sky courtyard. Some home designs allow for a courtyard alongside the living room, while others could have the courtyard situated next to the dining area. This is not an exhaustive list; many factors determine where the courtyard can go. A central courtyard can bring in natural light into the house where sunlight may not reach the inner walls easily. It can also act as a view of plants from all areas of the house. But this design requires planning from the beginning, if the house is under construction. If you are considering a courtyard alongside the living room, make sure you leave enough space so that your seating area is not cramped. A large courtyard may look nice on paper, but may leave you with barely enough room for a sofa, TV console and movement. The dining area could be another good candidate for a courtyard. A small courtyard next to it provides a green view while you eat. If the kitchen is in line with the courtyard, ensure that strong odours or excess moisture do not cause issues due to lack of proper ventilation. Taking up a portion of the floor or structural wall is not an easy interior adjustment. A qualified professional should always be consulted when the structural integrity and waterproofing is concerned. Open-to-Sky or Covered Courtyard? This decision will determine much in terms of the courtyard’s appeal, budget and maintenance. Both versions have their pros and cons, and the choice is dependent on your requirement. Open-to-sky courtyard  An open courtyard means exposure to sunlight and rain, and can be a good choice if you have a specific requirement for plants that need direct sunlight. But the amount of sunlight should be suitable for the varieties you intend to plant. Rainwater drainage becomes a crucial aspect of the courtyard in this case. The floor should be sloped appropriately to direct water towards a well-planned and easily accessible drain. Waterproofing of the walls and floor is paramount, or water could seep in adjoining rooms. The rooms surrounding the courtyard should also be taken into account. If bedroom windows view the courtyard, you will need to factor in privacy, and the amount of direct sunlight that will enter the room. Glass-covered courtyard  A glass-covered courtyard offers the appeal of an open courtyard, but allows you to keep direct sunlight and rain out. It is an ideal choice if you need an enclosed space but want to keep the feel of a courtyard in the home. However, the glass specification, support structure, ventilation and heat insulation must be planned thoroughly. Simply putting glass on a structure will not necessarily keep the courtyard cool, especially during Hyderabad’s summer. The roof’s provision for cleanability, water drainage and ventilation also need to be considered during the planning phase, rather than as finishing touches. Choosing Flooring and Wall Finishes  The type of flooring in a courtyard depends on how you plan to use it. A decorative finish looks nice but may need extra care. Choose a natural stone, suitable outdoor tile or a textured finish that also takes care of moisture, cleaning and wear. If the courtyard is open to the sky, avoid a slippery surface when it is wet. The slope and drain position are as important as the material. Water should not gather around pots or the doorway to an adjoining room. Paint, wallpaper and other interior finishes are not advisable for an exposed courtyard unless they have been tested and approved. You can also use one wall as a plant grower or simply put a textured finish, instead of trying to finish all the walls. This will make it easier to care for the courtyard, and avoid it from feeling cluttered. Which Plants Work in an Indoor Courtyard?  The plants in the courtyard need to be suited to its conditions. A courtyard that gets several hours of direct sunlight will have different plant requirements from a courtyard that is in the shade. Before buying plants, it helps to observe how much sunlight reaches the courtyard, and how the sunlight falls throughout the day. If you are still planning the courtyard, discuss the light requirement with the designer. For a courtyard with good natural light, you can think about varieties of areca palm, hibiscus and other plants suitable to the conditions. Shade plants are a better choice for a dark courtyard than sun plants that will not get the required sunlight. The size of the plant is also important. A plant that looks nice in a small pot could grow to be much bigger in a few years. Leave room for the mature plant, its pot and care access. If you want ground plants, the planting area needs to have the right soil depth, as well as waterproofing around adjoining construction. Potted plants offer much more flexibility, particularly in a small courtyard, where their

Indoor Courtyard Design Ideas for Indian Homes Read More »

Simple Bedroom Design Ideas

Simple Bedroom Design Ideas That Don’t Feel Empty

Simple Bedroom Design Ideas That Don’t Feel Empty A simple bedroom should feel calm, not unfinished. The difference comes from proportion, lighting, texture, furniture placement and a few carefully chosen details. You don’t need to fill every wall or add decorative furniture to make a room feel complete. The goal is to give each element a purpose while creating enough visual warmth for the bedroom to feel comfortable and personal. If you’re looking for simple bedroom design ideas, start with the elements you use every day: the bed, bedside lighting, curtains, storage and the wall behind the bed. When these work together, even a restrained interior can feel thoughtfully designed. Why Does a Simple Bedroom Sometimes Feel Empty? A bedroom can have good furniture, attractive colours and plenty of open space yet still feel incomplete. This usually happens when the elements don’t relate to one another. For example, a large bed against a completely bare wall can look disconnected from the rest of the room. A single ceiling light may make the space feel flat at night. Furniture that is too small for the room can leave the layout looking unbalanced. The solution isn’t necessarily to add more things. It is to identify what the room is missing. A simple bedroom generally needs three things: Visual balance: Furniture and wall elements should feel proportionate to the room. Warmth: Materials, fabrics and lighting should soften the overall appearance. Purpose: Every decorative or functional element should contribute something useful. Once these are in place, the room can remain uncluttered without feeling bare. 1. Give the Bed Wall a Clear Focal Point The bed is usually the largest piece of furniture in a bedroom, so the wall behind it has a major influence on how the entire room feels. Leaving it plain can work, especially when the architecture, bed and surrounding finishes already provide enough character. However, if the wall feels disproportionately empty, introduce one considered design element. Some simple bedroom wall design ideas include: A fabric-upholstered headboard that extends slightly beyond the bed. A restrained wood-finish panel behind the headboard. A matte or subtly textured paint finish. A pair of carefully positioned wall lights. One appropriately sized artwork above the bed, where clearance allows. Avoid combining every option on the same wall. A headboard, elaborate panelling, multiple shelves and several decorative objects can compete for attention. Choose one main feature and let the rest of the room support it. 2. Use a Warm, Restrained Colour Palette A simple bedroom doesn’t have to be entirely white. In fact, using the same shade on every surface can sometimes make a room feel flat. Instead, combine a light base with a few related tones. Warm white, beige, soft taupe, muted grey and natural wood finishes can create a calm background without making the bedroom look unfinished. For example, consider this combination: Walls: Warm off-white. Bed and upholstery: Beige or light taupe. Furniture: Natural wood or a restrained darker finish. Soft furnishings: A slightly deeper neutral for contrast. Accent colour: One muted green, terracotta or similar shade. The important point is not to use these exact colours. It is to create a relationship between the surfaces. If you want to explore more combinations, our guide to modern interior design in Hyderabad provides a broader starting point for understanding how colour, furniture and finishes work together. 3. Layer the Lighting Instead of Relying on One Ceiling Light Lighting is one of the easiest ways to make a simple bedroom feel more complete. A single bright ceiling light can illuminate the room adequately but often creates a flat atmosphere. Different lighting sources allow the bedroom to serve different purposes throughout the day. Consider three layers: General lighting: Recessed ceiling lights or another suitable ambient source provide overall illumination. Bedside lighting: Wall lights, table lamps or pendants provide convenient light for reading and other evening routines. Accent lighting: Soft, indirect illumination can highlight a textured wall, headboard or dressing mirror. You don’t need all three layers in every bedroom. The correct arrangement depends on the room layout, ceiling, electrical points and how the space will be used. Warm-toned lighting can help create a relaxed evening atmosphere. However, bedside reading still requires enough usable light, and dressing areas benefit from lighting that makes colours easier to distinguish. The aim is to make the room feel comfortable at different times, not simply attractive in photographs. 4. Choose Furniture That Fits the Room One common mistake in simple bedroom interiors is choosing furniture individually without considering how the pieces work together. A large bed, oversized bedside tables and a bulky dressing unit can crowd the room. At the other extreme, a small bed with tiny tables may look lost in a large bedroom. Start with the bed position and available circulation space. Then choose supporting furniture according to what the room genuinely needs. Furniture What to consider Bed Proportion, comfort and clearance around it Bedside tables Surface space, storage and accessibility Dressing unit Daily use, mirror position and lighting Study desk Whether the bedroom needs a dedicated work area Accent chair Whether it serves a real purpose without obstructing movement In smaller rooms, combining functions can be more effective than adding furniture. A bedside unit with drawers, for instance, may provide the storage you need without requiring another cabinet. For more detailed planning, see our space-saving interior design guidance. 5. Add Texture Without Adding Clutter When a bedroom has a restrained colour palette, texture can provide the visual depth that colour and decoration might otherwise supply. Consider a combination of smooth painted walls, soft bedding, woven curtains, an upholstered headboard and a wood-finish bedside table. Each surface contributes a slightly different quality. Together, they make the room feel layered without requiring numerous decorative accessories. A few practical options include: Linen-look or textured curtains. Cushions in two complementary fabrics. A bedspread with a subtle woven pattern. An upholstered headboard. A rug that relates to the bed and surrounding furniture. Wood or wood-look

Simple Bedroom Design Ideas That Don’t Feel Empty Read More »