
Decore Designz

Author name: Syed Nayeem

Modern storage unit with built-in cabinets, shelves, and contemporary design

Custom Wardrobe Design for Indian Homes

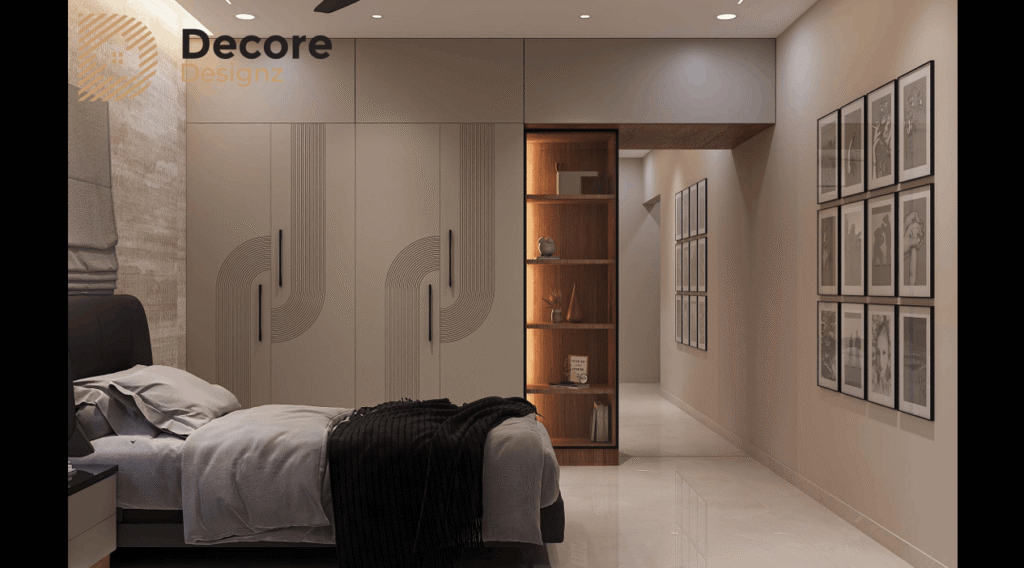
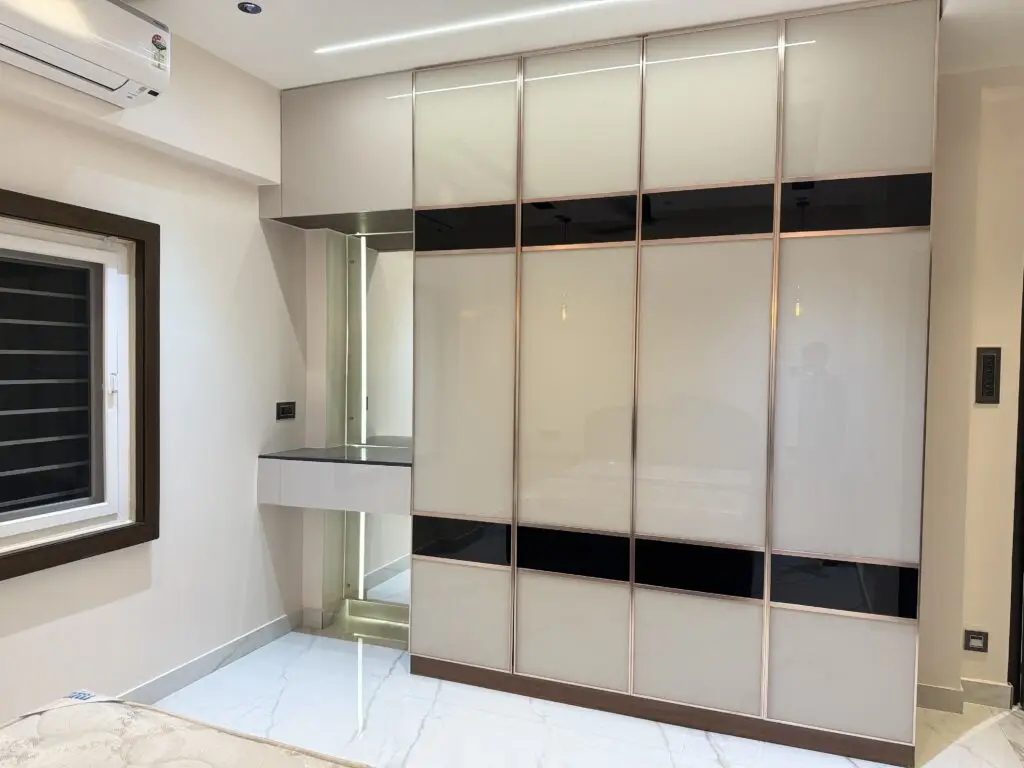
Custom Wardrobe Design for Indian Homes A wardrobe is one of the most commonly used items of furniture in a bedroom and is used for storing clothes, bags, footwear, accessories and other personal belongings. The amount of storage required can vary from one house to another, some people possibly needing more space for hanging clothes while others might require more shelves or drawers for their folded garments and other belongings. A Custom wardrobe gives more flexibility as compared to standard wardrobe, rather than selecting a ready-made unit and then making adjustments to fit its size, the wardrobe can be planned according to the available wall space and the amount of storage required in the bedroom. A well-planned wardrobe can make everyday storage easier. It also helps keep the bedroom more organised. What to Consider Before Planning a Wardrobe The first thing to check is where the wardrobe is to be placed. The wall must have enough room to accommodate the wardrobe without making the bedroom seem too crowded, and the position of the bed, the side tables, the doors and the windows should also be checked before you finalise the wardrobe.   Even if a wardrobe fits nicely against a full wall, its shutters need to have sufficient space to open properly, if there is very small room in front of the unit, sliding shutters would be a better choice. Storage is also an important thing to consider when planning a wardrobe, someone might require more space for hangers regarding shirts, trousers and dresses, while another person might need more shelves for folded garments. In Indian households there can also be sarees, bags, blankets, suitcases and other items which need to go in the wardrobe. The space inside the wardrobe can then be divided according to the requirement. Planning the Rest of Your Bedroom Interior A wardrobe works best when it is planned as part of the overall bedroom rather than as a separate piece of furniture. The wardrobe layout, bed position, dressing area, lighting and available movement space all need to work together. If you are planning a bedroom, see our guide to bedroom Colour design for ideas on creating a practical and well-balanced bedroom layout. Choosing the Right Layout The way in which the wardrobe is arranged may change according to the size and shape of the bedroom. The way in which the wardrobe is arranged may change according to the size and shape of the bedroom. A full-height wardrobe will offer a good amount of storage if there is sufficient wall space, and the unit may include hanging spaces, shelves, drawers as well as a loft at the top for things that are not used regularly. If the bedroom is smaller the simpler wardrobe with fewer compartments, and sliding shutters could also be useful when there is not much space between the wardrobe and the bed. A big bedroom could have enough space for a wardrobe with a dressing area, and in this area a mirror and some drawers could be provided for items that are used when getting ready. Storage Inside the Wardrobe  It is easy to notice the exterior of the wardrobe, but it is the storage space inside that you will be using every day. The shelves, drawers and hanging areas should be arranged according to the clothes and other items that are to be stored there. Hanging Space  Space on hangers is useful for folded clothes, such as shirts, trousers, dresses and certain traditional garments.   The height of this part will change according to the type of clothes being stored, if two people are using the wardrobe then having separate hanging sections will make it easier to keep their clothes separate. Shelves and Drawers Shelves are suitable for storing folded clothes, towels, bags and all other items,the size should be planned according to what will actually be stored in them. Drawers are useful for storing small items like watches, belts, accessories and other personal belongings and having several individual drawers makes it easier to find these items. It would be better to decide on these sections before the wardrobe is designed. Loft Storage  The area above the main wardrobe is suitable for storing items which are not needed every day, such as suitcases, blankets, seasonal clothing and extra bed sheets. A loft is useful when there is limited storage space in the bedroom, and the height of it should be appropriate for the room so that the wardrobe does not appear too heavy. Wardrobe Materials and Finishes  The type of material and the surface finish of the wardrobe can affect the appearance of the bedroom, when considering the bedroom’s design, as well as how easy it is to maintain and the budget available, laminates, acrylic, glass and other finishes should be looked at. In smaller bedrooms lighter tones can be a good choice, particularly if the wardrobe occupies a major portion of the wall. Wood finishes should be used for a warmer appearance. Built-In Wardrobes for Indian Bedrooms  Instead of considering the wardrobe as a standalone piece of furniture, the built-in wardrobe is designed to fit against the wall that is available. This allows it to make more effective use of the height and width of the bedroom. The top section could serve as a loft, and the sections below could have shelves, drawers and space for hanging things. This kind of wardrobe is useful in apartments in Hyderabad since the sizes and arrangements of the bedrooms can differ. Rather than attempting to fit a wardrobe size into the room, the unit can be designed to match the actual room. Wardrobe Design for Small Bedrooms Even if a bedroom is small in size, it can still have enough storage if the wardrobe is properly planned. The first thing to do is to examine the wall space and the distance between the wardrobe, the bed and all the other furniture. A full-height wardrobe can use the upper section of the wall without occupying
Custom Wardrobe Design for Indian Homes Read More »

IMG 8505 1

Modular Kitchen for Small Kitchens: 10 Smart Ideas

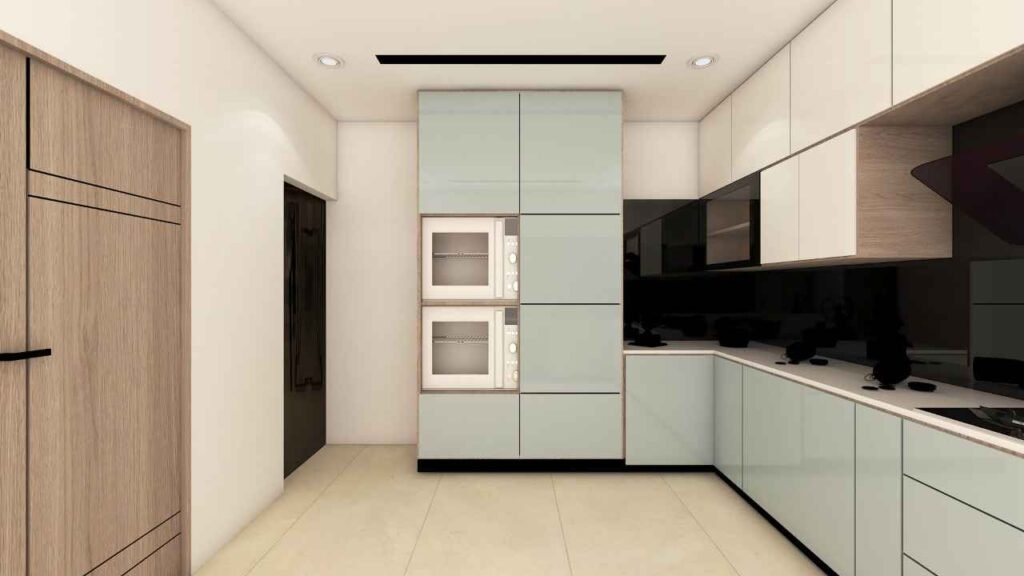
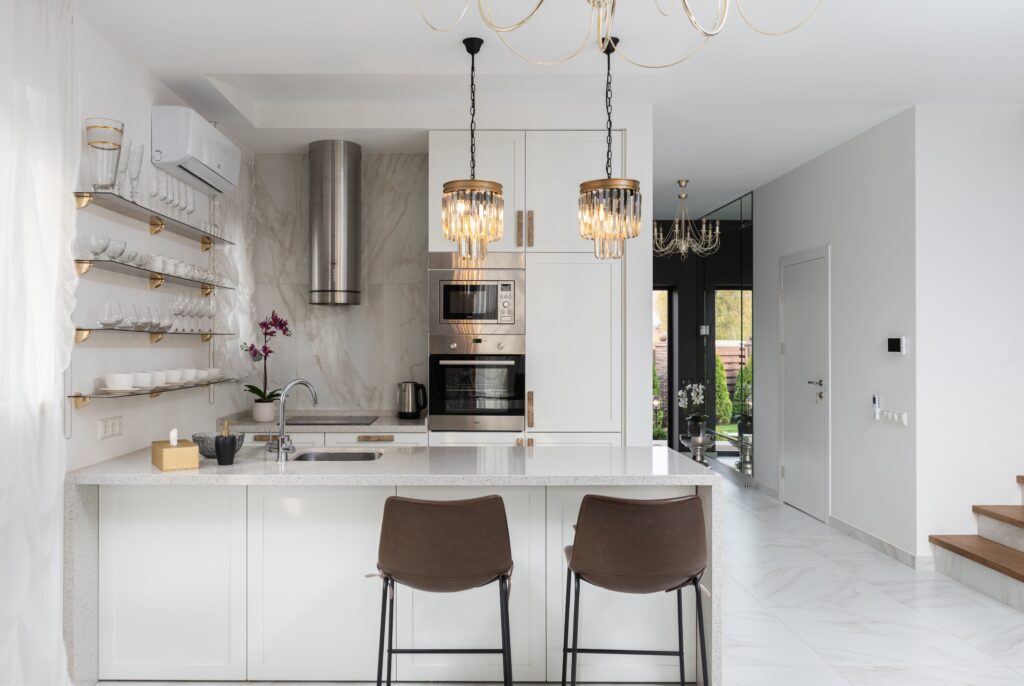
Modular Kitchen Design Ideas for Small Kitchens A small kitchen does not need to feel cramped. The right modular kitchen design can make limited space easier to cook in, easier to organise and visually more open. The key is to plan the layout, storage, appliances, counter space and finishes together. Instead of adding more cabinets everywhere, a small kitchen should make better use of vertical space, corners and the areas that are easiest to reach. What is the best modular kitchen design for a small kitchen? The best modular kitchen design for a small kitchen is the one that preserves comfortable movement while making efficient use of available walls and storage volume. Depending on the floor plan, an L-shaped, straight or parallel kitchen can work well. The right choice depends on wall lengths, door and window positions, appliances, plumbing, ventilation and how the family actually uses the kitchen. A compact kitchen should therefore be designed around workflow first and appearance second. What should you consider before designing a small modular kitchen? Before selecting cabinet colours or browsing kitchen images, understand the space itself. Check: Available wall length Door and window positions Plumbing points Electrical points Chimney and ventilation requirements Refrigerator location Washing machine or utility connection Major appliances Counter space required for preparation Storage requirements Number of people using the kitchen This matters particularly in Hyderabad apartments, where the kitchen footprint is often fixed by the original floor plan. A few centimetres can affect whether a cabinet door opens comfortably, whether an appliance blocks movement or whether a corner remains usable. Which kitchen layout works best for a small space? There is no single layout that works for every small kitchen. L-shaped modular kitchen An L-shaped kitchen uses two adjoining walls and leaves the centre relatively open. This can make it a practical option for compact apartments. It can also provide a useful separation between cooking, washing and preparation areas. However, corner storage needs to be planned carefully. A poorly designed corner can become difficult to access and reduce the benefit of the available cabinet space. For a detailed look at this layout, see Decore Designz Studio’s L-shaped kitchen design guide. Straight modular kitchen A straight kitchen places the cabinets and appliances along one wall. This can work particularly well when the kitchen is narrow or when the available room does not allow two usable cabinet runs. The limitation is storage. Since everything is concentrated on one wall, vertical storage and internal cabinet organisation become more important. Parallel modular kitchen A parallel or galley kitchen uses two opposing runs. It can provide considerable storage within a narrow room, but the central aisle has to remain comfortable. Cabinet depth, appliance doors, drawer openings and circulation all need to be checked together. A parallel kitchen should therefore be considered only when the room is wide enough to accommodate two functional runs without making movement difficult. How can you maximise storage in a small modular kitchen? The biggest mistake in a small kitchen is assuming that more cabinets automatically mean better storage. Instead, use each cabinet according to what needs to be stored. Use vertical space If the ceiling height allows it, cabinets can extend higher on the wall. Higher cabinets are useful for items that are not needed every day, such as occasional cookware, serving pieces or seasonal kitchen equipment. Frequently used items should remain within comfortable reach. Use drawers where they improve access Deep drawers can be useful for pots, pans and larger cookware. Shallow drawers can handle cutlery and smaller kitchen tools. However, not every cabinet needs to become a drawer. The storage mechanism should match the contents. Make narrow spaces useful A narrow gap between cabinet sections may be suitable for a pull-out unit. Depending on its width and construction, it can store bottles, spices, condiments or cleaning supplies. But a pull-out should solve an actual storage problem. Adding accessories simply because they are available can make the kitchen more complicated without making it more useful. Plan the corners Corners are often difficult to access in compact kitchens. Depending on the layout, you may consider corner drawers, shelves or rotating mechanisms. The right solution depends on the cabinet dimensions and how the adjoining units are configured. How should appliances be planned in a small kitchen? Appliances can consume a surprising amount of usable space. That is why they should be considered before the cabinet layout is finalised. Plan the positions of: Refrigerator Hob Chimney Microwave Oven Mixer grinder Air fryer Dishwasher, if required Washing machine, where applicable Do not design all the cabinets first and then try to fit the appliances into the remaining gaps. For example, the refrigerator needs enough clearance for its doors. The microwave needs a practical location. The chimney needs appropriate ventilation. And frequently used appliances need to remain accessible without occupying all the working counter. A small kitchen benefits from planned appliance placement, not simply compact appliances. How can you make a small kitchen look bigger? Function is the priority, but visual decisions can also influence how spacious the kitchen feels. Keep the colour palette controlled Using a limited colour palette can create a more continuous visual appearance. Lighter finishes can also help reflect available light, particularly in kitchens with limited natural illumination. That does not mean every small kitchen needs to be white. Soft neutrals, light wood tones and carefully selected contrasting elements can work well without making the room visually heavy. Avoid unnecessary visual breaks Too many colours, finishes, open shelves and decorative elements can make a small kitchen appear busy. A more controlled combination of cabinets, countertop, backsplash and hardware can create a cleaner visual field. Use overhead cabinets selectively Upper cabinets are valuable in a small kitchen because they use vertical space. However, filling every available wall with heavy-looking cabinetry can make the room feel enclosed. The balance depends on ceiling height, storage requirements, natural light and the overall design. How should storage be organised in a compact modular

Modular Kitchen for Small Kitchens: 10 Smart Ideas Read More »

Material Selection & Finishes

Modular Kitchen Materials: A Complete Guide

Modular Kitchen Materials: A Complete Guide Choosing modular kitchen materials is not simply about picking the most expensive board or the finish that looks best in a showroom. A kitchen has different requirements at different levels: the cabinet structure needs to handle everyday use, the outer finish needs to suit the desired appearance and maintenance expectations, and the countertop needs to handle regular food preparation. The right material therefore depends on where it is being used, how the kitchen will be used, moisture and heat exposure, expected load, finish requirements, maintenance and overall design priorities. This guide explains the main modular kitchen materials and how to think about them before finalising your kitchen. What are the main modular kitchen materials? Modular kitchen materials can broadly be divided into four groups: Cabinet construction materials — such as plywood, MDF and other board options. Shutter and surface finishes — such as laminate, acrylic and veneer. Countertop materials — such as granite and quartz. Special construction options — such as aluminium for kitchens where its particular properties make sense. These materials do different jobs. That distinction matters because saying that one material is simply “the best” can be misleading. A material that works well for a cabinet structure may not be the right choice for a decorative shutter. Similarly, a good cabinet board does not automatically make a good countertop. What should you consider before choosing kitchen materials? Before comparing individual materials, start with the conditions in which they will be used. 1. Moisture exposure Kitchen cabinets are exposed to water, steam and regular cleaning. Areas around the sink require particular attention. However, moisture resistance is not determined by the board name alone. Construction, edge treatment, installation and the specific product specification also matter. 2. Expected load Some cabinets carry heavier cookware, appliances or stored items than others. A material decision should therefore consider what the cabinet is expected to support and how frequently it will be used. 3. Frequency of use A kitchen used several times a day has different demands from a rarely used secondary kitchen. Daily opening, closing, cleaning and loading can influence the choice of board, finish and hardware. 4. Finish requirements Do you want a smooth painted appearance? A glossy surface? A textured finish? A wood-like appearance? The answer can influence which material and finish combination makes sense. 5. Maintenance A beautiful finish is not automatically a practical finish for every household. Consider how easily the surface can be cleaned, how visible fingerprints or marks may be and how much maintenance you are comfortable with. 6. Construction quality The material specification is only one part of the finished cabinet. Thickness, joining method, edge treatment, hardware and installation can all affect how the finished kitchen performs. This is why two kitchens described using the same board name can still have different levels of quality. What is plywood, and where does it work in a modular kitchen? Plywood is made by bonding layers of wood veneer together. The construction gives it good structural strength, which makes it a commonly considered option for furniture that needs to handle regular use and load. In kitchens, plywood can be considered for cabinet components where structural performance is important. However, simply specifying “plywood” is not enough. The actual specification, construction, thickness, edge treatment, finish and installation should also be understood. For example, a kitchen cabinet near a sink may have very different exposure conditions from a tall dry-storage unit. So the question should not only be: “Is plywood good for a modular kitchen?” A better question is: “Where does plywood make sense in this particular kitchen, and what specification is being proposed?” For a detailed plywood-versus-MDF comparison, refer to the existing Plywood vs MDF for Home Interiors guide rather than treating this article as a replacement for that deeper comparison. What is MDF, and where can it be useful? MDF, or Medium-Density Fibreboard, is manufactured from refined wood fibres compressed with resin. Its smooth and consistent surface can make it useful for certain painted, routed and decorative applications. That does not mean MDF is automatically suitable for every part of a kitchen. Its suitability depends on the specific application, moisture exposure, construction and finish. For example, a decorative component with a smooth painted finish may have different requirements from a heavily used cabinet structure. Therefore, MDF should be evaluated according to where it is being used, rather than simply labelled as good or bad for kitchens. Can plywood and MDF be used together? Yes. A modular kitchen does not have to use one board material for every component. Different materials can be considered for different applications when their properties suit the job. For example, one component may prioritise structural strength while another may prioritise a smooth surface for a particular finish. This approach can be more practical than deciding that the entire kitchen must use one material. The important question is whether each choice has a clear reason behind it. What are laminate finishes for modular kitchens? Laminate is a commonly used exterior finish for modular furniture. It is available in a wide range of colours, patterns, textures and surface appearances. This makes it useful when homeowners want flexibility in the visual direction of the kitchen. Laminate can work particularly well when the priorities include: A wide choice of colours and textures Practical everyday surfaces Easy visual coordination Different matte or textured appearances A finish that fits the overall interior design However, laminate is a finish, not the same thing as the board used inside the cabinet. This distinction is important when comparing quotations. A quotation may mention laminate while separately specifying plywood, MDF or another board for the cabinet construction. So always ask: What is the cabinet made from, and what is the exterior finish? What is acrylic for modular kitchens? Acrylic is another kitchen surface finish, commonly associated with a smooth and glossy appearance. It can create a more reflective, contemporary look and can be useful when the visual goal is

Modular Kitchen Materials: A Complete Guide Read More »

top 10 interior designers in hyderabad

What Does “Modular Kitchen” Actually Mean?

What Does “Modular Kitchen” Actually Mean? A modular kitchen is a kitchen made from pre-designed cabinet modules or units that are manufactured separately and then assembled and installed at the site. These modules can include base cabinets, wall cabinets, tall units, drawers and other storage components. The layout, dimensions, materials, finishes and internal storage can be customised to suit the kitchen. In simple terms, instead of building every cabinet from scratch at the site, a modular kitchen uses planned components that are manufactured and then fitted together. That is the basic meaning of “modular.” However, a modular kitchen is not simply a collection of ready-made cabinets. Good modular kitchen design still involves planning the room, workflow, storage, appliances, materials, finishes and installation around the way the kitchen will actually be used. Why is it called a “modular” kitchen? The word modular refers to the way the kitchen is constructed. The kitchen is divided into individual units or modules. Each module has a specific function and can form part of the larger kitchen when assembled. For example, a kitchen may contain: Base cabinet modules Wall-mounted cabinet modules Drawer units Tall storage units Pantry units Corner units Sink units Appliance units Open shelves or display sections These components are planned together so that they form one functional kitchen. The important point is that the modules are planned as a system, rather than treated as unrelated pieces of furniture. How is a modular kitchen different from a traditional carpenter-built kitchen? This is one of the most common points of confusion. A traditional carpenter-built kitchen is generally constructed and assembled at the site. Cabinet boxes, shelves and other elements are cut, built and adjusted according to the site conditions. A modular kitchen, on the other hand, is generally designed and manufactured as separate components before being brought to the site for installation. The difference is therefore not simply about appearance. It is mainly about how the kitchen is designed, manufactured and installed. Modular kitchen Traditional carpenter-built kitchen Components are planned as modules Cabinets are generally built at the site Manufacturing and installation are separate stages More of the construction happens on site Dimensions are planned before production More adjustments can happen during construction Factory or workshop production can provide consistent components Final finish depends heavily on site workmanship Installation focuses on assembling and fitting planned units Construction and fitting happen progressively Design can be planned around standardised cabinet systems Greater freedom for completely site-built solutions This does not mean one approach is automatically better in every situation. The right choice depends on the kitchen, the level of customisation required, site conditions, materials, execution method and the homeowner’s priorities. What does a modular kitchen include? There is no single fixed package called a “modular kitchen.” The exact scope can vary from project to project. Depending on the design, a modular kitchen may include the following. Base cabinets These are the lower cabinets installed below the countertop. They commonly provide storage for cookware, utensils, cleaning supplies and other frequently used items. Wall cabinets Wall-mounted cabinets use the vertical space above the countertop. They can provide additional storage without taking up more floor area. Tall units Tall cabinets can be used for pantry storage, appliances or other items that benefit from full-height storage. Drawers Drawers are useful for frequently accessed items such as cutlery, cooking tools and smaller kitchen accessories. Sink unit The cabinet below the sink has to accommodate plumbing while still providing practical storage. Corner units Corners can otherwise become difficult-to-access spaces. Specially planned corner units can make better use of them. Hardware and accessories The term modular kitchen can also involve hinges, drawer systems, handles, pull-outs and internal storage accessories. These details affect how the cabinets work every day. Countertop The countertop is usually planned together with the cabinet layout because its dimensions, sink position, hob location and appliance placement all affect the design. The exact inclusions should therefore be confirmed before comparing two modular kitchen quotations. Is a modular kitchen completely standardised? No. This is another common misunderstanding. A modular kitchen uses a system of components, but the overall kitchen does not have to look or function the same as another modular kitchen. The layout can change. The cabinet sizes can change within the available system. Storage can be planned differently. Finishes, colours, handles, countertops and hardware can also vary. For example, an L-shaped kitchen in one apartment may have a very different cabinet arrangement from an L-shaped kitchen in another apartment because the doors, windows, plumbing points, appliances and storage requirements are different. That is why modular does not mean “one-size-fits-all.” What can be customised in a modular kitchen? A modular kitchen can be customised at several levels. Layout The kitchen can be planned as a straight, L-shaped, U-shaped, parallel, island or peninsula layout depending on the room. Storage Cabinet sizes, drawers, pantry storage, pull-outs and other internal arrangements can be planned around what you actually store. Materials The cabinet construction, shutters, countertop and other elements can use different materials depending on the design and performance requirements. Finishes Laminate, acrylic, veneer and other finishes can change the appearance of the kitchen. Appliances The positions of the refrigerator, hob, chimney, oven, microwave, dishwasher and other appliances need to be considered during planning. Hardware Hinges, drawer systems and other mechanisms can be selected according to how the kitchen will be used. This is where modular kitchen design becomes more than simply selecting cabinet colours. What are the main advantages of a modular kitchen? A well-planned modular kitchen can offer several practical advantages. 1. The design is planned before installation Because the kitchen is designed before manufacturing, the cabinet arrangement, storage and appliance positions can be reviewed before installation begins. 2. Components can be manufactured separately The manufacturing process can reduce the amount of cabinet construction required directly at the site. 3. The kitchen can be organised around specific functions Instead of treating every cabinet the same way, storage can be divided according to

What Does “Modular Kitchen” Actually Mean? Read More »

smart kitchen design

Types of Modular Kitchen Layouts Explained

Types of Modular Kitchen Layouts Explained The right modular kitchen layout depends on the room’s shape, available space, storage needs, cooking habits and movement within the kitchen. The most common modular kitchen types include straight, L-shaped, U-shaped, parallel and island or peninsula layouts. Each solves a different planning problem, so the best layout is not necessarily the one that looks best in a photograph. What are the main types of modular kitchen layouts? The main modular kitchen layouts are: Straight-line kitchen — cabinets arranged along one wall L-shaped kitchen — cabinets arranged along two adjoining walls U-shaped kitchen — cabinets arranged across three sides Parallel kitchen — two facing runs of cabinets Island kitchen — a central island added to the main kitchen layout Peninsula kitchen — a connected extension that creates an additional working surface The choice depends mainly on the shape and dimensions of the room. It also depends on how you cook, how much storage you need, where your appliances will go and how many people need to use the kitchen at the same time. For a modular kitchen in Hyderabad, these practical constraints matter because apartment kitchens can vary considerably in width, ventilation, windows, doors and available circulation space. How do you choose the right modular kitchen layout? Start with the room rather than the style. Before choosing a layout, look at: Room dimensions Door and window positions Plumbing points Electrical points Cooking and preparation areas Refrigerator and appliance locations Storage requirements Number of people using the kitchen Available walking space Whether the kitchen is open or enclosed A layout should make everyday movement easier. For example, adding more cabinets may increase storage but reduce comfortable movement. Similarly, an island may look attractive but may not be practical if the room does not have enough clearance around it. The best modular kitchen design balances storage, workflow and circulation. What is a straight modular kitchen? A straight kitchen, also called a single-wall kitchen, places the main cabinets and appliances along one wall. This is one of the simplest layouts and can work well where space is limited. When does a straight kitchen work well? A straight layout can be suitable when: The kitchen is narrow Only one wall is available The home has a compact kitchen A simple arrangement is preferred The kitchen is part of an open-plan space Because everything is arranged along one wall, planning the sequence of the refrigerator, preparation area, sink and hob becomes particularly important. The limitation is storage. Since there is only one main run of cabinets, a straight kitchen may require careful use of wall cabinets, drawers and tall units when additional storage is needed. What is an L-shaped modular kitchen? An L-shaped kitchen uses two adjoining walls to create an L configuration. It is one of the most versatile modular kitchen types because it can provide a useful combination of countertop, storage and movement without occupying all four sides of the room. When is an L-shaped kitchen a good choice? An L-shaped layout can work particularly well when: Two adjoining walls are available The kitchen needs more storage than a single-wall layout The room needs an open circulation area The kitchen connects to a dining or living space Multiple work zones need to be accommodated The corner needs particular attention. Simply placing cabinets around the corner does not automatically create useful storage. The corner can become difficult to access unless the cabinet arrangement and storage solution are planned properly. Decore Designz has a dedicated guide covering L-shaped kitchen design and layout planning, so this hub should serve as the starting point before moving into the more detailed layout discussion. Explore: L-Shaped Kitchen Design: A Layout Guide What is a U-shaped modular kitchen? A U-shaped kitchen places cabinetry along three sides of the room. This creates a strong working zone with cabinets and countertops surrounding the user. When does a U-shaped kitchen work best? A U-shaped layout can be considered when: Three usable sides are available More storage is required Several work areas need to be separated The kitchen is used frequently There is enough space for comfortable movement The main consideration is the centre of the kitchen. A U-shaped kitchen needs enough open space between the opposing runs. If the room is too narrow, the layout can feel cramped despite providing plenty of cabinetry. Corner planning is also important because the layout creates two corner areas. For detailed planning, see the dedicated U-shaped kitchen ideas, layouts and dimensions guide: Explore: U-Shaped Kitchen Ideas, Layouts and Dimensions What is a parallel modular kitchen? A parallel kitchen has two opposing runs of cabinets. One side may contain the main cooking and preparation area, while the other can accommodate additional storage, appliances or preparation space. This arrangement can be effective in long or rectangular kitchens. What are the advantages of a parallel kitchen? A parallel layout can provide: Two working runs Good use of elongated rooms Separate preparation and cooking zones Significant storage potential Efficient movement between opposing work areas However, the width of the room becomes critical. The two cabinet runs should not leave an uncomfortable passage between them. Doors, drawers, appliance openings and user movement also need to be considered before finalising the layout. Decore Designz has a dedicated guide on whether a parallel kitchen design is right for you, which can be used for a deeper evaluation. Explore: Parallel Kitchen Design: Is It Right for You? What is an island modular kitchen? An island kitchen adds a separate working unit in the middle of the kitchen. Depending on the design, the island can provide: Additional preparation space Extra storage Seating A breakfast counter Appliance integration A visual connection between the kitchen and adjoining space However, an island should not be added simply because it is a popular feature. The room needs enough space around it for people to move comfortably and for cabinet doors, drawers and appliances to open without obstruction. For a compact apartment kitchen, a peninsula

Types of Modular Kitchen Layouts Explained Read More »

bedroom

Grey Bedroom Design Ideas: 12 Stylish Combinations

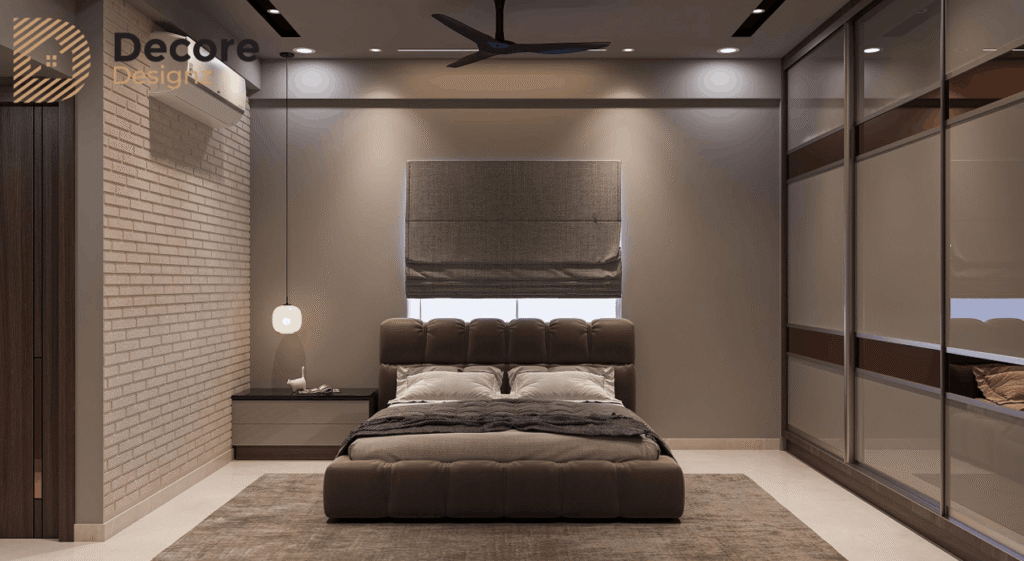
Grey Bedroom Design Ideas Grey works unusually well in bedrooms because it can be warm, cool, soft or dramatic depending on the shade and what you place around it. The strongest grey bedroom design ideas do not simply paint every wall grey. They combine the right grey with wood, white, beige, lighting, upholstery and texture to create a bedroom that feels calm rather than flat. Is grey a good colour for a bedroom? Yes. Grey is one of the most adaptable bedroom colours because it provides a neutral background while allowing furniture, textures and accent colours to do the visual work. The important part is choosing the right grey for the room. A cool pale grey can make a bright bedroom feel clean and contemporary. A warm greige can make the same type of room feel softer. Charcoal can create a dramatic feature wall, while mid-grey can provide contrast without becoming overpowering. For a bedroom, the goal is usually not to make grey the most noticeable element. It is to use grey to establish the mood of the room and then build the rest of the interior around it. What are the best grey bedroom colour combinations? The best combinations depend on the shade of grey and the overall style you want. Some reliable combinations include: Grey and white for a clean modern look Grey and beige for warmth Grey and walnut for a richer contemporary bedroom Grey and light wood for a softer natural look Grey and muted green for an earthy feel Grey and blush pink for a softer bedroom Grey and navy blue for a deeper, more dramatic palette Grey and black for a monochrome modern bedroom Grey and cream for a warm, understated bedroom Grey and gold accents for a more luxurious look The difference between these schemes is not simply the second colour. The finish, lighting, proportions and furniture also determine how the grey will actually feel in the room. Should the bedroom walls and furniture be the same colour? There is no single “best” grey. The right shade depends mainly on natural light, room size and the colours already present in the bedroom. Light grey Light grey is useful when you want the bedroom to feel open and understated. It works particularly well in apartments and smaller bedrooms because it provides colour without introducing the visual weight of a dark wall. Pair it with: White Cream Light wood Soft beige Pale upholstery For a minimalist bedroom, light grey can also provide more depth than an all-white scheme without making the room visually busy. Warm grey Warm grey has subtle beige or brown undertones. It is often a better choice when you want a comfortable bedroom rather than a sharply contemporary one. Warm grey works well with: Walnut Beige Cream Taupe Natural wood Warm lighting This is particularly useful when the rest of the home already uses warm materials. Mid-grey Mid-grey provides more contrast while remaining relatively neutral. It can work well behind the bed, on selected cabinetry or through upholstery. The key is to give the room enough lighter surfaces so the grey does not dominate. Charcoal grey Charcoal is much more dramatic. It can look excellent on a headboard wall or another controlled feature surface, particularly when paired with lighter bedding, warm wood and layered lighting. Using charcoal across too many large surfaces in a poorly lit bedroom can make the room feel heavy. The problem is not the colour itself; it is the proportion. How do you design a modern grey bedroom? A modern grey bedroom usually works best when the palette is restrained and the furniture has clean lines. A practical combination could be: Warm grey + white + walnut + black accents The grey establishes the background, white keeps the room lighter, walnut adds warmth and black gives selected details some definition. Modern bedrooms should not rely on colour alone. Lighting, wardrobe shutters, headboard detailing, bedside storage and wall treatment all contribute to the final appearance. Decore Designz’s existing modern-bedroom guidance similarly identifies beige, grey and white as calming neutral colours and combines them with clean-lined wardrobes, soft materials and warm lighting. What does a grey and white bedroom look like? Grey and white is one of the cleanest combinations for a contemporary bedroom. Use white where you need brightness and grey where you want definition. For example: White ceiling Light grey walls Grey upholstered bed White or light bedding Darker grey or black accents Warm wood bedside tables The important thing is not to make every element the same shade. Different tones and textures keep a neutral bedroom from looking sterile. A textured grey wall behind the bed can work particularly well because it introduces depth without requiring another strong colour. Does grey work with wooden furniture? Yes, and this is one of the strongest ways to prevent a grey bedroom from feeling cold. Grey provides a neutral, slightly restrained background. Wood introduces warmth and visible texture. Grey + walnut Walnut gives grey a richer, more premium appearance. This works particularly well with darker grey walls, upholstered beds and warm lighting. Grey + light wood Light wood produces a softer result. It works well when you want the bedroom to feel contemporary but relaxed rather than dramatic. Grey + medium wood Medium wood tones provide a useful middle ground. They can add warmth without creating the stronger contrast of dark walnut. The important consideration is consistency. If the wardrobe, bed, bedside tables and other furniture all use different wood tones, the bedroom can become visually fragmented. How can you make a grey bedroom feel warm? This is where many grey bedroom designs go wrong. Grey is neutral, but some greys have strong cool undertones. If you combine a cool grey with bright white, cool lighting, glass and metal everywhere, the bedroom can start feeling clinical. To warm it up, introduce: Warm white rather than stark white Natural or walnut wood Soft upholstery Beige or cream textiles Textured wall

Grey Bedroom Design Ideas: 12 Stylish Combinations Read More »

wardrobes and bedroom

Bedroom Colour Design: 15 Combinations That Work

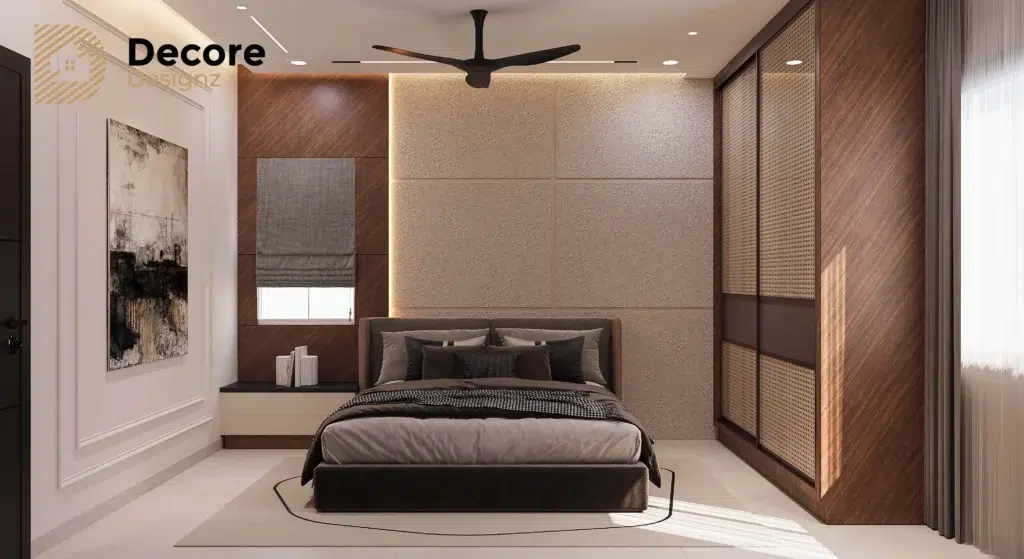
Bedroom Colour Design: Combinations That Work for Every Style The right bedroom colour design is not simply about choosing two colours that look good together. The colours need to work with the room’s natural light, furniture, flooring, wardrobe finishes, fabrics and the mood you want the bedroom to create. For most bedrooms, a balanced combination of a dominant neutral, a supporting colour and a smaller accent works better than using several strong colours at once. How do you choose a bedroom colour combination that actually works? Start with the room rather than the paint catalogue. Look at the amount of natural light, room size, flooring, bed upholstery, wardrobe finish and existing furniture. Then decide whether you want the bedroom to feel warm, calm, dramatic, contemporary, minimal or luxurious. A useful starting point is: Base colour: the largest visual area, usually walls, ceiling or major furniture Supporting colour: wardrobes, upholstery, curtains or larger furniture pieces Accent colour: cushions, artwork, lighting details or a feature wall This creates hierarchy without making the room feel visually busy. At Decore Designz Studio, colour selection is considered alongside furniture, materials, lighting and the way the room will actually be used. Colour should not be treated as a decision made separately at the end of the design process. What are the best bedroom colour combinations? There is no single best combination for every bedroom. The right choice depends on the style, lighting and materials in the room. Here are combinations that work particularly well across different interior styles. 1. Beige and Warm White Beige with warm white is one of the safest choices for a calm bedroom. Warm white keeps the room light, while beige introduces enough warmth to prevent it from feeling stark. Add natural wood, cream upholstery or soft brown accents if you want more depth. Works well for: minimalist, contemporary and timeless bedrooms. 2. Beige and Walnut Brown For a warmer and richer bedroom, combine beige walls with walnut or medium-brown furniture. The neutral wall colour keeps the room visually open while the darker wood gives the bedroom structure. This combination works particularly well when wardrobes, bedside tables or a bed frame have prominent wood finishes. Works well for: contemporary, modern and luxury bedrooms. 3. Grey and White Grey and white create a clean, restrained bedroom colour scheme. Use warmer greys rather than very cold grey when the bedroom needs to feel comfortable. White can be used for walls, ceilings, bedding or selected furniture, while grey provides contrast through upholstery, a feature wall or cabinetry. Works well for: modern and minimalist bedrooms. If you want to explore grey as a complete design direction rather than just a colour pairing, the planned Grey Bedroom Design Ideas article should sit underneath this pillar and go deeper into that specific palette. 4. Sage Green and Cream Muted green paired with cream creates a softer connection with natural colours. Sage, olive or similarly subdued greens work better in a bedroom than highly saturated greens when the goal is a restful atmosphere. Cream balances the green and keeps the overall scheme warm. Works well for: contemporary, natural and relaxed bedrooms. 5. Olive Green and Warm Beige Olive green becomes more sophisticated when combined with warm beige instead of bright white. The beige provides a neutral foundation while olive can be introduced through the bed wall, upholstery, curtains or smaller decorative elements. This is particularly useful when the bedroom already contains natural wood tones. 6. Navy Blue and Off-White Navy blue creates stronger contrast and gives the bedroom a more dramatic character. The mistake is using navy everywhere. A better approach is to use it selectively on a bed wall, upholstered bed or cabinetry while keeping the surrounding elements lighter. Works well for: contemporary, modern and statement bedrooms. 7. Charcoal and Warm Beige Charcoal can make a bedroom feel sophisticated, but it needs enough lighter colour around it. Pairing charcoal with warm beige creates a useful balance: charcoal provides depth while beige prevents the room from becoming visually heavy. This combination works particularly well with warm lighting, wood textures and restrained metallic accents. 8. Blush Pink and Cream Blush pink does not have to make a bedroom look overly decorative. A muted blush combined with cream, beige or light wood can create a soft and contemporary bedroom. Keep the pink controlled rather than using it across every surface. Works well for: soft contemporary, modern and elegant bedrooms. 9. Terracotta and Beige Terracotta adds warmth without the intensity of a bright red. Combine it with beige, cream or warm white and use wood tones to connect the palette. It can work particularly well as an accent colour on a bed wall, upholstery or decorative panels. Explore Our Projects 10. Burgundy and Taupe Burgundy works best as an accent rather than the dominant colour in most bedrooms. Taupe creates a quieter background, allowing burgundy to provide depth and personality without overwhelming the room. This is a particularly useful combination for a more luxurious bedroom. 11. Black and White Black and white is one of the strongest bedroom colour combinations, but it needs careful proportion. Too much black can make the room feel heavy, particularly if natural light is limited. Use white or a soft neutral as the larger background and introduce black through furniture, frames, lighting, handles or selected wall details. The planned Black and White Bedroom Design Ideas article can cover this specific combination in greater depth once published. 12. Cream and Light Wood For a warm minimalist bedroom, cream and light wood are difficult to get wrong. The combination works because both colours are relatively quiet. Texture therefore becomes important. Upholstery, timber grain, curtains, rugs and subtle wall finishes can provide variation without adding strong colours. 13. Greige and Natural Wood Greige sits between grey and beige and can be useful when you want a neutral bedroom without making it feel too cold. Pair it with natural wood and warm lighting for a contemporary bedroom that feels understated

Bedroom Colour Design: 15 Combinations That Work Read More »

3 BHK Front view of a modern bedroom featuring built-in cupboards, storage units, and a floor-to-ceiling wardrobe

Do You Really Need a False Ceiling? 1BHK, 2BHK & 3BHK

Do You Really Need a False Ceiling? 1BHK, 2BHK & 3BHK A false ceiling can improve lighting, conceal wiring, accommodate services and add architectural detail. But that does not mean every home—or every room—needs one. For a 1BHK, 2BHK or 3BHK, the right decision depends on the existing ceiling height, lighting requirements, electrical work, AC services, room proportions and how the space will actually be used. In many apartments, a selective false ceiling in the living room may make sense while the bedrooms can retain the original ceiling. In other homes, even the living room may not need one. The question should not be “Which false ceiling design should I choose?” It should be “What problem will the false ceiling solve?” What Is a False Ceiling and Why Do People Use One? A false ceiling is a secondary ceiling installed below the original structural ceiling. Homeowners generally consider one for four main reasons: Integrating recessed or concealed lighting Concealing electrical wiring and selected services Creating a cleaner architectural finish Introducing ceiling details that support the interior design A false ceiling can therefore be functional as well as decorative. But if your existing ceiling already provides enough lighting, the wiring is suitably routed and there is no architectural reason to lower the ceiling, adding another layer may not provide enough benefit. Decore Designz’s broader false ceiling design for homes guide makes the same distinction: a false ceiling should serve a purpose and should not unnecessarily reduce the room’s available height. Does Every Room Need a False Ceiling? No. A false ceiling is not necessary in every room. The decision should be made room by room. A living room may need several lighting points and concealed electrical routing. A bedroom may only need one or two well-positioned lights. A passage might need no ceiling treatment at all. Before deciding, ask: Does the room need additional lighting? Is electrical wiring difficult to conceal otherwise? Are AC ducts, pipes or other services being routed through the ceiling? Is there enough ceiling height? Will the ceiling improve the room rather than simply add decoration? Will future maintenance remain practical? If most of these answers are no, keeping the original ceiling may be the better decision. Do You Need a False Ceiling in a 1BHK? A 1BHK usually benefits from a more selective approach because the rooms are often compact and ceiling height is particularly noticeable. Living room The living room is usually the strongest candidate if you need: Multiple lighting points Concealed wiring A TV-wall lighting arrangement A small perimeter detail Better separation between living and dining areas But a compact living room does not automatically need a multi-level ceiling. A simple, shallow treatment—or even a well-planned original ceiling—may work better. Bedroom A bedroom generally needs less general lighting than a living room. If the existing ceiling height is comfortable and the electrical requirements are straightforward, there may be little reason to install a full false ceiling. The false ceiling design for bedroom guide also takes this room-specific approach rather than assuming every bedroom requires a ceiling treatment. Kitchen A 1BHK kitchen needs functional lighting and coordination with cabinets, ventilation and services. A false ceiling can help in some layouts, but it should not be added purely for appearance. Decore Designz’s kitchen ceiling guide makes the same point: a kitchen can work perfectly well without a false ceiling when the existing ceiling, lighting and electrical arrangement already meet the requirements. Is a False Ceiling Necessary in a 2BHK? Not necessarily. A 2BHK is large enough for ceiling design to become useful, but that still does not mean the entire apartment needs the same treatment. Living room This is often where a false ceiling provides the most practical value. You may need several lighting layers, concealed wiring, fan coordination and lighting around the TV or feature wall. A simple ceiling with carefully positioned lights may be enough. Dining area If the dining table is part of the living space, a ceiling detail can visually define the dining zone. But if there is already an appropriate light point above the table, a full ceiling treatment may not be necessary. Bedrooms Bedrooms should be evaluated separately. If the room has sufficient ceiling height, straightforward lighting and no services to conceal, the original ceiling may be perfectly adequate. Passage A passage only needs a false ceiling when there is a genuine reason for it, such as lighting, wiring or service concealment. A heavy ceiling design in a narrow passage can make it feel lower and more enclosed. The existing Decore Designz 2BHK guide already establishes this selective approach; expanding it to other apartment sizes gives the page a broader search-intent footprint without abandoning the original ranking signals. Explore Our Projects Does a 3BHK Need a False Ceiling? A 3BHK gives you more flexibility, but size alone is not a reason to install a false ceiling. A larger home may have more rooms, more lighting zones and more services to coordinate. That can make ceiling planning more useful. At the same time, a 3BHK apartment with limited ceiling height may still benefit from keeping several rooms simple. Where a false ceiling may be useful Living room Dining area Selected bedroom areas Passage with multiple lighting requirements Areas where AC or electrical services need concealment Where you may not need one Rooms with adequate existing lighting Bedrooms with simple electrical requirements Areas where reducing ceiling height would make the room uncomfortable Spaces where the ceiling would be decorative without solving a practical problem The goal is not to make every room look identical. It is to make each room work. When Is a False Ceiling Actually Worth It? A false ceiling is more justified when it solves one or more practical problems. 1. You need multiple lighting layers If a room needs ambient, task and accent lighting, the ceiling can provide a useful framework for organising those points. For more detail, see Decore Designz’s guide to false ceiling LED lighting

Do You Really Need a False Ceiling? 1BHK, 2BHK & 3BHK Read More »

Led Lights Ceiling

False Ceiling LED Lighting Ideas for a Warmer Home

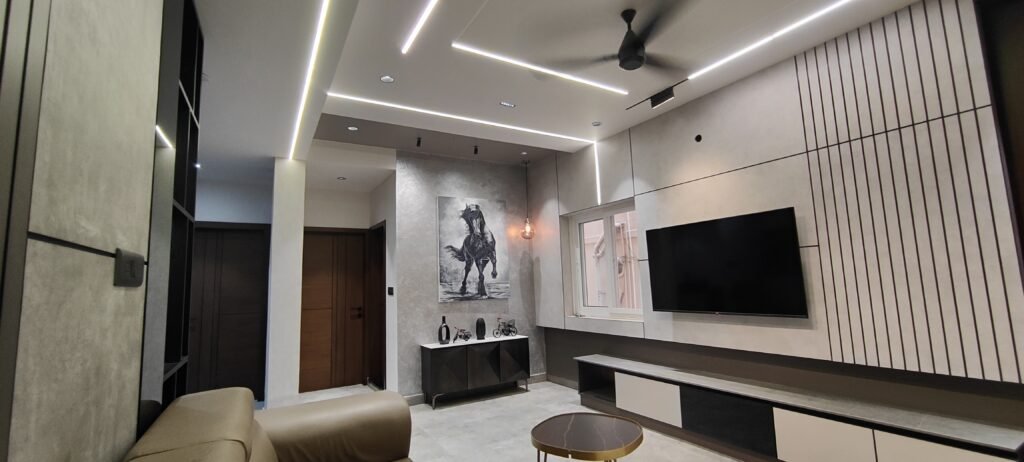
False Ceiling LED Lighting Ideas for a Warmer Home False ceiling LED lighting can do much more than brighten a room. When planned properly, it can make a home feel warmer, create separate lighting zones, highlight architectural details and reduce the need for one harsh central light. The important part is not simply adding more LEDs. The right false ceiling LED lights should match the room’s size, ceiling height, furniture layout, colour palette and how the space is actually used. A living room may need a combination of ambient and accent lighting. A bedroom usually benefits from softer illumination. A kitchen needs stronger functional light. The ceiling should support these differences rather than using the same lighting pattern throughout the home. What Are False Ceiling LED Lights? False ceiling LED lights are LED-based fixtures or strips integrated into a suspended or secondary ceiling. They can include: Recessed LED downlights Concealed LED strip lights LED panels Perimeter LED lighting Linear LED lights LED spotlights LED lighting integrated into trays, recesses or ceiling details The important distinction is between lighting the room and decorating the ceiling with lights. A ceiling filled with fixtures is not necessarily better lit. Good lighting should provide enough illumination for everyday activities while creating the atmosphere you want in the evening. 1. Use Layered LED Lighting Instead of One Bright Light One of the most useful approaches is to divide lighting into different functions. Ambient lighting This provides general illumination throughout the room. Recessed LEDs, concealed LED strips or other ceiling-mounted fixtures can provide this layer. Task lighting This is lighting for specific activities. Examples include: Kitchen worktops Study desks Dressing areas Reading corners Dining areas Accent lighting Accent lighting draws attention to something specific, such as a textured wall, artwork, architectural feature or decorative surface. This layered approach gives you more control than switching on a single bright ceiling light every time you enter the room. Decore Designz’s published Hitech City 3BHK project is a useful example of this broader principle. The project documents ceiling, decorative and accent lighting being used together to create different layers of illumination, rather than treating lighting as a single fixture decision. 2. False Ceiling LED Strip Lighting for a Softer Glow LED strips are particularly useful when the light source itself does not need to be visible. They can be integrated into: Ceiling recesses Perimeter details Floating ceiling elements Tray ceilings Selected architectural gaps The result can be softer than a directly visible downlight because the light is reflected from another surface. However, LED strips should not automatically be used around the entire ceiling. If the room already has enough general illumination, a continuous bright strip can make the ceiling unnecessarily dominant. The objective should be controlled ambient light, not simply more light. 3. Combine Recessed LEDs With Concealed Lighting A combination of recessed lights and concealed LED lighting is often more flexible than relying on either one alone. The concealed lighting can provide a softer background layer while recessed fixtures provide more direct illumination. For example, a living room could have: Concealed LED lighting → ambient atmosphere Recessed LEDs → general illumination Accent lighting → artwork or feature wall Pendant/chandelier → visual focal point This creates different moods without requiring the ceiling itself to become overly complicated. The existing Decore Designz guidance on false ceiling design follows the same principle: lighting should be planned together with the ceiling, furniture and room layout rather than added after the ceiling design is finished. 4. Choose the Right LED Colour Temperature Colour temperature has a major effect on how a room feels. Warm white lighting generally creates a softer, more relaxed atmosphere and works particularly well in living rooms and bedrooms. Neutral white lighting can provide a cleaner, more functional appearance and can be useful where visibility matters more. As a general starting point: Lighting tone Typical range Suitable use Warm white Around 2700–3000K Bedrooms, living rooms, relaxed spaces Neutral white Around 3500–4000K Kitchens, studies, functional areas Cooler white 4000K+ More task-oriented environments These are starting points rather than rules. The colour of the walls, flooring, furniture and cabinetry also affects how the lighting will appear. A warm LED against a warm beige interior can feel very different from the same light used against a predominantly white or grey interior. 5. Use LED Lighting Around the Perimeter Carefully A perimeter LED detail can make a ceiling appear lighter and more visually defined. It can work particularly well when: The ceiling has enough height The room has a relatively clean layout The perimeter detail has a clear architectural purpose The central ceiling is kept visually simple This is different from saying that every room needs perimeter lighting. In a compact apartment, a narrow perimeter detail may be enough. In another room, recessed lights without a perimeter strip may produce a cleaner result. The ceiling should respond to the room rather than follow a fixed formula. 6. False Ceiling LED Lights for the Living Room Living rooms often benefit most from layered ceiling lighting because they perform several functions. The same room may be used for: Family time Watching television Entertaining guests Reading Relaxing in the evening A useful combination could include recessed LEDs for general lighting, concealed lighting for softer evening illumination and a decorative fixture where the furniture layout supports one. The living-room ceiling should also be coordinated with the sofa, TV unit, dining area and circulation path. For more room-specific ceiling ideas, see Decore Designz’s guide to false ceiling design for hall and living room, which covers fan positions, ceiling proportions, recessed lights, perimeter lighting and different ceiling forms. 7. False Ceiling LED Lighting for Bedrooms Bedrooms generally need more control over brightness. A bright ceiling full of exposed or highly visible lights can work against the relaxed atmosphere you want at night. A better approach may be: Soft ambient LED lighting Selected recessed lights Bedside lighting Dressing-area lighting Study lighting where required Concealed LED lighting for atmosphere The bedroom

False Ceiling LED Lighting Ideas for a Warmer Home Read More »

IMG 8553

False Ceiling Cove Lights: Ideas That Elevate a Room

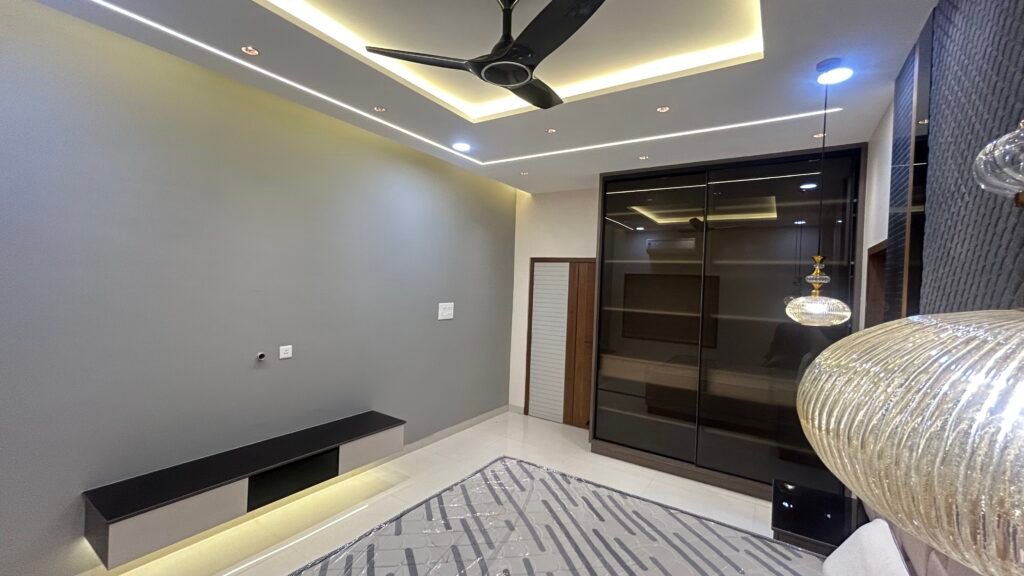
False Ceiling Cove Lighting: Ideas That Elevate a Room False ceiling cove lighting is a concealed lighting technique where the light source is hidden inside a recessed ceiling detail, allowing light to wash across the ceiling or wall rather than shining directly into the room. It can create a softer, warmer atmosphere and make a simple false ceiling feel more considered. The key is not using more light, but placing and controlling it properly. What is false ceiling cove lighting? Cove lighting uses a recessed section, ledge or concealed channel in the false ceiling to hide the light source. Instead of seeing the LED strip or fixture directly, you mainly see the light reflected from the ceiling or wall surface. This makes cove lighting different from a conventional downlight. A downlight directs light toward the room.   A cove light creates indirect illumination. That difference is what makes it useful for living rooms, bedrooms and other spaces where softer ambient lighting is desirable. The cove itself can be part of a: Perimeter false ceiling Tray ceiling Floating ceiling Layered ceiling Simple recessed ceiling detail The ceiling design and the lighting therefore need to be planned together. Why do homeowners choose cove lighting for a false ceiling? The biggest advantage is atmosphere. A room illuminated only with direct downlights can sometimes feel bright but flat. Cove lighting introduces another layer of illumination that can soften the overall appearance. It can also: Create a warmer evening atmosphere Highlight the shape of the ceiling Add depth to a simple ceiling Provide ambient background illumination Reduce dependence on harsh overhead lighting Complement furniture and wall finishes But cove lighting should not be treated as a replacement for all other lighting. A well-planned room usually has different lighting layers serving different purposes. For example, a living room may use cove lighting for ambient illumination, downlights for general light and a decorative pendant or accent light for a specific area. What are the best false ceiling cove lighting ideas? 1. Simple perimeter cove A narrow cove running around the perimeter of the room is one of the most versatile approaches. The central ceiling remains clean while concealed light creates a soft glow around the edges. This works particularly well in contemporary apartments because it adds detail without requiring a heavily layered ceiling. It is also easier to coordinate with fans and furniture than a complicated central ceiling design. 2. Cove lighting around a tray ceiling A tray ceiling can create a recessed central area surrounded by a border. Cove lighting placed inside that transition can emphasise the change in level. This works particularly well in larger living rooms, dining spaces and bedrooms where the ceiling has enough height to support the architectural detail. The important point is proportion. A large room may accommodate a wider ceiling border. A compact room usually needs a much more restrained version. 3. Floating ceiling with concealed cove lighting A floating ceiling is designed to appear visually separated from the surrounding ceiling. Concealed lighting around the edge strengthens that effect. When viewed from below, the light can make the central ceiling element appear lighter or suspended. This can be effective in modern interiors, but the recess needs to be designed carefully. If the light source becomes directly visible, the floating effect can turn into a visible bright line. 4. Cove lighting with recessed spotlights This is one of the most practical combinations. Use the cove for soft ambient illumination and recessed spotlights for more focused or general lighting. The two serve different purposes. For example: Cove lighting: atmosphere and indirect illumination. Spotlights: functional illumination. This gives the homeowner more control over the room at different times of the day. 5. Cove lighting around a living-room perimeter Living rooms often benefit from a perimeter cove because it can create a softer evening environment without making the entire ceiling visually busy. It can work particularly well when: The furniture is relatively simple The TV wall already has visual detail The room has adequate ceiling height The homeowner prefers a warm contemporary look The cove should follow the architecture rather than simply forming a rectangle because that is the easiest shape to construct. 6. Bedroom cove lighting Bedrooms are one of the spaces where indirect lighting can be especially useful. The objective is usually not maximum brightness. A concealed cove can provide a softer background glow while bedside lights, dressing lights or selected recessed fixtures handle more specific tasks. The bedroom false-ceiling article already highlights cove lighting as a useful approach for creating softer indirect illumination. This page should therefore go further into how the light is planned, rather than repeating bedroom ceiling designs. Should you use warm or cool light for cove lighting? For most residential cove lighting, warm or neutral-warm light is generally easier to live with, especially in bedrooms and living spaces. The choice should still depend on the room’s materials, colours and purpose. Light tone Usually suits Visual effect Warm light Bedrooms, living rooms, lounges Softer and more relaxed Neutral light Contemporary living areas, multipurpose spaces Cleaner and more balanced Cool light Functional areas where a brighter appearance is required Crisper and more energetic The important point is consistency. If the cove lighting is warm but the main ceiling lights are very cool, the room can develop an uncomfortable colour contrast. The lighting should therefore be considered as a complete system rather than selecting the cove strip separately. What colour should false ceiling cove lighting be? For a home, the safest starting point is usually a warm white or neutral-warm tone, particularly where the goal is a comfortable evening atmosphere. But the ceiling colour and surrounding materials matter. Warm light can complement: Beige Cream Walnut Natural wood Taupe Warm grey Earthy finishes A very cool light can make warm materials appear less natural. This is particularly important in premium interiors where the appearance of wood, stone, fabrics and wall finishes is part of the overall design. Should cove lighting

False Ceiling Cove Lights: Ideas That Elevate a Room Read More »