

False Ceiling Installation: What the Process Actually Involves
False ceiling installation is not simply fixing a board to the ceiling and adding a few lights. The finished ceiling depends on what happens before the visible surface is installed: site measurements, ceiling levels, service coordination, framing, electrical planning, boarding, joint treatment, finishing and final inspection. Understanding this sequence helps homeowners know what should happen on site and where poor planning can create problems later.
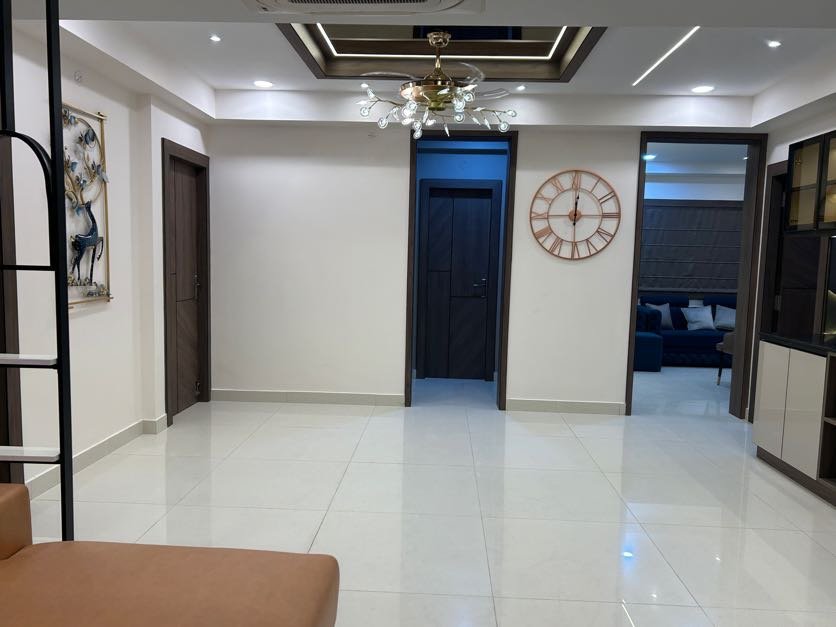
What is the false ceiling installation process?
A typical false ceiling installation moves through several stages: site assessment and measurement → design and level marking → service coordination → framework installation → electrical preparation → board installation → joint treatment → finishing → lighting and final inspection.
The exact sequence can change depending on the material, room, ceiling condition and services involved.
The important point is that the visible ceiling is only the final part of the process. Most of the decisions that determine whether it works properly are made before the first board is fixed.
What happens before false ceiling installation starts?
The installation should begin with the existing space, not the ceiling design alone.
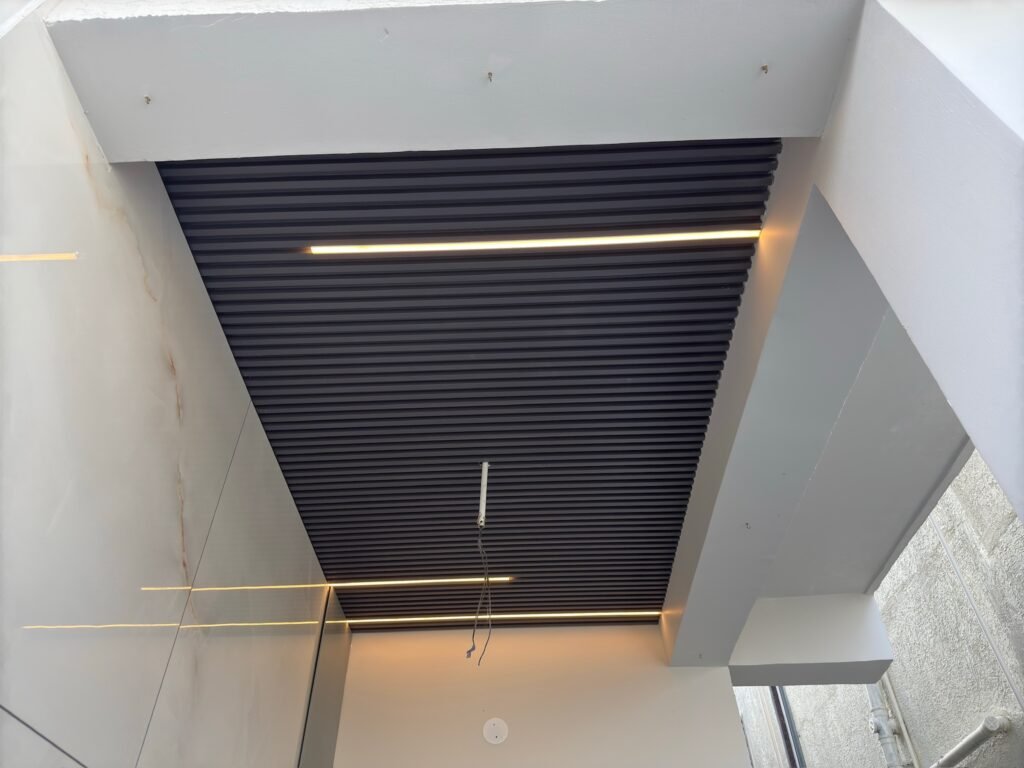
1. The site is measured and assessed
The existing ceiling height, room dimensions, walls, beams, electrical points and other relevant conditions need to be checked.
This establishes what can realistically be built.
For example, a reference image may show a deep layered ceiling, but the actual room may not have enough height to reproduce it comfortably.
The ceiling design therefore has to respond to the site.
2. The final ceiling level is decided
A false ceiling sits below the original structural ceiling.
The amount of drop depends on the design and what needs to be accommodated above it.
Lighting, wiring, air-conditioning services and other requirements may influence the final level.
This is one reason the ceiling height should be settled before fabrication begins.
If the level is changed after the framework has been installed, other parts of the work may need to be adjusted.
3. Lighting and electrical requirements are coordinated
The electrical plan should be established before the ceiling is closed.
Decide where the recessed lights, cove lighting, fans, pendant lights or other fixtures need to go.
The lighting should follow the room layout and furniture rather than being distributed randomly across an empty ceiling.
For a living room, for example, the sofa arrangement, TV wall, circulation and any dining area can influence the lighting positions.
Decore Designz’s existing hall and living-room false-ceiling guidance follows the same principle: ceiling height, fan position, lighting, electrical and AC services and furniture layout should be considered together rather than designing the ceiling independently.
4. The ceiling layout is marked
The planned ceiling lines are transferred onto the actual site.
This is where the approved design becomes a physical reference.
The team needs to establish:
- Ceiling perimeter
- Levels and drops
- Curves or geometric details
- Lighting openings
- Fan positions
- Access requirements
- Areas where services pass above the ceiling
Accuracy at this stage matters.
A small alignment error can become much more visible once lights, wall lines and furniture are in place.
5. The framework is fixed
The supporting framework is then installed according to the required ceiling configuration.
It needs to be properly aligned and supported.
This stage is not visible once the ceiling is finished, which is exactly why homeowners should not judge installation quality only from the final photograph.
The framework affects the stability and alignment of the finished ceiling.
When are electrical and other services installed?
Service coordination happens before the ceiling is fully closed.
This is one of the most important parts of false ceiling work.
Electrical wiring, light points and other services that need to run above the ceiling should be positioned before the boards make access difficult.
Depending on the project, the ceiling may also need to accommodate:
- Electrical wiring
- Lighting connections
- Air-conditioning-related services
- Selected plumbing or other concealed services
- Access requirements
- Fixture support
The exact scope varies from project to project.
The important principle is simple:
Services should be coordinated before the ceiling is sealed.
This reduces the risk of cutting into a finished ceiling later just to move a wire or light point.
6. The boards are cut and fixed
Once the framework and required above-ceiling services are ready, the ceiling boards can be installed.
For a gypsum ceiling, boards are cut according to the approved layout and fixed to the framework.
Openings are created where required for lights, fans and other fixtures.
This is where the shape of the ceiling starts becoming visible.
Straight ceilings are relatively straightforward in comparison with designs involving curves, multiple levels, recessed sections or detailed geometric forms.
The more complicated the design, the more carefully the fabrication and site coordination need to be handled.
7. Joints and screw points are treated
The joints between boards and visible fixing points need to be treated so that the final surface can be finished cleanly.
This stage is important because imperfections can become obvious after painting, particularly when light falls across the ceiling.
A ceiling can look perfectly acceptable under construction lighting and reveal uneven areas once the final lighting is switched on.
8. The surface is finished
After joint treatment and preparation, the ceiling is finished according to the approved specification.
This may involve surface preparation and painting or another selected finish.
The final appearance depends not only on the board but also on the quality of the preparation underneath the finish.
This is why “which board should I use?” is only one part of the installation question.
The supporting structure, joint treatment and finishing work also matter.
When are the lights installed?
Lighting installation normally comes after the ceiling has been prepared for the fixtures, with the exact sequence depending on the electrical and finishing work.
Recessed lights require accurately positioned openings.
Cove lighting requires the appropriate recess or concealed space.
Pendant lights and heavier fixtures may require suitable support arrangements rather than simply being attached to the finished board.
The lighting plan should therefore be finalised before installation rather than decided after the ceiling is complete.
How long does false ceiling installation take?
There is no single installation timeline that applies to every project.
A simple single-level ceiling in one room is fundamentally different from a multi-level ceiling across an entire apartment.
The timeline can be influenced by:
- Area being covered
- Ceiling design complexity
- Number of levels
- Curves or custom details
- Electrical work
- AC or other service coordination
- Material availability
- Site access
- Finishing requirements
- Number of rooms being worked on
- Changes made after work begins
A useful way to think about the timeline is by stages rather than one fixed number of days.
Stage | What happens |
Site preparation | Existing conditions and measurements are checked |
Layout marking | Ceiling levels and design are transferred to site |
Framework | Supporting structure is installed |
Service coordination | Electrical and other concealed services are positioned |
Boarding | Ceiling boards are cut and fixed |
Joint treatment | Joints and fixing points are prepared |
Finishing | Surface is prepared and finished |
Lighting | Fixtures and final connections are installed |
Inspection | Alignment, finish and functional points are checked |
This gives a homeowner a better understanding of why a ceiling cannot always be treated as a one-day installation.
Does false ceiling installation create a lot of dust?
It can, particularly during cutting, drilling, sanding and finishing.
The amount depends on the material, design and scale of the work.
Good site preparation should therefore include protection for furniture, flooring and finished surfaces where applicable.
If false ceiling work is being carried out as part of a larger interior project, its sequence should also be coordinated with painting, furniture installation, flooring and other activities.
Installing a ceiling after sensitive finished surfaces have already been completed can create unnecessary protection and cleaning work.
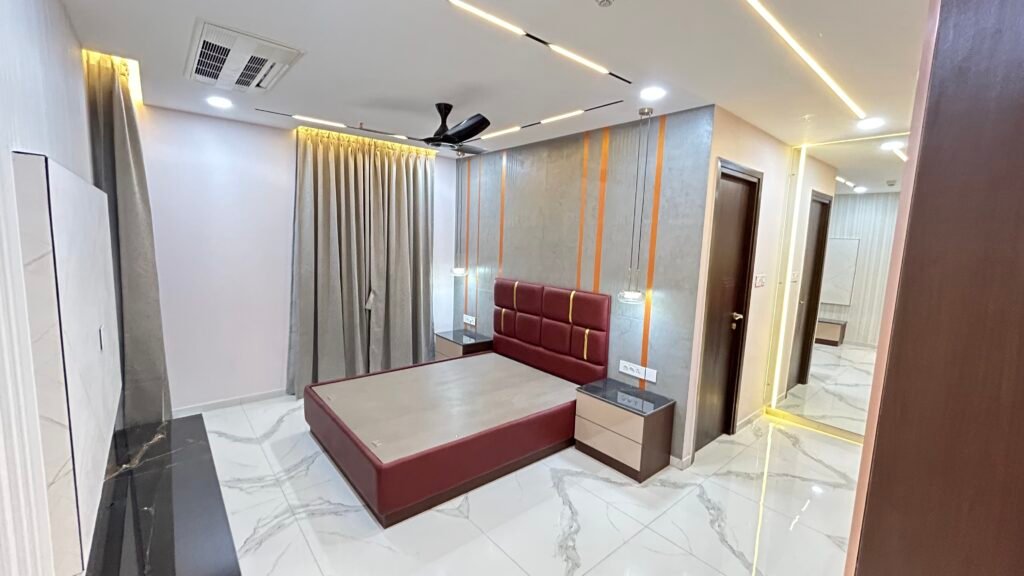
Should false ceiling installation happen before furniture?
For a new interior project, ceiling work is generally coordinated before final furniture installation because overhead work can involve drilling, cutting, sanding and painting.
The exact project sequence depends on the scope of work.
The broader principle is to avoid installing delicate finished elements before activities that are likely to disturb them.
This is one reason complete interior execution requires coordination between trades rather than treating every item as an independent installation.
What should you check before approving false ceiling work?
Before installation starts, confirm the following:
Design
- Is the final ceiling design approved?
- Are the ceiling levels clear?
- Are all layers and details documented?
- Are fan positions final?
Electrical
- Are light positions final?
- Are switch and control requirements coordinated?
- Are electrical routes planned?
- Are fixture positions marked?
Services
- Has AC coordination been completed?
- Are any concealed services passing through the ceiling?
- Is maintenance access required anywhere?
Dimensions
- Has the existing ceiling height been checked?
- Is the proposed drop appropriate for the room?
- Will the ceiling interfere with doors, windows, tall furniture or wardrobes?
Finish
- Are the board and framing systems specified?
- Are joint treatments defined?
- Is the final paint or finish confirmed?
These checks prevent a common problem: making design decisions while the installation is already underway.
Should the false ceiling match the living room?
Usually, some visual connection helps.
If the balcony opens directly from the living room, carrying a similar colour palette, ceiling line or material language into the balcony can make the two spaces feel connected.
That does not mean copying the living-room ceiling exactly.
A balcony has different environmental conditions and a different purpose. The ceiling can be simpler while still relating to the interior.
For example, if the living room uses a restrained gypsum ceiling with warm lighting, the balcony could use a simpler ceiling treatment and complementary lighting rather than reproducing the entire interior ceiling design.
This broader approach is consistent with Decore Designz Studio’s residential design philosophy: lighting, materials, furniture and spatial planning are considered together rather than designing one element in isolation. Its Hyderabad residential services include living-room planning, lighting, materials and ceiling concepts as part of the wider interior scope.
What are the most common false ceiling installation mistakes?
1. Starting without a final design
Changing the ceiling layout after framing begins can create unnecessary rework.
2. Designing before checking ceiling height
A design may look excellent in a render but make the actual room feel too low.
3. Installing electrical points too late
Moving wiring after the ceiling has been closed can mean reopening finished work.
4. Ignoring maintenance access
Some services may need future inspection or maintenance.
A ceiling should not make every future repair unnecessarily difficult.
5. Treating the framework as unimportant
The framework disappears from view after installation, but it supports the finished ceiling.
6. Using the same design in every room
A living room, bedroom, kitchen and passage have different requirements.
The ceiling should respond to the room rather than using one repeated pattern throughout the home.
What does professional false ceiling installation actually involve?
The visible ceiling is only the final result of several coordinated decisions.
A properly managed process connects:
site measurement → design → ceiling levels → services → framework → boarding → finishing → lighting → inspection.
That sequence matters because mistakes become progressively more expensive to correct as the ceiling moves toward completion.
Decore Designz Studio describes its broader interior process in the same connected way: understand the home, plan the space, develop the design, visualise it, execute the approved work and complete the finishing and handover. Its published process specifically includes material coordination, custom work, installation and finishing rather than treating execution as an afterthought.
Final Takeaway
False ceiling installation is a coordinated construction process, not a decorative finishing step.
The important work happens before the ceiling looks finished: measuring the site, deciding the ceiling level, coordinating electrical and other services, installing the framework and ensuring the design can actually be built.
Once the boards are fixed, joint treatment, finishing, lighting and inspection complete the process.
If you are planning false ceiling work as part of a home interior in Hyderabad, the better approach is to finalise the ceiling together with the furniture layout, lighting, electrical requirements and other services. That reduces last-minute changes and helps the finished ceiling work as part of the room rather than as a separate decorative layer.
Decore Designz Studio handles residential interior design and execution in Hyderabad, including design development, material coordination, installation and finishing. If you are planning a complete interior, you can discuss the ceiling requirements as part of the wider design and execution scope rather than arranging the ceiling as an isolated afterthought.
Frequently Asked Questions
What are the steps in false ceiling installation?
The typical process is site assessment, measurement, ceiling-level marking, service coordination, framework installation, electrical preparation, board installation, joint treatment, finishing, lighting installation and final inspection. The exact sequence can vary according to the material and project.
How is a gypsum false ceiling installed?
A gypsum false ceiling is built using a supporting framework, followed by cutting and fixing gypsum boards to the frame. Joints and fixing points are then treated before the surface is finished and lighting fixtures are installed.
Should electrical work be done before the false ceiling?
The electrical and service requirements that run above or through the ceiling should be coordinated before the ceiling is closed. This allows light points, wiring and other services to be positioned without reopening finished ceiling work.
How long does false ceiling installation take?
There is no universal timeline. A simple ceiling in one room will require a different amount of work from a multi-room or highly detailed ceiling. Design complexity, services, finishing and site conditions all influence the schedule.
Does false ceiling installation reduce ceiling height?
Yes. A false ceiling is installed below the original structural ceiling, so some vertical space is lost. The actual reduction depends on the design and the services that need to be accommodated.
Can a false ceiling be installed in an existing home?
Yes. False ceiling work can be carried out in an existing home, provided the existing ceiling condition, height, electrical requirements and other services are assessed first.
Should the fan be installed before the false ceiling?
The fan position and required support should be coordinated before the ceiling is closed. The final installation sequence depends on the ceiling system and electrical work.
What should be checked after false ceiling installation?
Check the ceiling alignment, surface finish, joints, paint, light openings, fan positions, lighting operation and any required access points. The final inspection should confirm both appearance and function.